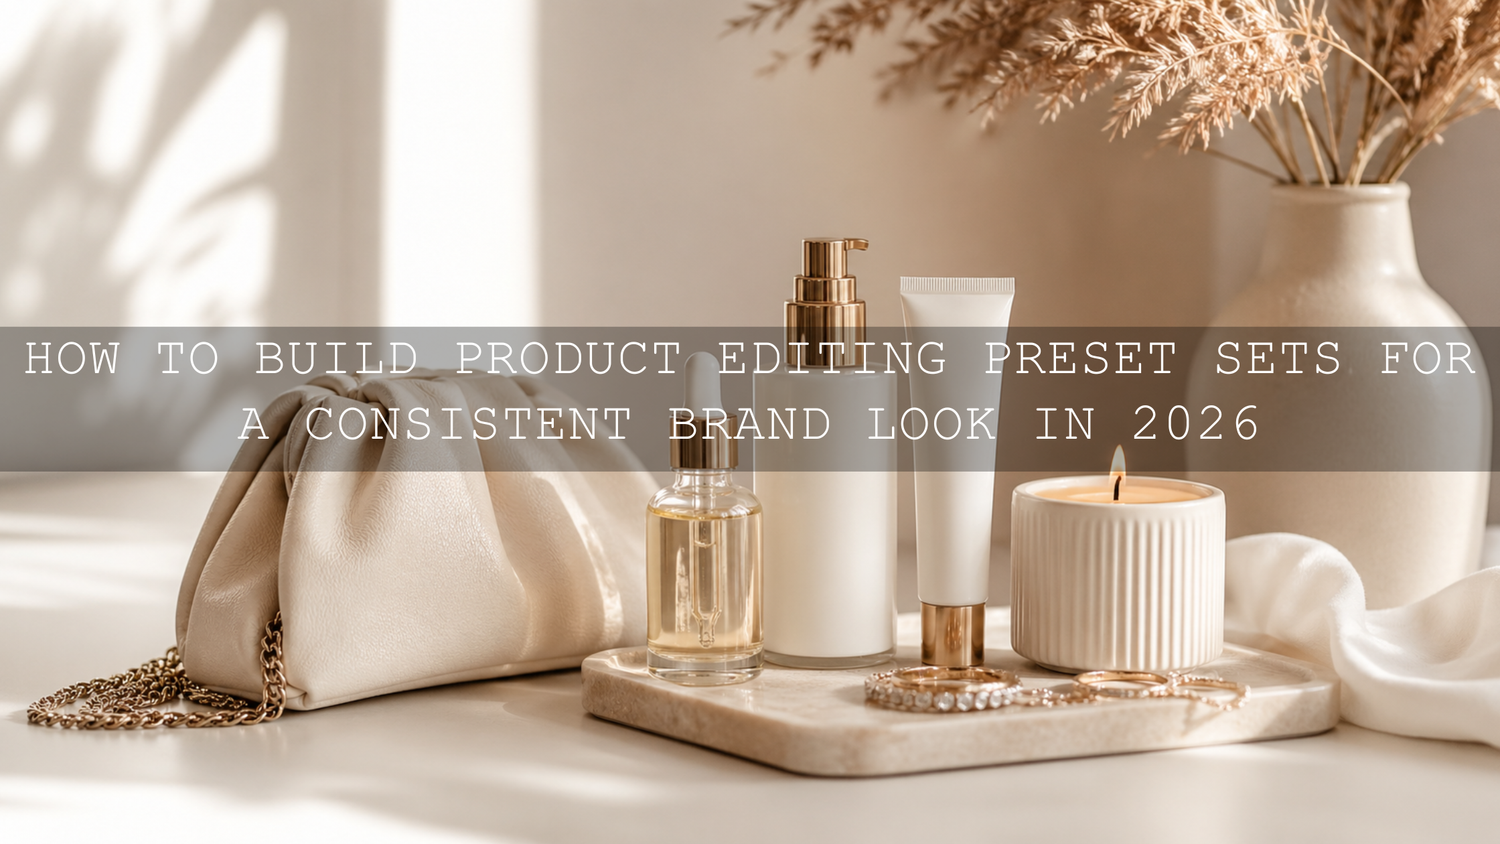
How to Build Product Editing Preset Sets for a Consistent Brand Look in 2026
Product editing preset sets are one of the fastest ways to create clean, consistent, and professional product photos in 2026. Whether you sell jewelry, skincare, fashion items, home decor, presets, digital tools, or physical products, your visuals need to feel connected across your website, ads, social media, and email campaigns. A strong preset set helps every image follow the same color direction, contrast level, brightness style, and brand mood.
Here’s why this matters: in a busy online store, customers often judge your brand before they read a product description. If one image looks warm and premium, another looks flat and gray, and another looks overly saturated, your store can feel less trustworthy. A well-planned product photo editing workflow fixes that by giving your catalog a clear visual signature.
If you want a faster starting point, explore the AI-Optimized Home Studio Clean Lightroom Presets for indoor product photos and browse the Lightroom Presets for Lightroom Mobile & Desktop collection to build a flexible editing base. Try these presets today — Buy 3, Get 9 FREE — and create a more polished look across your product visuals.
Why Product Editing Preset Sets Matter for E-Commerce Brands
A product editing preset set is more than a single Lightroom preset. It is a small system of related looks that work together. One preset might be bright and clean for white-background images. Another might be soft and warm for lifestyle shots. Another might add a deeper cinematic tone for social media hero images. The goal is not to make every photo identical; the goal is to make every photo feel like it belongs to the same brand.
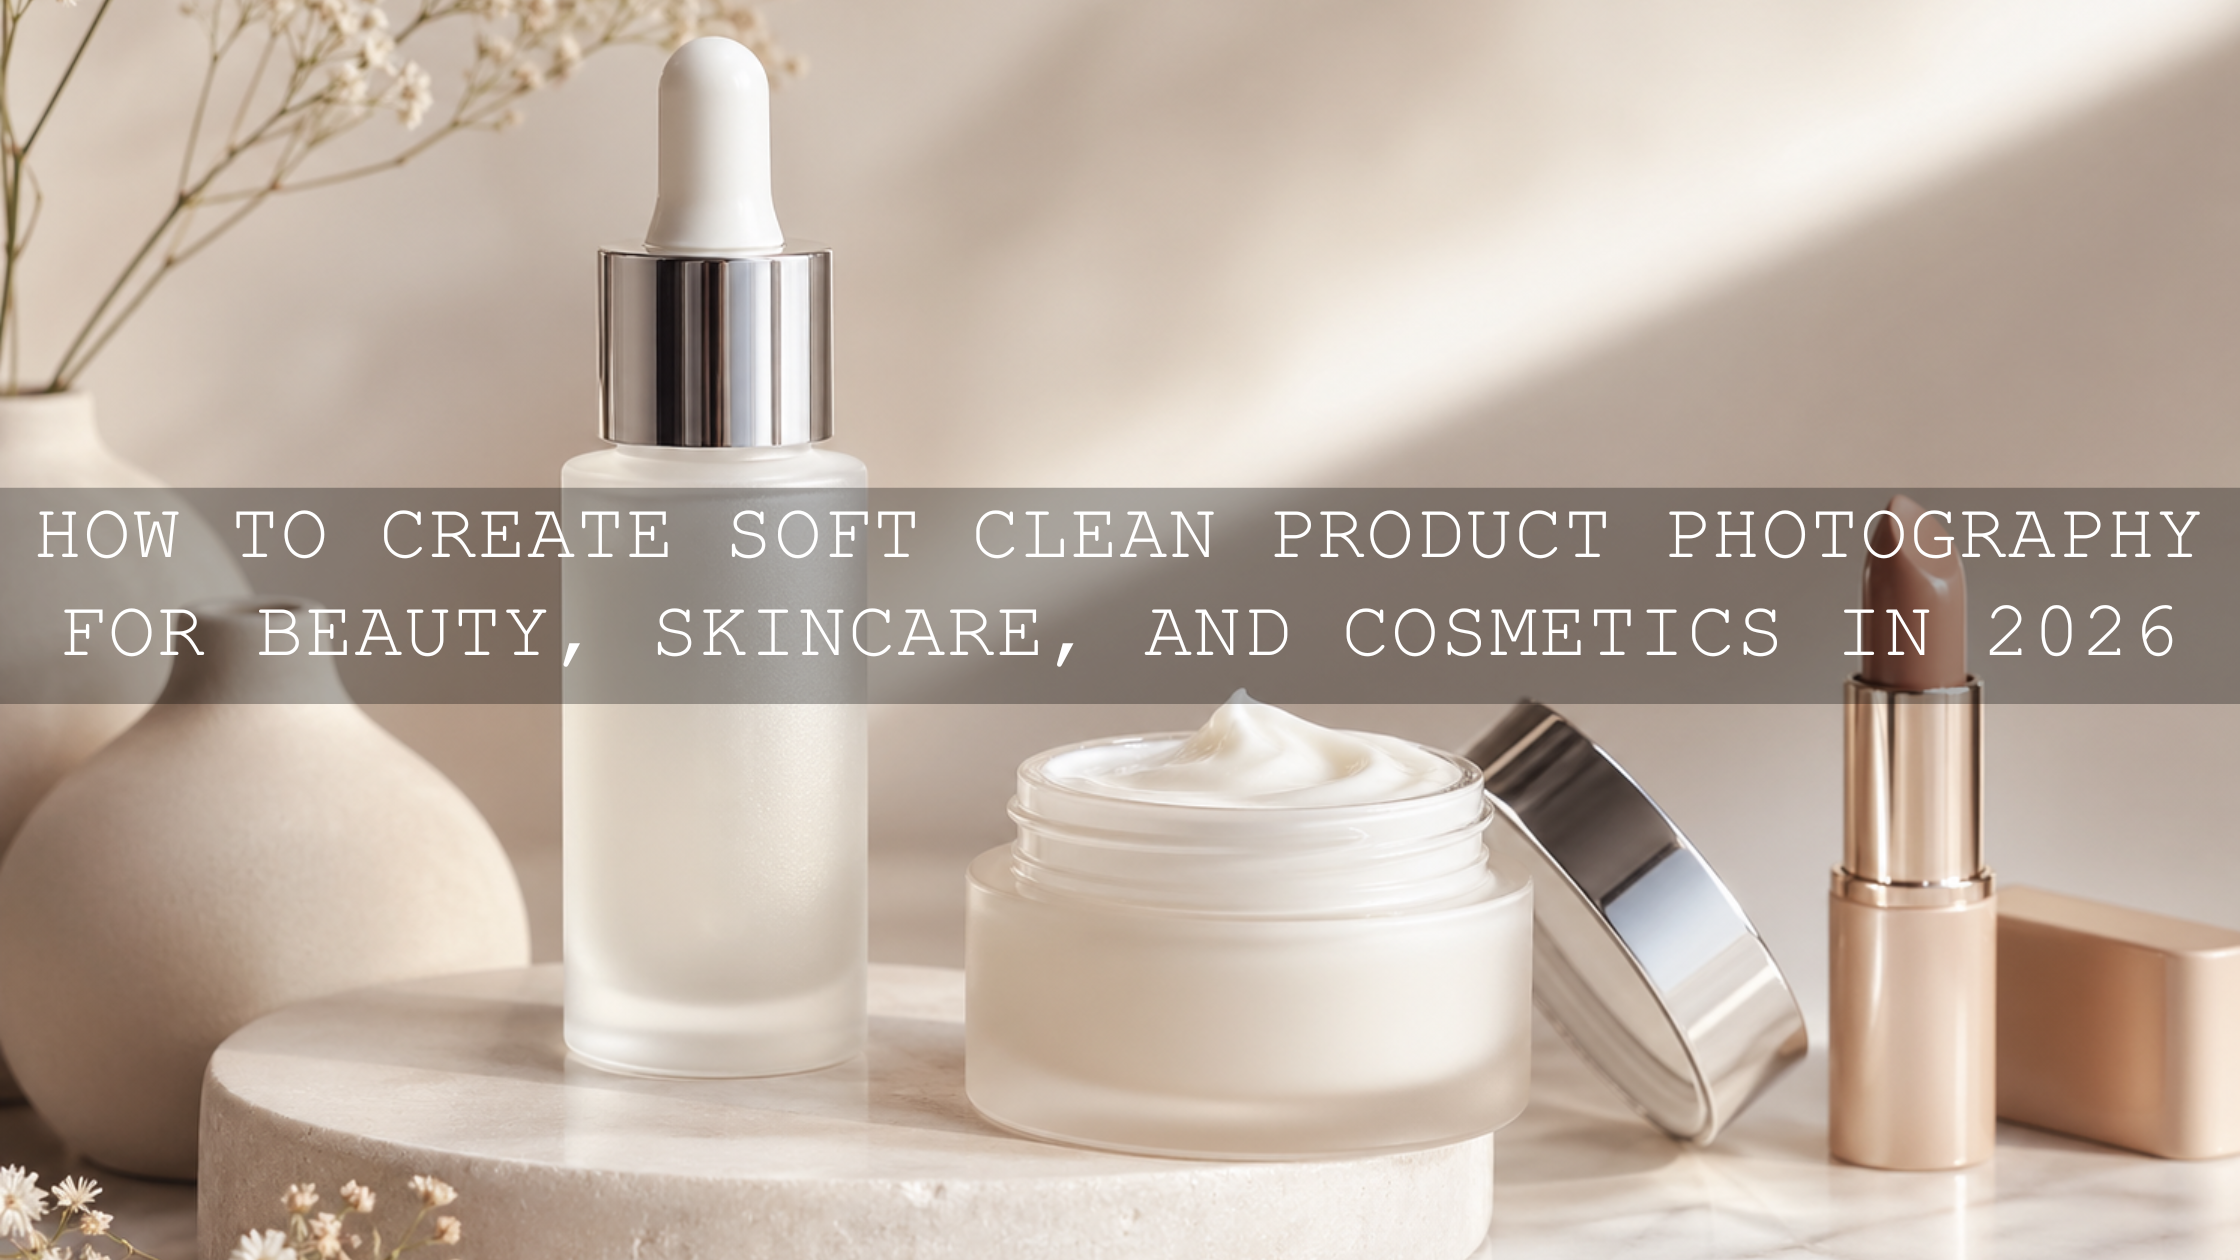
Think about a skincare brand with white bottles, soft cream textures, and pastel packaging. If the edits are too dark, the products may feel heavy. If the highlights are too harsh, the packaging may lose detail. If the colors are too warm, the product shade may look inaccurate. A product-focused preset set helps control these problems by giving you repeatable starting points for common lighting situations.
I tested this approach on indoor product shots with white packaging, reflective caps, and soft window light. The biggest improvement came from correcting white balance first, then applying a clean preset as the creative finish. That small order change made the final images look more natural, especially on products where color accuracy matters.
Start with Your Brand Visual Identity
Before building product editing preset sets, define the look your brand should communicate. This step saves time because you are not randomly testing presets; you are choosing edits that match your positioning.
- Luxury: smooth contrast, controlled highlights, rich shadows, clean neutral tones.
- Minimal: bright whites, low distraction, natural color, soft contrast.
- Organic: warm light, earthy tones, gentle greens, natural texture.
- Bold and modern: stronger contrast, crisp detail, cooler whites, sharp product edges.
- Vintage: faded blacks, warmer highlights, soft grain, nostalgic color balance.
Use your logo colors, packaging colors, website background, and target audience as your guide. If your website uses soft beige, cream, and warm gold, a cold blue product edit may feel disconnected. If your brand sells modern tech accessories, an overly rustic film tone may reduce the premium feel.
For color direction, you can also use Adobe Color harmony rules to build a palette that supports your brand mood. This is especially useful when planning product photos for campaigns, seasonal launches, and social media feeds.
Presets vs Manual Editing: Which Is Better?
The best answer is not “presets only” or “manual editing only.” The strongest workflow uses both. Lightroom presets give you speed and consistency. Manual editing gives you accuracy and control.
When presets are better
Presets are better when you need a repeatable look across many images. For example, if you photographed 50 product variations in the same studio setup, a preset can quickly apply the same contrast, tone curve, color mix, and sharpening style. Adobe explains that Lightroom presets apply predefined photo adjustments, which can include exposure, contrast, saturation, color grading, and more.
When manual editing is better
Manual editing is better when the image needs correction before style. Product photos often need accurate whites, correct skin tones if a model is included, clean shadows, and controlled reflections. If the image is too yellow, too blue, underexposed, or overexposed, fix those issues before applying your creative preset.
The best workflow
Use manual corrections first, apply the preset second, then fine-tune the final image. This gives you the speed of presets without losing the accuracy required for product photography.
What to Include in a Strong Product Editing Preset Set
A useful product editing preset set should cover the real situations your brand shoots most often. Most businesses do not need 100 random looks. They need a smaller set of reliable presets that solve common editing problems.
- Clean white preset: for website product pages, marketplace images, and minimal catalog shots.
- Soft lifestyle preset: for home, desk setup, skincare, beauty, and cozy product scenes.
- Warm premium preset: for gift products, jewelry, candles, fashion, and handmade items.
- Detail-enhancing preset: for close-ups, textures, jewelry, packaging, fabric, and small products.
- Social media hero preset: for stronger contrast and more eye-catching color on Instagram, TikTok, Pinterest, and ads.
For close-up product photos, the AI-Optimized Macro Photography Lightroom Presets can help enhance small details, textures, and rich colors. For jewelry and reflective products, the Jewelry Product Photography Lightroom Presets are a better match because jewelry images often need controlled highlights, clean sparkle, and a premium finish.

Step-by-Step Product Photo Editing Workflow
Let’s break it down into a simple workflow you can repeat for every product shoot.
1. Import and organize your product photos
Start by organizing images by product type, lighting setup, or campaign. For example, create groups such as “white background,” “lifestyle,” “close-up,” and “social media crops.” This makes batch editing easier later.
2. Correct white balance first
White balance is one of the most important steps in e-commerce product photography. If the image is too warm, white packaging may look cream. If it is too cool, skin tones or natural materials may look lifeless. Correct temperature and tint before applying a creative preset.
3. Fix exposure and highlights
Make the product clearly visible without blowing out important details. For white packaging, reduce highlights if the label is disappearing. For dark products, lift shadows carefully without making the image look flat.
4. Apply your base preset
Choose the preset that matches the image type. A clean product page photo may need a bright minimal preset, while a lifestyle image may need a warmer, softer look. If you need more guidance on product-focused editing styles, read the best Lightroom presets for e-commerce and product photography.
5. Adjust color accuracy
After applying the preset, check whether the product color still looks believable. This is especially important for cosmetics, fashion, jewelry, food, and home decor. A preset should improve the image, not change the product into something the customer will not receive.
6. Sync settings across similar images
When multiple photos were captured in the same lighting, copy your final settings and apply them to the rest of the batch. Adobe’s Lightroom Classic workflow for copying and pasting edit settings is helpful when you want a consistent edit across several product images.
7. Review every image before exporting
Do a final check for blown highlights, strange skin tones, crushed shadows, color shifts, dust spots, and uneven brightness. Product photos need polish, but they also need honesty.
Expert Tips for Better Product Preset Results
- Do not use one preset for every image. Product page photos, lifestyle images, and close-ups often need different versions of the same brand style.
- Protect whites and labels. If packaging text disappears, lower highlights or whites before increasing exposure.
- Keep saturation controlled. Over-saturated product colors can look attractive at first, but they may reduce trust if the real product looks different.
- Use sharpening carefully. Too much sharpening can make packaging edges, jewelry details, and fabric texture look harsh.
- Create preset groups by purpose. Name them clearly, such as “Brand Clean,” “Brand Warm Lifestyle,” and “Brand Detail Close-Up.”
For beauty, skincare, and cosmetics, product texture is just as important as color. You can learn more from this guide to sharp beauty product close-ups in 2026, especially if you shoot reflective bottles, small labels, or soft cream textures.
How to Build a Preset Set for Different Product Niches
Every product category has different editing needs. A preset set for jewelry will not be the same as one for food photography or fashion accessories.
Jewelry and accessories
Jewelry photos need clean highlights, accurate metal tone, and enough contrast to show shape. Silver should not become blue-gray, and gold should not become orange. Use presets that keep reflections controlled while making the product feel premium.
Beauty and skincare
Beauty product photos should feel soft, clean, and trustworthy. Keep whites smooth, reduce harsh shadows, and avoid changing the real color of makeup, lipstick, foundation, or skincare packaging.
Food and drink products
Food products need color that feels fresh and appetizing. Warmth can help, but too much yellow or orange can make food look artificial. If your brand works with food visuals, the Food Photography Lightroom Presets collection can give you more niche-specific editing options.
Home, desk, and lifestyle products
For home studio product images, the look should often be bright, clean, and natural. The AI-Optimized Home Studio Clean Lightroom Presets are useful for desk setups, indoor product photography, lifestyle content, and clean brand visuals.

Common Mistakes to Avoid When Using Product Editing Presets
The most common mistake is applying a preset before fixing the photo. Presets work best on a solid image. If the original file is underexposed, mixed lighting, too yellow, or blurry, the preset will not magically solve everything.
- Using presets as the final edit: Treat presets as a starting point, then refine exposure, color, and detail.
- Ignoring product color accuracy: The product should look attractive but still realistic.
- Over-brightening white backgrounds: Clean white is good, but lost label detail is bad.
- Using too many different styles: A store with five unrelated editing looks can feel messy.
- Not testing on mobile: Many shoppers view product photos on phones, so always check mobile brightness and contrast.
If you work across Lightroom Mobile and Desktop, understanding file types also helps. This DNG vs XMP presets guide explains how mobile and desktop preset formats can affect your workflow.
Related Reading
- Best Lightroom presets for e-commerce and product photography
- How to edit sharp beauty product close-ups in 2026
- DNG vs XMP presets for mobile and desktop editing
- Why every photographer needs a Lightroom presets bundle
The Takeaway: Build a Preset Set That Sells the Brand, Not Just the Product
In 2026, strong product presentation is not optional. Your photos need to communicate trust, quality, and brand style before customers even read the product details. Product editing preset sets help you create that consistency faster, especially when you combine presets with careful manual corrections.
Start with your brand mood, build a small set of practical looks, test each preset on real product images, and refine the settings until they feel reliable. For a complete editing foundation, explore the Jewelry Product Photography Lightroom Presets, AI-Optimized Macro Photography Lightroom Presets, and the AI-Optimized Lightroom Presets for Mobile and Desktop collection. If you need setup help, visit the AAAPresets Lightroom preset installation and FAQ page.
FAQ
What are product editing preset sets?
Product editing preset sets are groups of Lightroom presets designed to create a consistent look across product photos. They help control color, contrast, brightness, and mood while speeding up the editing workflow.
Are presets enough for professional product photography?
Presets are a strong starting point, but professional results usually need small manual adjustments. Correct white balance, exposure, highlights, and product color before finalizing the image.
Can I use the same preset for all product photos?
You can use the same brand style, but not always the exact same preset. Product page images, lifestyle photos, close-ups, and social media images often need slightly different preset versions.
Do product presets work on Lightroom Mobile?
Yes, many presets work with Lightroom Mobile when they are provided in compatible formats such as DNG or supported mobile preset files. Always check the product details before using them in your workflow.
How do I keep product colors accurate after applying presets?
Correct white balance first, then apply the preset, then compare the edited image with the real product. Reduce saturation or adjust color mix if the product shade becomes unrealistic.
Written by Asanka — creator of AAAPresets (10,000+ customers).
Leave a comment
This site is protected by hCaptcha and the hCaptcha Privacy Policy and Terms of Service apply.