Cool Tones, Real Impact: How to Use Winter Lightroom Presets and Cinematic LUTs for a Cold, Cinematic Look
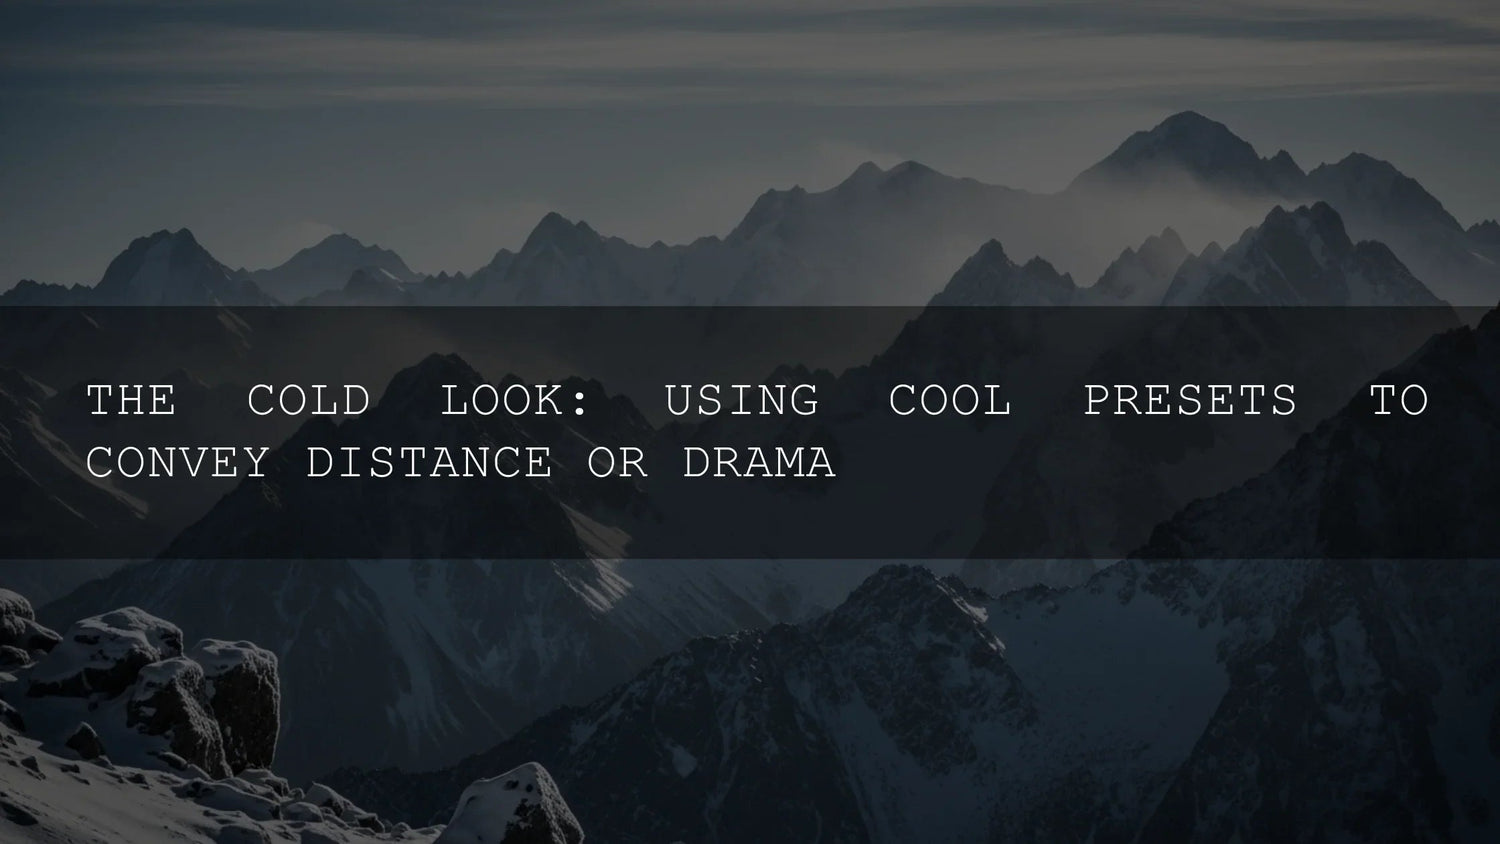
If you want that crisp, frosty mood that makes scenes feel expansive and dramatic, winter Lightroom presets and cinematic LUTs are the fastest, most reliable way to get there. Cool tones (blues, cyans, steel grays) create distance, sculpt depth, and instantly dial in a winter vibe—whether you’re editing snowy landscapes, moody city streets, or a chilly wedding portrait. In this guide, we’ll break down when to use cool presets and LUTs, show practical steps, and share pro tips I use in real client work. Secondary ideas we’ll cover include cool color grading, snow presets, Lightroom Mobile workflows, and winter LUTs for video.
Want a proven starting point? Try the AI-Optimized Cinematic Winter Lightroom Presets or the New Winter Cinematic LUTs Pack. They’re built for a clean, cinematic cold look—perfect if you’re working across photo and video. Try them today — Buy 3, Get 9 FREE. For more options, browse [Browse collection – Collections “Lightroom Presets”].
Why Cool Tones Work (and When to Use Them)
Cool colors naturally recede, so pushing blues and cyans can make backgrounds feel farther away and scenes feel larger. That’s ideal for mountain vistas, frozen lakes, foggy streets, or any story that needs mood and atmosphere. Use cool tones when you want to:
- Create distance and depth: Subtle blue in shadows pushes the background back and keeps attention on your subject.
- Set a cinematic mood: Steel blues + balanced contrast suggest quiet, isolation, or high-stakes drama.
- Amplify winter textures: Snow detail pops when you manage exposure and color carefully (watch those highlights!).
For a fast, non-destructive photo workflow, start with AI-Optimized Cinematic Winter Lightroom Presets or dial in snow detail with Snow Landscape Presets for Lightroom. For video, anchor your grade with the New Winter Cinematic LUTs Pack or go ultra-ethereal with Snow Winter LUTs for Cinematic Snowy Scenes.

How to Nail the Winter Look in Lightroom (Step by Step)
- Expose for highlights first. Snow clips easily—bring Highlights down and use the Histogram to avoid right-side clipping.
- Apply your base preset. Start with a consistent look using AI-Optimized Cinematic Winter Lightroom Presets. Then fine-tune.
- Balance the white balance. Set a neutral base, then cool it slightly. Keep skin tones believable by warming selectively (see masking below).
- Shape with Masking. Use Sky/Subject/Background masks to keep faces warm and backgrounds cool. See Adobe’s guide to masking in Lightroom Classic for precise control.
- Add gentle color separation. Use the Color Grading wheels or Tone Curve to cool shadows and keep midtones neutral. Adobe’s notes on working with tone and color are a great refresher.
- Preserve texture. Snow looks plastic if clarity/texture are pushed too far. Keep detail natural—small moves go a long way.
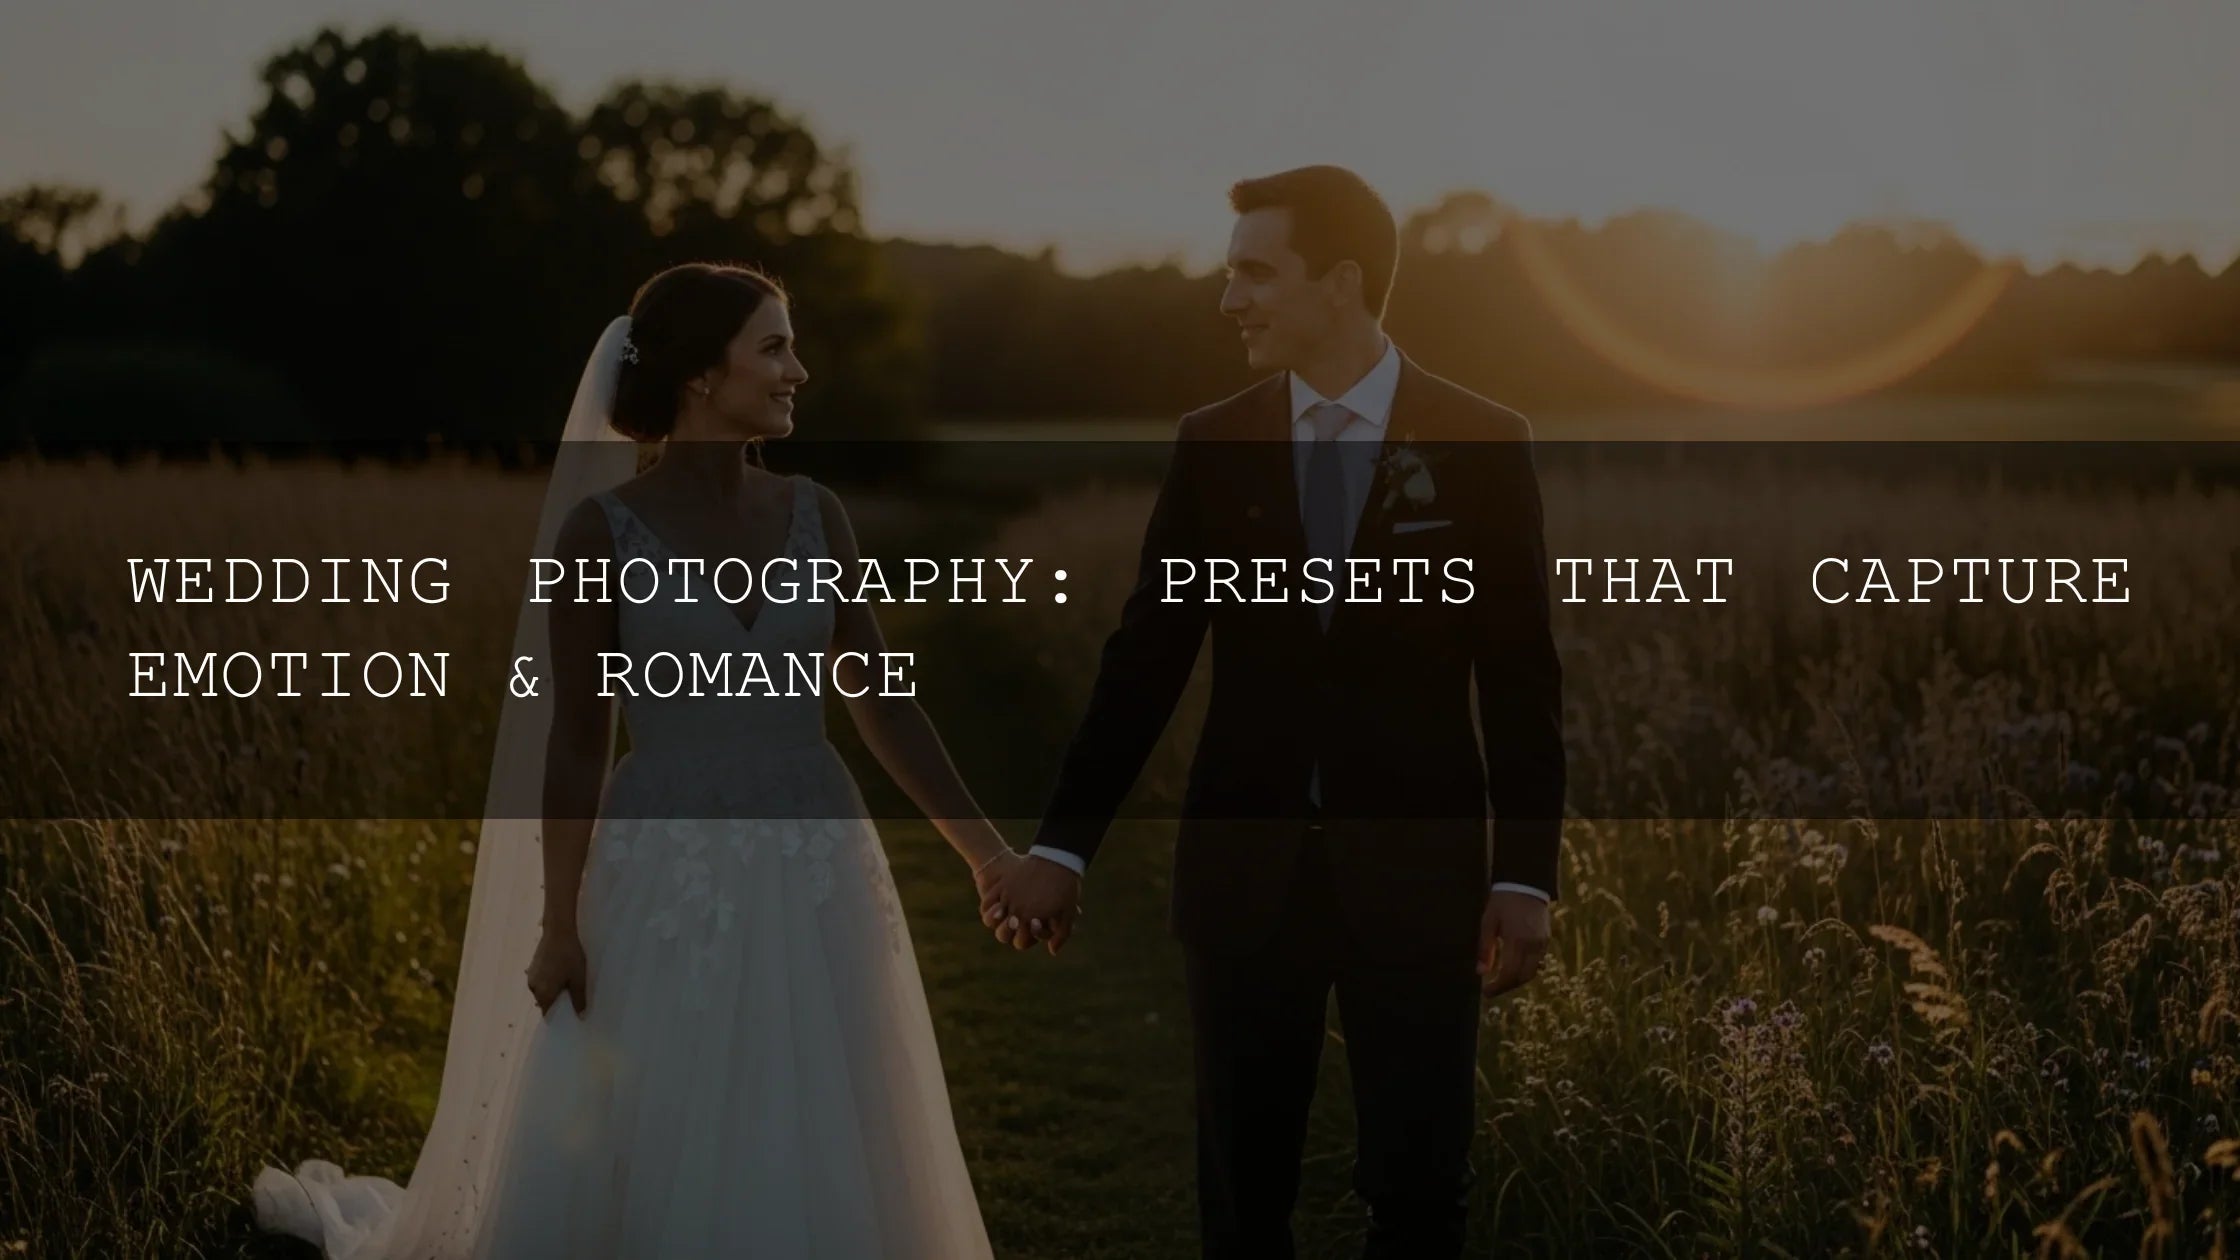
Field note: I tested the Winter presets on a dusk wedding shoot with falling snow. A Sky mask cooled the environment while a People mask kept skin tones soft and warm. The final images felt cinematic without looking “filtered.”

Bring the Chill to Video with Cinematic LUTs
LUTs are color recipes you can apply to footage for instant style. In Premiere Pro, add a LUT in the Lumetri Color panel (Basic Correction > Input LUT). See Adobe’s walkthroughs for Looks and LUTs in Premiere Pro and how to add Look-Up Tables.
- Normalize first. Fix exposure and white balance. If you shot LOG, apply the correct technical transform before a creative LUT.
- Apply your creative LUT. Try the New Winter Cinematic LUTs Pack for a balanced, cool film look or Snow Winter LUTs for glowing, ethereal snow.
- Trim to taste. Lower LUT intensity (e.g., 60–80%) to avoid oversaturation or crushed shadows. Then refine contrast and color in Lumetri.
- Match shots. Keep continuity across clips—copy Lumetri settings or nest adjustments to avoid drifting color.

Presets vs Manual Editing: Which Should You Use?
- Presets/LUTs are perfect for speed and consistency. They give you a proven base in one click—great for batches, deadlines, and brand cohesion.
- Manual editing is best for unusual lighting or when you want a very specific artistic twist. You’ll still save time by starting with a preset and then refining.
Best practice: Start with a preset or LUT for foundation, then use masking and selective color to personalize. If you need a snow-centric photo look, start with Snow Landscape Presets. For video, the Cinematic Snow Winter Video LUTs deliver a classic cool grade with strong contrast.

Pro Tips for Authentic Winter Color
- Protect highlights: Slight negative exposure and Highlights control keep snow from blowing out—then lift Whites conservatively for sparkle.
- Control skin tones: Cool the background, warm the subject. Use Lightroom’s People mask to nudge Temp/Tint warmer on faces (Masking in Lightroom).
- Separate hues: Cool shadows, neutral mids, and gentle warmth in highlights feel cinematic and natural.
- Watch contrast + clarity: Too much clarity makes snow waxy. Keep micro-contrast lower and sharpen edges selectively.
- Add a warm accent: A red scarf or tungsten window light against blue snow creates compelling color contrast. Explore combos with the Adobe Color harmony wheel.
Real-World Workflow: From Shoot to Share
- Shoot clean: Expose slightly darker to preserve snow detail. Consider a CPL to cut glare.
- Choose your base look: Apply AI-Optimized Cinematic Winter Lightroom Presets for photos or New Winter Cinematic LUTs for video.
- Refine locally: Mask sky/background cooler; keep skin or subject neutral-to-warm. (Adobe’s Lightroom masking guide.)
- Polish color + curve: Use Tone Curve to add soft contrast and anchor blacks without crushing (Lightroom tone & color controls).
- Deliver consistently: Sync settings across sets, then spot-check and tweak. Consistency beats perfection.
Quick Wins You Can Try Today
- Blue Shadows Only: In Color Grading, push Shadows Hue toward blue with low Saturation. Leave Midtones neutral.
- Warm Subject, Cool World: People mask + small Temp bump on skin, Background mask −Temp. Instant cinematic contrast.
- Snow Texture Rescue: Lower Highlights, raise Whites slightly, reduce Clarity a touch; add Texture selectively to trees/rocks.
- Video LUT Blend: Apply a winter LUT at 70% intensity, then refine with Lumetri’s Curves to avoid over-processing.
Related Reading
- Lightroom tricks to make snow sparkle (winter editing guide)
- Seasonal mobile presets for spring–winter (includes winter workflows)
- Cinematic color on mobile: using LUTs in CapCut & VN
- Best LUTs for cinematic color in DaVinci Resolve (2025 guide)
- 2026 LUT forecast: what’s next for color grading
Recommended Tools for a Winter-Cinematic Toolkit
- AI-Optimized Cinematic Winter Lightroom Presets — a polished cold look for portraits and landscapes.
- Snow Landscape Presets for Lightroom — built to preserve snow detail and color.
- New Winter Cinematic LUTs Pack — versatile, cool cinematic grades for Premiere Pro and beyond.
- Cinematic Snow Winter Video LUTs — classic cold film tone with balanced contrast.
Keep Learning with Official Adobe Resources
For deeper control and faster edits, bookmark these:
- Adobe’s guide to masking in Lightroom Classic
- Looks and LUTs in Premiere Pro
- Work with image tone & color (Tone Curve, HSL)
- Adobe Color harmony wheel (build cool/warm contrast)
How do I keep skin tones natural with a cold background?
Use Lightroom’s People mask to warm faces slightly (Temp/Tint) while cooling the Background/Sky. This preserves realistic skin while maintaining the winter atmosphere.
Are winter Lightroom presets good for sunsets or golden hour?
Yes—start with the preset, then reduce the cool cast and let warm highlights breathe. You’ll get crisp snow detail with a believable golden hue.
What’s the best way to apply a winter LUT without overdoing it?
Normalize exposure, apply the LUT at ~60–80% intensity, then refine with Curves and White Balance. Keep an eye on shadow crush and over-blue midtones.
Do these presets work on Lightroom Mobile?
Yes. Import the DNG presets or XMP profiles to sync across devices. The same principles—masking, tone, color—apply on mobile.
How do I handle mixed lighting (street lamps + snow)?
Mask the subject and pools of warm light to protect warmth, cool the background, then fine-tune orange/yellow in HSL so colors don’t go muddy.
Finish Strong with a Cohesive Winter Look
If your goal is speed, consistency, and a cinematic cold palette, start with purpose-built tools and personalize with masking. I recommend the AI-Optimized Cinematic Winter Lightroom Presets for photos and the New Winter Cinematic LUTs Pack for video; complement them with Snow Landscape Presets or Cinematic Snow Winter Video LUTs for specific scenarios. Ready to upgrade your winter edits? Build your toolkit today — Buy 3, Get 9 FREE. For broader browsing, see [Browse collection – Collections “Lightroom Presets”] and [Browse collection – Collections “Video LUTs”]. For installation help, visit [Install guide – Pages “How to Install Lightroom Presets”].
Image Alt-Text Suggestions
- winter lightroom presets cool blue grading on snowy landscape
- cinematic winter luts cold tone video color grade
- snow presets for lightroom before after edit with preserved highlights
- cool tones photography with warm skin tone contrast
- cold look grading for urban winter night scene
Written by Asanka — creator of AAAPresets (10,000+ customers).

Leave a comment
This site is protected by hCaptcha and the hCaptcha Privacy Policy and Terms of Service apply.