
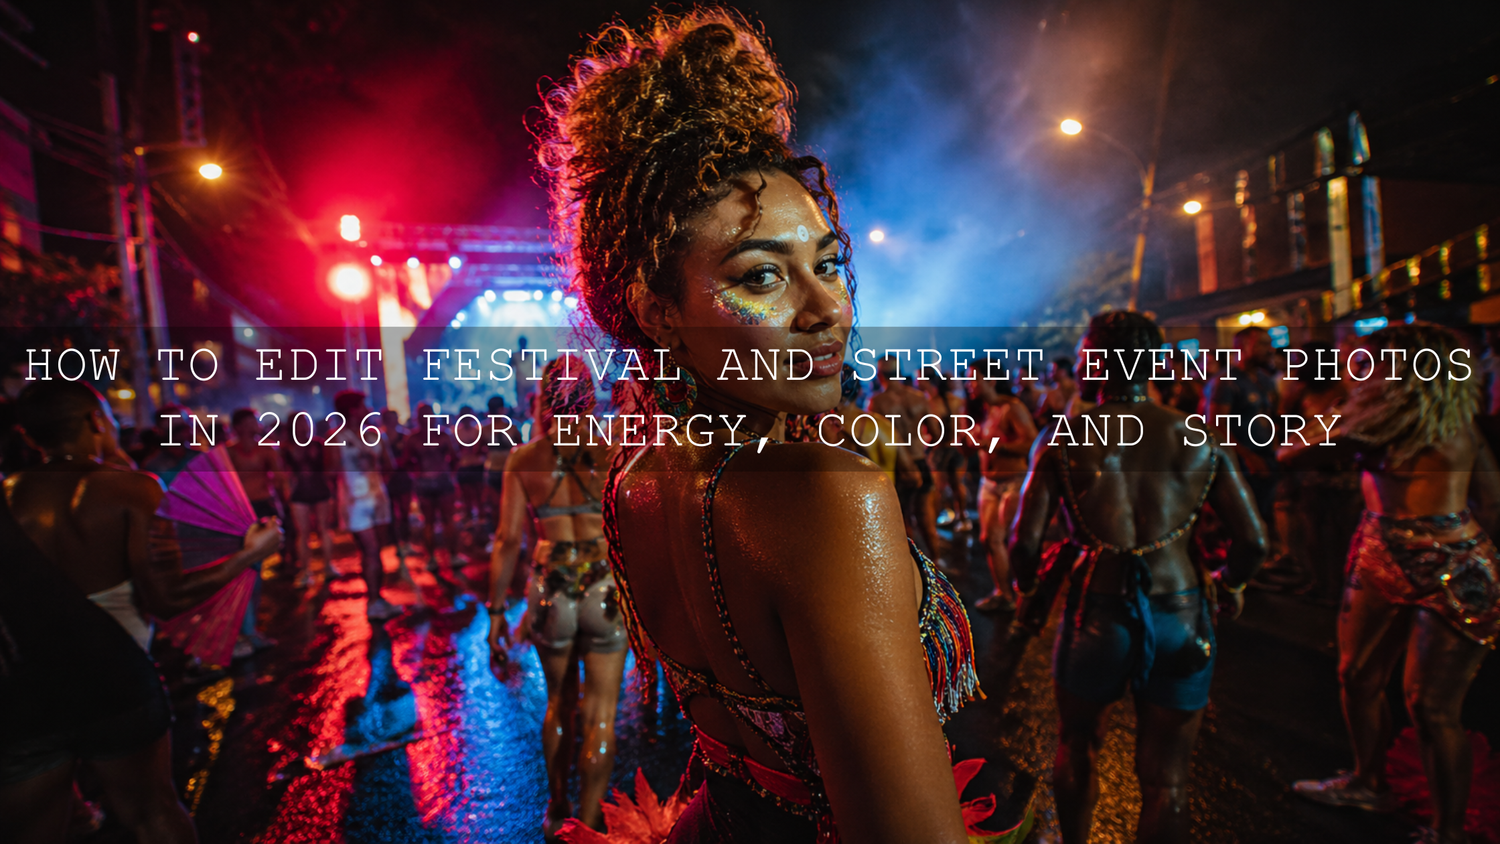
How to Edit Festival and Street Event Photos in 2026 for Energy, Color, and Story
Editing festival and street event photos in 2026 is about more than making colors brighter. A strong edit should bring back the real feeling of the moment: the moving crowd, neon lights, street performers, food stalls, music, costumes, flash portraits, and spontaneous reactions that make the scene feel alive. The goal is to create vibrant event photos that feel polished, emotional, and natural without turning skin tones orange, shadows muddy, or colors too fake.
Here’s why this matters: festival photography and street event photography usually happen in messy lighting. You may have harsh midday sun, mixed LED lights, smoke, stage colors, reflective streets, fast movement, and busy backgrounds all in one shoot. A good Lightroom workflow helps you control that chaos and turn it into a clean visual story.
For a faster starting point, try the AI-Optimized Concert Music Festival Lightroom Presets for bold stage lights and nightlife edits, then browse the Street Photography Lightroom Presets collection for more urban, candid, and event-ready looks. Try these presets today — Buy 3, Get 9 FREE.
Start With the Feeling of the Event Before You Touch the Sliders
Before editing, ask one simple question: what did this scene feel like in real life? A music festival may need strong contrast, bright color, and deep shadows. A cultural street parade may need warm skin tones, colorful clothing, and clean highlights. A night market may need neon glow, controlled blacks, and a little cinematic mood. A rainy street event may need reflective contrast, deeper blues, and softer highlights.
This first decision matters because not every festival photo should look the same. Some images need high-energy color. Some need a darker documentary mood. Some need a clean, timeless finish so the people and emotions stay natural.
When I test presets on event-style images, I usually start with three versions: one vibrant edit, one moody cinematic edit, and one clean natural edit. Comparing those looks side by side makes it easier to choose the style that matches the story instead of forcing every image into the same trend.
Use Color to Build Energy Without Over-Editing
Color is the biggest emotional tool in festival and street event photo editing. Red can add excitement, blue can create night energy, yellow can make a scene feel warm, and green can either feel natural or distracting depending on the location. The mistake many editors make is pushing global saturation too far. That may make the photo look bright, but it can also damage skin tones and make the image feel cheap.
A better approach is to adjust colors selectively. Adobe explains how the Color Mixer in Lightroom can fine-tune individual color ranges, which is useful when one color is too strong but the rest of the photo already looks good. Learn more from Adobe’s guide to the Lightroom Color Mixer.
A simple color workflow for festival photos
- Fix white balance first. Mixed lighting can make faces too green, orange, or purple.
- Use vibrance before saturation. Vibrance is usually safer for people because it is less aggressive than global saturation.
- Control reds and oranges carefully. These colors affect skin, costumes, firelight, and stage lights.
- Lower distracting colors. If a sign, LED panel, or background object steals attention, reduce that color slightly.
- Protect the main subject. The viewer should notice the person, performer, or story first, not only the color grade.
For concert photos, nightlife scenes, and music festival shots, the AI-Optimized Concert Music Festival Lightroom Presets are designed to enhance bold lighting, colorful stage effects, and energetic crowd moments while still giving you room to fine-tune exposure, white balance, and skin tones.
Fix Light and Contrast Before Adding a Strong Style
Festival and street event photos often look flat because the lighting is difficult, not because the photo lacks color. Before adding a strong preset, make sure the basic light feels balanced. Look at the subject’s face, the brightest highlights, and the darkest shadows. If the highlights are blown out, the image may lose detail. If the shadows are crushed too much, the street atmosphere can disappear.
Here’s a practical edit order that works well for most event photos:
- Exposure: Brighten only enough to reveal the subject clearly.
- Highlights: Pull down harsh lights, white shirts, reflective signs, and stage lamps.
- Shadows: Open shadows slightly if faces or important details are hidden.
- Contrast: Add depth, but avoid making skin too harsh.
- Blacks: Deepen the image carefully for a cinematic finish.
For more advanced control, Lightroom masking can help you brighten faces, darken distractions, or control a bright background without changing the entire image. Adobe’s official masking guide explains how local adjustments can target specific parts of a photo instead of applying every change globally. See Adobe’s guide to masking in Lightroom.
Presets vs Manual Editing: Which Is Better for Event Photos?
Presets and manual editing are not enemies. They work best together. Manual editing gives you total control, while presets help you build a consistent style faster across a full gallery.
Manual editing is best when:
- The lighting is very different from photo to photo.
- You need perfect skin tone correction.
- The photo has difficult color casts from LED or stage lights.
- You are preparing a hero image, client delivery, or portfolio shot.
Presets are best when:
- You need a consistent style across many event photos.
- You want a strong starting point for color, contrast, and mood.
- You are editing social media content quickly.
- You want the same visual identity across Instagram, TikTok, blog images, and client galleries.
The smartest workflow is to apply a preset first, then adjust exposure, white balance, highlights, shadows, and color mixer settings to match the actual photo. Adobe describes Lightroom presets as pre-defined settings that can apply adjustments such as exposure, contrast, saturation, and color grading, but the final result still depends on the image and your refinements. You can read more in Adobe’s official guide to Lightroom presets.
For more workflow ideas, read Master Concert & Event Photo Editing Under Stage Lights and AI-Optimized Presets in Lightroom Mobile.
Create a High-Energy Festival Look
A high-energy festival edit should feel bright, bold, and alive. This style works best for music festivals, concerts, outdoor night events, parades, DJ shows, fireworks, and colorful street performances. The key is to make the scene pop without making every color fight for attention.
How to build this look
- Start with a vibrant preset. Use it as the base mood, not the final edit.
- Boost contrast moderately. Strong contrast gives stage lights and crowds more impact.
- Increase vibrance, not heavy saturation. This keeps the image colorful but more controlled.
- Use the Color Mixer. Push blues, purples, reds, or oranges only where they help the story.
- Add clarity or texture lightly. Too much can make skin and smoke look rough.
A good before-and-after result should feel like this: before, the image looks dark, flat, and crowded; after, the subject stands out, the lights feel alive, and the colors support the energy without overpowering the people.
For street-focused inspiration, explore The Best Street Photography Lightroom Presets and Top 5 Street Lightroom Presets for Captivating Cityscapes.
Use Moody Editing for Night Streets, Rain, and Quiet Moments
Not every event photo needs to be bright and loud. Some of the strongest images come from quiet corners: a performer waiting backstage, a couple walking past neon lights, a vendor under warm lamps, or a rainy street reflecting festival signs. These photos need atmosphere more than saturation.
The AI-Optimized Cinematic Dreamy Moody Film Lightroom Presets are a strong choice for this style because they create softer highlights, deeper shadows, muted tones, and a cinematic fade. This works especially well for rainy streets, night markets, lifestyle portraits, and emotional street event photos.
When I edit moody street event photos, I usually avoid pushing saturation too high. Instead, I focus on controlled contrast, gentle warmth, and clean skin tones. This helps the photo feel cinematic without looking artificial.
For more moody street ideas, read Street Photography in Fall: Grit, Texture & Storytelling and browse the Lightroom Presets for Moody Photography collection.
Add Vintage Flash Character for Parties and Street Nights
The vintage 35mm flash look is perfect for parties, indoor events, nightlife, candid street portraits, and behind-the-scenes festival moments. It gives the photo a direct, nostalgic, slightly raw feeling. This style works well when the image already has flash, reflective skin highlights, bold backgrounds, or spontaneous expressions.
The AI-Optimized Vintage 35mm Flash Lightroom Presets help create punchy highlights, clean contrast, and a retro film mood while keeping details sharp. Use this look when you want the photo to feel honest, energetic, and instantly social-media-ready.
Pro tip for flash event photos
Watch the forehead, nose, cheeks, and white clothing. Flash can create strong highlights very quickly. Lower highlights first, then add contrast. This keeps the flash look punchy without making faces look oily or overexposed.
Protect Skin Tones in Crowded Festival and Street Photos
Street events often include people with different skin tones standing under the same difficult lighting. A preset that looks good on the background may not always look good on every face. That is why skin tone checking should be part of every event editing workflow.
The AI-Optimized Dark Skin Cinematic Lightroom Presets are helpful for portraits, weddings, fashion, street photography, and events where medium to deep and dark skin tones need to stay rich, natural, and cinematic. The goal is not to flatten the skin or make it overly warm. The goal is to preserve depth, undertone, and natural highlight detail.
Quick skin tone checklist
- Check faces before increasing saturation.
- Use white balance to remove green, orange, or magenta casts.
- Lower orange saturation only if skin looks too strong.
- Use masks to brighten faces instead of lifting the whole photo.
- Compare the edit with the original so the person still looks real.
Build a Consistent Event Gallery
A strong event gallery should feel connected from the first photo to the last. That does not mean every image needs identical settings. It means the color, contrast, mood, and skin tones should feel like they belong together.
Use one main preset family for the full gallery, then create small variations for different lighting groups. For example:
- Daylight crowd photos: clean contrast, natural color, controlled highlights.
- Stage-light photos: stronger contrast, richer blues and reds, deeper shadows.
- Night street photos: moody tones, softer highlights, cinematic blacks.
- Flash portraits: punchy highlights, retro contrast, sharp details.
- Portrait moments: careful skin tones, smoother shadows, less saturation.
This workflow helps you edit faster while still making each photo feel intentional. For a larger editing toolkit, browse the AI-Optimized Lightroom Presets for Mobile and Desktop collection.
Step-by-Step Lightroom Workflow for Festival and Street Event Photos
- Choose your hero image first. Pick one photo that represents the whole event’s mood.
- Apply the best matching preset. Use a vibrant, moody, clean, or vintage flash look depending on the scene.
- Correct exposure and white balance. Make the photo look believable before pushing the style.
- Adjust highlights and shadows. Protect stage lights, signs, faces, and reflective surfaces.
- Use Color Mixer for problem colors. Control strong reds, oranges, blues, and greens selectively.
- Mask the subject if needed. Brighten faces or performers without changing the whole background.
- Refine texture and sharpness. Add enough detail for energy, but avoid rough skin.
- Sync similar images. Apply the same base settings to photos shot in the same light.
- Export for the platform. Use sharper, cleaner exports for blogs and slightly punchier edits for social media.
Common Mistakes to Avoid
- Over-saturating every color: This can make the image look artificial and damage skin tones.
- Ignoring white balance: Mixed lighting can ruin the whole edit if the temperature and tint are wrong.
- Crushing shadows too much: Deep shadows are cinematic, but blocked shadows remove story details.
- Using one preset without adjustments: Every lighting situation needs small refinements.
- Making skin too smooth: Event photos should feel real, not plastic.
Final Thoughts: Make the Energy Feel Real
The best festival and street event photos do not only show what happened. They make the viewer feel the sound, color, movement, and emotion of the moment. That comes from a balanced workflow: choose the right mood, correct the light, control the colors, protect skin tones, and use presets as a strong creative starting point.
For bold concert lights and high-energy festival edits, start with the AI-Optimized Concert Music Festival Lightroom Presets. For night streets, rainy scenes, and cinematic atmosphere, try the AI-Optimized Cinematic Dreamy Moody Film Lightroom Presets. For party flash and retro nightlife edits, use the AI-Optimized Vintage 35mm Flash Lightroom Presets. Then explore the Lightroom Presets for Lightroom Mobile and Desktop collection to build a complete editing style for your next event gallery. Buy 3, Get 9 FREE.
Frequently Asked Questions
What is the best way to edit festival photos in Lightroom?
Start by correcting white balance, exposure, highlights, and shadows. Then apply a festival or concert-style preset and refine colors with the Color Mixer so stage lights and crowd energy look vibrant without damaging skin tones.
Should festival photos be bright or moody?
It depends on the story. Music festivals and colorful parades often work well with bright, vibrant edits, while night markets, rainy streets, and quiet candid moments often look better with a moody cinematic style.
Are Lightroom presets good for street event photography?
Yes. Lightroom presets are useful because they give you a consistent starting point across many photos. The best results come when you apply a preset, then manually adjust exposure, white balance, shadows, highlights, and skin tones.
How do I keep skin tones natural in colorful event photos?
Avoid pushing global saturation too far. Correct white balance first, use vibrance carefully, check orange and red tones, and use masks to adjust faces separately from the background when needed.
Can I use the same presets on mobile and desktop?
Yes, many AAAPresets packs include DNG files for Lightroom Mobile and XMP files for Lightroom Desktop, Lightroom Classic, Photoshop, and Adobe Camera Raw. For installation questions, visit the AAAPresets FAQ page.
Written by Asanka — creator of AAAPresets (10,000+ customers).

Leave a comment
This site is protected by hCaptcha and the hCaptcha Privacy Policy and Terms of Service apply.