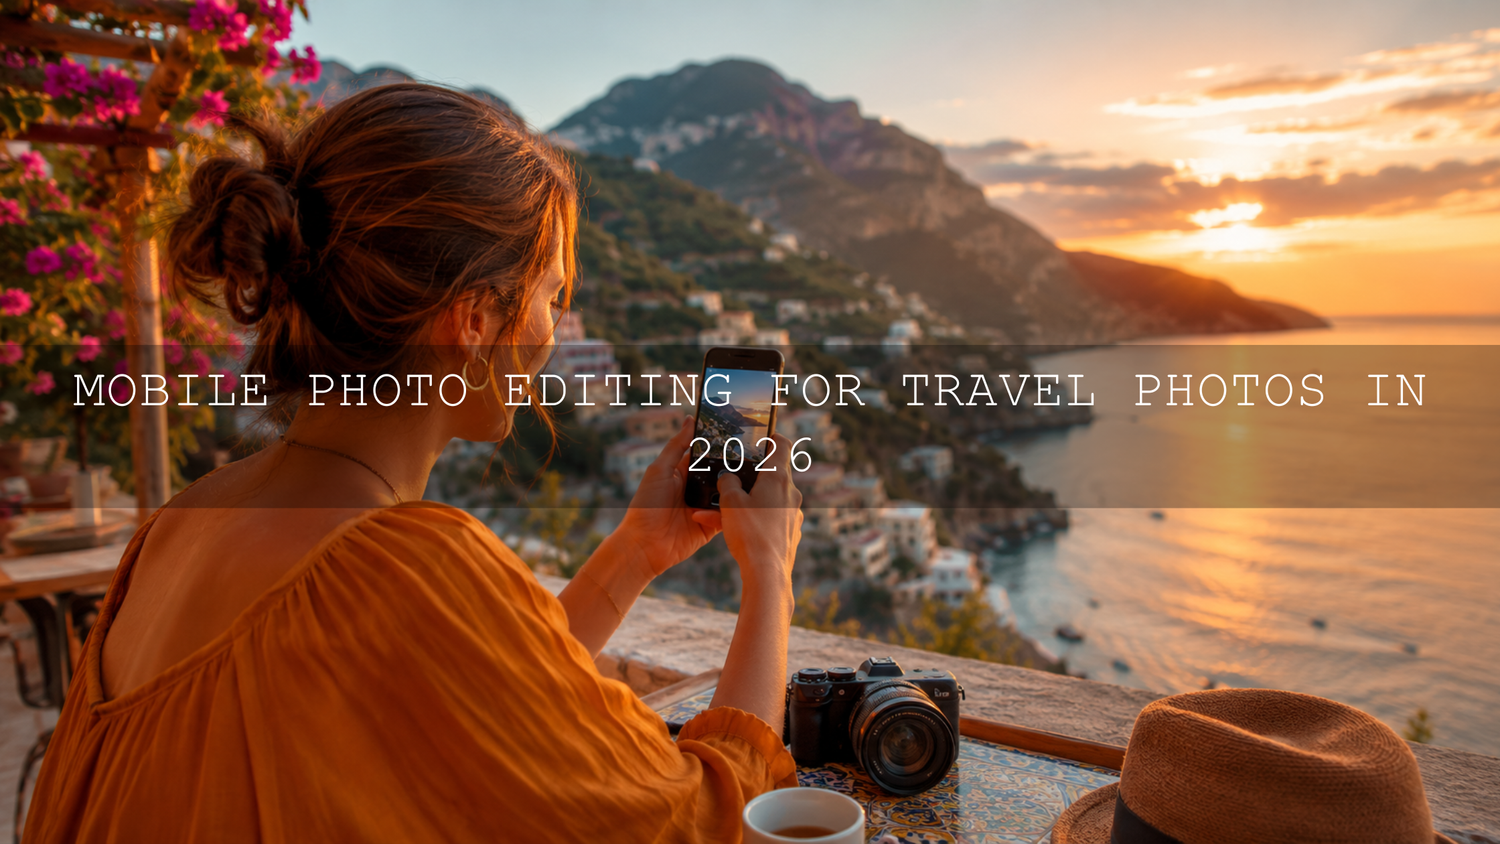
Mobile Photo Editing for Travel Photos in 2026
Mobile photo editing in 2026 is no longer a backup plan for travelers, creators, bloggers, or small business owners. Your phone can capture, edit, color grade, and export polished travel photos without a laptop. Whether you are editing golden-hour landscapes, busy street scenes, food photos, beach portraits, or Instagram carousel images, the right Lightroom Mobile workflow can turn flat phone shots into clean, cinematic, share-ready images.
Here’s why this matters: travel photos often look less exciting on your camera roll than they felt in real life. The sky may be too bright, the shadows may look muddy, the colors may feel dull, or the whole image may lack depth. With a smart editing process, you can bring back the feeling of the moment while keeping the photo natural.
For a faster starting point, try the Cinematics Look Lightroom Presets Pack for dramatic mobile edits, or browse the Lightroom Mobile Presets collection for DNG and XMP presets made for phone and desktop editing. Try these presets today — Buy 3, Get 9 FREE when you add 12 presets to your cart.
Start With a Better Capture Before You Edit
The strongest mobile photo editing workflow starts before you open Lightroom Mobile. A preset can improve color, contrast, and mood, but it cannot fully rescue a blurry image, a heavily smudged lens, or a photo with no clear subject. Think of capture as the foundation and editing as the polish.
I have tested travel presets on beach photos, city walks, food images, and moody street shots, and the best results almost always came from photos with clean light and a clear focal point. Even a simple phone shot can look premium when the light, framing, and edit work together.
- Clean your phone lens first: A smudged lens creates haze, weak contrast, and soft details. Wipe it before every important shot.
- Shoot in soft light: Sunrise, sunset, cloudy weather, open shade, and window light are easier to edit than harsh midday sun.
- Use RAW when possible: RAW or DNG files hold more editing data, giving you better control over highlights, shadows, and white balance.
- Watch your background: Remove distractions before shooting so you do not waste time fixing them later.
- Leave space around your subject: This gives you room to crop for Instagram feed, Reels covers, Pinterest pins, or blog images.
For a deeper understanding of what Lightroom Mobile can do, Adobe explains the app’s mobile editing and sharing features in its official Lightroom for mobile FAQ.
The Best Mobile Photo Editing App for Travel Creators
There are many mobile editing apps, but Lightroom Mobile is the strongest choice for a professional travel workflow because it gives you control over exposure, color, presets, masking, cropping, sharpening, noise reduction, and export quality in one place. It is also useful because it supports a non-destructive editing workflow, meaning your original photo stays safe while you adjust the edit.
Adobe’s guide to editing photos in Lightroom for mobile covers key tools such as presets, cropping, light adjustments, color adjustments, effects, detail, optics, and masking. These are the same tools you will use to build a polished travel photo edit from start to finish.
Other apps can still help in specific situations. Snapseed is useful for quick selective fixes, TouchRetouch can help remove distractions, and VSCO offers simple film-style filters. But if your goal is consistency across a whole trip, Lightroom Mobile presets and manual fine-tuning are the better long-term workflow.
Presets vs Manual Editing: Which Is Better?
Presets and manual editing are not enemies. The best mobile photo editing workflow uses both. A preset gives you a strong creative starting point, while manual adjustments help you make the edit fit the exact photo.
- Use presets when: you want a consistent travel feed, fast batch editing, cinematic tones, or a ready-made color style.
- Use manual editing when: the photo has unusual lighting, mixed indoor/outdoor color, blown highlights, dark shadows, or skin tones that need extra care.
- Use both when: you want speed and quality. Apply a preset, then fine-tune exposure, white balance, crop, and color.
For example, a sunset beach photo may look amazing with a warm cinematic preset, but you may still need to reduce highlights in the sky, lift shadows on the subject, and lower orange saturation slightly so the edit does not look too heavy. That is where presets become a workflow tool instead of a one-click shortcut.
If you want to understand why presets can look different from one photo to another, read why Lightroom presets look different and how to fix them. It explains why exposure, white balance, camera profiles, and lighting change the final result.
A Step-by-Step Lightroom Mobile Workflow for Travel Photos
Step 1: Import and Choose the Best Photo
Do not edit every photo from your trip. Start by choosing the strongest frames. Look for sharp focus, good light, a clear subject, and a scene that tells a story. A strong image might show a person walking through a market, sunlight hitting a mountain, steam rising from street food, or a clean architectural detail.
Pro tip: pick one “hero photo” from each location and edit that first. Once you like the look, copy similar settings to the rest of the set for a consistent travel series.
Step 2: Correct Exposure First
Before applying heavy color grading, fix the basic light. In Lightroom Mobile, start with exposure, contrast, highlights, shadows, whites, and blacks. These sliders shape the structure of the photo.
- Lower highlights to recover bright skies, white buildings, or sunlit clothing.
- Lift shadows to reveal detail in faces, cafés, alleys, and shaded streets.
- Adjust whites and blacks to create clean brightness and stronger depth.
- Use contrast carefully so the image feels rich without becoming harsh.
Here’s why this matters: if your exposure is wrong, your color edit will also feel wrong. A preset applied to an underexposed photo can become too dark and moody. The same preset applied to an overexposed photo can look washed out. Fix light first, then style the image.
Step 3: Set White Balance for Natural Color
White balance controls whether your image feels warm, cool, green, or magenta. Travel photos often have mixed lighting: warm sunset light, cool shadows, neon signs, hotel interiors, or reflective water. Use temperature and tint to bring the photo back to a natural starting point before creative grading.
For portraits, check skin tones first. For landscapes, check the sky and greenery. For food photos, make sure whites do not look blue or yellow. A clean white balance makes every later adjustment easier.
Step 4: Apply a Preset as a Creative Base
Once the photo is balanced, apply a Lightroom preset that matches the mood. For landscapes, try a cinematic travel look. For city scenes, use a street photography preset with controlled contrast. For food or café images, choose a warm preset that protects detail and color.
The AI-Optimized Cinematic Travel Landscape Wanderlust Lightroom Presets are a strong match for mountain views, beaches, road trips, and outdoor adventure photos. For markets, city walks, and lifestyle travel shots, the AI-Optimized Cinematic Travel Street Lightroom Presets can help create a polished street-style look.
Adobe’s official guide to presets in Lightroom explains how presets apply saved groups of adjustments to speed up editing. The important part is to treat them as editable starting points, not locked filters.
Step 5: Fine-Tune Color With HSL
HSL stands for Hue, Saturation, and Luminance. This is where your travel photo starts to feel intentional. Instead of increasing saturation across the whole image, adjust individual colors.
- Blue: Use it for skies, oceans, pools, and mountain shadows.
- Green: Control jungle, grass, palm trees, and landscape tones.
- Orange: Protect skin tones, sunsets, sand, and warm street lights.
- Yellow: Adjust sunlight, buildings, food, and dry landscapes.
For example, if a tropical photo looks too green, lower green saturation slightly and shift green hue toward a softer tone. If a sunset looks flat, gently increase orange luminance and reduce highlights instead of pushing saturation too hard.
For color inspiration, Adobe Color’s color wheel and harmony tool is useful when you want to understand complementary, analogous, triadic, and monochromatic color relationships for more consistent travel edits.
Step 6: Use Masking for Professional Depth
Masking lets you edit specific areas of the photo instead of changing everything globally. This is one of the biggest differences between a basic mobile edit and a professional-looking one.
- Brighten a subject’s face without lifting the whole background.
- Darken a distracting sky edge to keep attention in the center.
- Add clarity to mountains, architecture, or food texture.
- Reduce saturation in distracting background colors.
I tested this approach on a street travel photo with a person walking through warm afternoon light. A global edit made the whole image too bright, but a simple subject mask lifted the person while keeping the background cinematic. That small targeted adjustment made the photo feel more intentional.
Step 7: Crop for the Platform
After editing, crop based on where the image will be posted. A wide crop works well for a blog banner. A 4:5 crop is strong for Instagram feed posts. A 9:16 crop is useful for Stories, Reels covers, TikTok, and Pinterest Idea Pins.
Pro tip: do not crop too early. First complete your main light and color edit, then crop with the final mood in mind. This helps you choose the strongest subject placement.
Step 8: Sharpen, Reduce Noise, and Export
Finish with detail adjustments. Add sharpening carefully, especially on phone photos. Too much sharpening creates rough edges and a crunchy look. If you shot in low light, apply noise reduction gently so the photo stays clean without looking plastic.
For web and social sharing, export as JPEG in sRGB color space. Keep quality high enough to preserve details, but avoid oversized files when posting online. If you are creating website visuals, product images, or blog covers, a clean export can make the difference between a polished brand image and a soft, compressed upload.
How to Keep a Consistent Travel Editing Style
Consistency is what makes a travel album, Instagram feed, or blog look professional. The goal is not to make every photo identical. The goal is to make the images feel like they belong to the same story.
- Use one main preset family: Do not mix five completely different styles in one travel post.
- Create a reference edit: Edit your strongest photo first, then match the rest to it.
- Protect skin tones: If people are in the frame, check orange and red tones after applying presets.
- Balance warm and cool images: A beach sunset and a blue mountain morning can still look connected if contrast and saturation are consistent.
- Save your favorite adjustments: Build a repeatable workflow for future trips.
If you edit on your phone often, compare DNG vs XMP presets for mobile photographers so you know which format fits your workflow. You can also read common Lightroom Mobile mistakes to avoid before editing important travel images.
Common Mobile Photo Editing Mistakes to Avoid
Even strong photos can look amateur when the edit goes too far. The most common mistake is over-editing: too much saturation, too much clarity, crushed blacks, unnatural skin tones, and heavy vignettes. A good travel edit should feel polished, not forced.
- Do not overuse clarity: It can make clouds, skin, and water look harsh.
- Do not oversaturate skies: Deep blue skies can quickly look fake.
- Do not ignore white balance: Color problems become worse after applying presets.
- Do not export too small: Low-resolution files can look soft on social media and websites.
- Do not apply one preset at 100% every time: Adjust the edit to fit each photo.
If your DNG presets import but do not apply properly, use this DNG preset troubleshooting guide for Lightroom Mobile. For broader speed and consistency tips, read how Lightroom presets can improve your editing workflow.
Best Preset Types for Travel Photos
Different travel moments need different editing styles. A single preset can work across many images, but choosing the right look for the scene gives better results.
- Cinematic presets: Best for landscapes, road trips, dramatic skies, and destination photos.
- Street presets: Best for markets, cafés, city walks, architecture, and lifestyle travel shots.
- Vintage presets: Best for film-inspired edits, nostalgic travel stories, and warm portraits.
- Food presets: Best for restaurants, local dishes, coffee shops, and travel blogging.
- Drone presets: Best for aerial beaches, mountains, hotels, roads, and wide landscape scenes.
For a full toolkit, the 1000+ Master Lightroom Presets Bundle gives you a wide mix of DNG and XMP looks for landscapes, portraits, lifestyle, moody edits, cinematic tones, and social media content. You can also browse the Lightroom Presets for Mobile and Desktop collection if you want presets that work across phone and computer editing.
Related Reading
- AI-optimized presets in Lightroom Mobile
- DNG vs XMP presets for mobile photographers
- Lightroom Mobile mistakes beginners should avoid
- Why Lightroom presets look different on every photo
- AAA Presets FAQ and Lightroom preset installation help
Final Thoughts on Mobile Photo Editing
Mobile photo editing gives travelers and creators the freedom to shoot, edit, and share from anywhere. You do not need a complicated desktop setup to create clean, cinematic, professional-looking photos. Start with strong light, use Lightroom Mobile for control, apply presets as a creative base, fine-tune each image manually, and export with the right settings for your platform.
The best results come from balance. Let the photo still feel real, but guide the viewer toward the emotion you felt in the moment. A mountain scene can feel more dramatic. A café photo can feel warmer. A street portrait can feel more cinematic. A flat phone snapshot can become a polished travel memory.
Ready to speed up your travel edits? Start with the Cinematics Look Lightroom Presets Pack, explore the Cinematic Travel Landscape Wanderlust presets, or browse the full Lightroom Mobile Presets collection. Try these presets today — Buy 3, Get 9 FREE when you add 12 presets to your cart.
FAQ
What is the best app for mobile photo editing?
Lightroom Mobile is one of the best apps for mobile photo editing because it supports detailed exposure, color, masking, preset, crop, sharpening, and export controls in one workflow.
Can I use Lightroom presets on my phone?
Yes. Many Lightroom presets are available in DNG format for Lightroom Mobile and XMP format for Lightroom desktop workflows. DNG presets are especially useful for phone-only editing.
Should I edit travel photos manually or use presets?
Use both. Presets give you a consistent creative starting point, while manual adjustments help you fine-tune exposure, white balance, crop, and color for each image.
Why do my presets look different on every travel photo?
Presets react to the original photo’s light, color, exposure, camera profile, and white balance. Adjust exposure and white balance before judging the preset result.
What export settings should I use for social media?
Export as a high-quality JPEG in sRGB color space. Choose dimensions based on the platform, such as 4:5 for Instagram feed posts or 9:16 for Stories and Reels covers.
Written by Asanka — creator of AAAPresets (10,000+ customers).
Leave a comment
This site is protected by hCaptcha and the hCaptcha Privacy Policy and Terms of Service apply.