How to Darken Backgrounds for a Cinematic Look
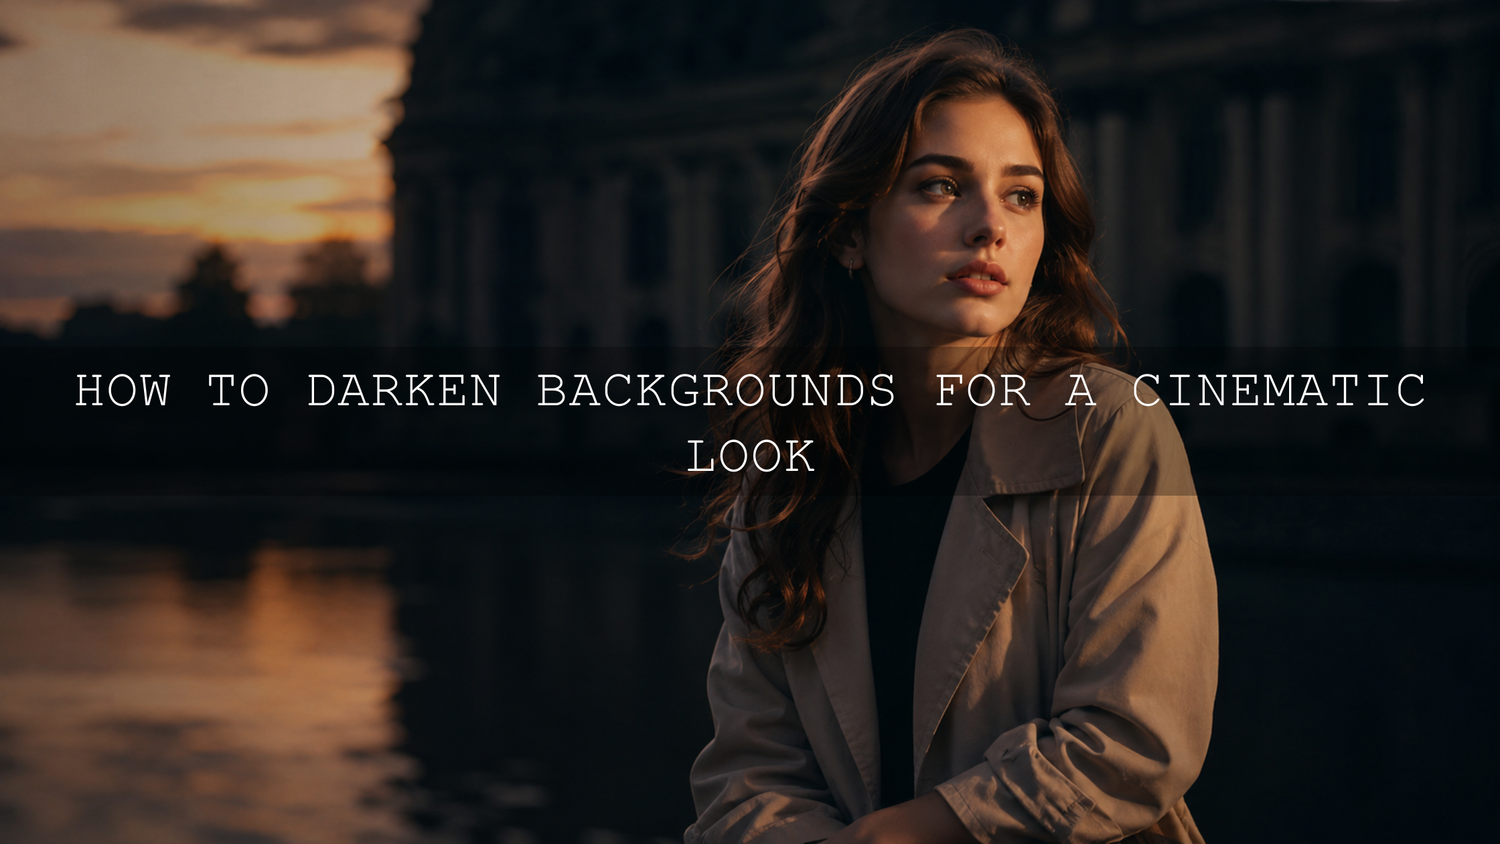
Learning how to darken backgrounds for a cinematic look is one of the fastest ways to make portraits, product photos, travel shots, street images, and videos feel more dramatic and professional. A darker background helps the subject stand out, removes distractions, adds depth, and creates that moody film-style atmosphere many creators want in 2026.
Here’s why this matters: the viewer’s eye usually goes to the brightest and sharpest part of an image first. If the background is too bright, messy, or colorful, it competes with your subject. But when you control the background using lighting, exposure, Lightroom masking, tone curve adjustments, vignettes, and cinematic presets, your photo or video starts to feel intentional instead of random.
If you want a faster starting point before refining the background manually, try the 1000+ Master Lightroom Presets Bundle and browse the Lightroom Presets for Moody Photography collection. Apply a cinematic preset first, then use masks and tone adjustments to shape the background naturally. Try these presets today — Buy 3, Get 9 FREE when you add 12 eligible items to your cart.
Why Dark Backgrounds Make Photos and Videos Look More Cinematic
A cinematic image is not only about dark shadows. It is about control. The subject, light direction, contrast, color mood, and background separation all work together to guide attention. When the background is darker than the subject, the image instantly feels cleaner and more focused.
Think about a portrait taken in a busy street. If every shop sign, window reflection, and car light is bright, the viewer has no clear place to look. But if the subject’s face is slightly brighter and the background falls into soft shadow, the photo becomes more emotional. The same idea works for product photography, wedding details, music videos, travel footage, and drone shots.
- Subject focus improves: The viewer notices the face, product, or main action first.
- Depth becomes stronger: A darker background creates separation between foreground and background.
- Distractions disappear: Clutter, harsh colors, and unwanted objects become less noticeable.
- Mood feels richer: Shadows can create drama, mystery, elegance, or intimacy.
- Colors can pop more: Warm skin tones, clothing, lights, and product details stand out better against darker tones.
I tested this approach on a moody outdoor portrait where the background trees were too bright and distracting. After applying a cinematic preset, I used a background mask to lower exposure and highlights while keeping the face bright. The result looked more polished, but still natural because the subject remained the visual hero.
Start in Camera: How to Capture a Darker Background Before Editing
The best cinematic edits usually start before you open Lightroom, Photoshop, Premiere Pro, or any other editing software. You can darken backgrounds in post-production, but it is much easier when the original image already has good light direction and subject separation.
Move Your Subject Away From the Background
Distance is one of the simplest tricks. If your subject stands right against a wall, the same light hitting the subject will also hit the wall. Move the subject a few feet forward, and the background usually becomes darker, softer, and less detailed. This is especially useful for portraits, wedding photos, interviews, and product setups.
Control Where the Light Falls
Light should hit the subject more than the background. Use a window, softbox, reflector, or natural sunlight from the side. Avoid lighting everything evenly. Even light can look clean, but it often feels flat. Directional light creates shape, shadow, and cinematic depth.
A simple setup is to place your subject near a window and let the background fall farther away from the light. If the background still looks too bright, block some light with a dark curtain, black fabric, or a simple black board. This is called negative fill, and it helps absorb unwanted bounce light.
Expose for the Subject, Not the Background
When shooting, expose carefully for the face, product, or main subject. Do not brighten the whole scene just because the background is dark. If you overexpose the photo, the background may lose detail and become harder to edit later. Shooting in RAW gives you more flexibility when adjusting exposure, highlights, shadows, and color during editing.
Camera Settings That Help Create a Cinematic Background
Your camera settings can support the cinematic look before editing begins. You do not need expensive gear, but you do need to understand how aperture, ISO, shutter speed, and focal length affect the background.
- Use a wider aperture: A low f-number like f/1.8, f/2.0, or f/2.8 creates background blur. Blur does not darken the background by itself, but it makes the background less distracting and easier to shape in editing.
- Keep ISO as low as possible: Lower ISO helps protect image quality and keeps shadows cleaner when you darken them later.
- Use shutter speed to control ambient light: A faster shutter speed can reduce background brightness, especially outdoors or near bright windows.
- Use a longer focal length: Portrait lenses and telephoto lenses compress the background and help separate the subject from the environment.
- Shoot RAW when possible: RAW files hold more editing information, which helps when using shadows, highlights, curves, and masks.
If your goal is a consistent dark and moody editing style, it helps to learn why the same preset can behave differently on each photo. This guide on why Lightroom presets look different on every photo explains how exposure, camera profiles, white balance, masking, and original lighting affect the final result.
How to Darken Backgrounds in Lightroom
Lightroom is one of the best tools for darkening backgrounds because you can make local adjustments without damaging the full image. Instead of lowering the exposure of the entire photo, you can use masks to target only the background. Adobe’s official Lightroom Classic masking tools guide explains how masking helps make selective color and tone corrections.
Step 1: Apply a Preset for the Overall Mood
Start with a preset that gives the image a strong cinematic base. This can adjust contrast, tone curve, color balance, shadows, and overall mood. A preset should not be the final step. It should be the foundation.
For moody portraits, lifestyle photos, travel scenes, and street edits, the Cinematics Look Lightroom Presets Pack is a good starting point because it gives your photo a film-inspired base before you fine-tune the background manually.
Step 2: Create a Background Mask
Use Lightroom’s Masking tool and choose Select Background if available. If the automatic selection is not perfect, refine it with the Brush, Add, or Subtract tools. The goal is to affect the background without darkening the face, skin, clothing, or main product.
Once the background mask is active, reduce Exposure slightly. Start small. A change between -0.20 and -0.70 can often be enough. Then lower Highlights if bright areas are pulling attention away from the subject. Increase Contrast carefully if the background feels washed out.
Step 3: Use Shadows and Blacks Carefully
Lowering Shadows and Blacks can create deeper mood, but too much can destroy detail. If the background becomes pure black with no texture, the image may look fake. Keep a little detail in walls, trees, fabric, buildings, or clouds so the edit feels premium instead of overprocessed.
Step 4: Add a Soft Vignette
A vignette darkens the edges of the frame and naturally pulls attention toward the center. Use it gently. A heavy vignette can look obvious, especially on bright backgrounds or clean product photos. For cinematic work, subtlety usually looks more expensive.
Step 5: Refine Color for Mood
Darkening the background is not only about exposure. Color also changes the feeling. Cooler shadows can feel cinematic and mysterious. Warm highlights can keep skin tones pleasant. Adobe’s guide to working with image tone and color in Lightroom Classic is useful when you want to understand tone curve, color grading, and tonal control more deeply.
Presets vs Manual Editing: Which Is Better for Dark Backgrounds?
Presets and manual editing both have a place. The strongest workflow is usually not one or the other. It is preset first, manual refinement second.
- Presets are faster: They give your photo a consistent cinematic look in seconds.
- Manual editing is more precise: You can protect skin tones, brighten eyes, darken backgrounds, and fix specific distractions.
- Presets help with consistency: This is important for Instagram feeds, client galleries, product collections, and brand visuals.
- Manual masks help with realism: Every photo has different light, so local adjustments make the edit fit the image.
For example, if a preset makes the whole photo beautifully moody but the face becomes too dark, do not remove the preset immediately. Instead, mask the subject and lift Exposure or Shadows slightly. This is exactly the kind of problem explained in the guide on why presets make photos too dark and how to recover detail.
How to Darken Backgrounds in Photoshop
Photoshop gives you even more control when the background needs careful cleanup. It is useful for product photos, high-end portraits, fashion images, and commercial work where every detail matters.
- Duplicate your image or use adjustment layers: Keep your workflow non-destructive.
- Select the subject: Use selection tools to separate the subject from the background.
- Add a Curves adjustment: Pull down the midtones or shadows to darken the background.
- Mask the effect: Keep the subject protected so the face, product, or main detail stays bright.
- Paint with a soft brush: Use low opacity to blend the darkness naturally.
A pro tip: do not darken every part of the background equally. Real light falls unevenly. Leave a little glow behind the subject or near the natural light source. This helps the edit feel realistic and creates separation.
How to Darken Backgrounds in Video for a Cinematic Look
The same idea works for video. In Premiere Pro, DaVinci Resolve, Final Cut Pro, or After Effects, you can use exposure, contrast, curves, masks, and LUTs to make the background darker while keeping the subject clear. Adobe’s guide to applying Lumetri looks in Premiere is helpful when working with creative looks and LUT-based color grading.
For video, be extra careful with skin tones and motion. A mask that looks perfect on one frame may not stay perfect when the subject moves. If the clip has movement, use softer masks, gentle vignettes, and LUTs that improve contrast without crushing the image.
If you want dark cinematic tones for landscapes, travel clips, moody roads, overcast scenes, and atmospheric footage, explore the Cinematic Landscape Dark and Moody Video LUTs. For a stronger film-style video workflow, the Cinematic Hollywood Film Look Video LUTs can help create a polished base before you fine-tune exposure and contrast.
Common Mistakes When Darkening Backgrounds
Dark backgrounds can look beautiful, but they can also go wrong quickly. The goal is not to make everything black. The goal is to create controlled contrast and subject separation.
- Making the subject too dark: The subject should still be the brightest or most important part of the frame.
- Crushing all shadow detail: Keep some texture so the image does not look flat.
- Overusing vignettes: If the viewer notices the vignette before the subject, it is too strong.
- Ignoring skin tones: Dark moody edits should not make skin look muddy, gray, or unnatural.
- Using one preset without adjusting: Presets are powerful, but each image needs small corrections.
If your preset looks too intense, use the advice in the guide to taming overly powerful presets. A small reduction in contrast, saturation, clarity, or preset intensity can make the edit look more natural.
A Simple Cinematic Background Editing Workflow
Here is a practical workflow you can use for photos, portraits, travel images, product shots, and social media content.
- Apply a cinematic preset: Build the overall mood first.
- Correct exposure: Make sure the subject is properly visible.
- Fix white balance: Keep skin tones and product colors natural.
- Create a background mask: Select the background only.
- Lower exposure and highlights: Darken distractions gently.
- Use tone curve: Add controlled contrast and deeper blacks.
- Adjust color grading: Add cool shadows or warm highlights depending on the mood.
- Add subtle vignette: Guide the eye toward the subject.
- Check before and after: Make sure the image still feels realistic.
For travel creators, this technique works especially well in city streets, hotel interiors, mountains, forests, and night markets. You can see a related workflow in this guide on editing travel photos for a cinematic feel. For creators who love dramatic color palettes, this article on teal and orange, bleach bypass, and cross-processing looks is also useful for understanding cinematic color choices.
Best Types of Images for Dark Cinematic Backgrounds
Not every photo needs a dark background, but this style works beautifully when the subject needs emotional weight or strong focus.
- Portraits: Dark backgrounds make faces, eyes, and expressions more powerful.
- Wedding details: Rings, flowers, dresses, and emotional moments can feel more elegant.
- Street photography: Shadows help remove background noise and create mystery.
- Product photography: A darker background can make packaging, jewelry, food, or luxury items feel premium.
- Travel and drone content: Darker tones can add scale, drama, and atmosphere.
- Music videos and reels: Cinematic contrast helps footage feel more polished and intentional.
When building your editing toolkit, browse the Cinematic Film Lightroom Presets for Mobile and Desktop collection for photo edits and use video LUTs when working with footage. A preset or LUT gives you the style quickly, while masking and exposure control help you make the result fit your exact image.
Pro Tips for a Natural Cinematic Look
- Keep the subject brighter than the background: This creates instant visual hierarchy.
- Protect skin tones: Lower background exposure without making faces muddy or orange.
- Use masks instead of global exposure when possible: This keeps the edit controlled.
- Darken highlights before shadows: Bright background highlights are usually the biggest distraction.
- Zoom out often: A dark background should improve the full image, not just look good at 100% zoom.
- Test on mobile: Many viewers will see your work on phones, where shadows can look darker than expected.
At AAAPresets, I often test presets on real-world photos with mixed lighting, not only perfect studio shots. The best dark cinematic edits are the ones that still work on imperfect photos: street portraits with bright signs, travel shots with harsh sky, wedding images with uneven reception lighting, and product photos with distracting backgrounds.
Related Reading
- Why Lightroom presets look different on every photo
- How to recover detail when presets make photos too dark
- How to soften strong presets for more natural edits
- How to edit travel photos for a cinematic feel
- Cinematic color grading looks explained
Darkening backgrounds is not about hiding everything. It is about using light, shadow, color, and contrast to make the subject feel important. Start with a strong edit, refine with masks, protect the subject, and keep enough background detail to make the image feel real. For a fast cinematic workflow, explore the 1000+ Master Lightroom Presets Bundle, try the Cinematics Look Lightroom Presets Pack, and browse the Lightroom Presets for Lightroom Mobile & Desktop collection. Build your editing toolkit today — Buy 3, Get 9 FREE when you add 12 eligible items to your cart.
FAQ
How do I darken only the background in Lightroom?
Use the Masking tool to select the background, then lower Exposure, Highlights, Shadows, or Blacks carefully. Keep the subject protected so the face, product, or main detail stays bright and natural.
Can presets darken backgrounds automatically?
Presets can create a darker cinematic base by adjusting contrast, shadows, tone curve, and color grading. For the cleanest result, apply the preset first, then use a background mask to refine the darkness for each photo.
Why does my dark background look too fake?
The background may be too dark, too flat, or missing texture. Raise the shadows slightly, reduce the vignette, soften contrast, and keep a small amount of detail in the background for a more realistic cinematic look.
Should I darken the background in camera or editing?
Do both when possible. Use lighting, distance, and exposure to make the background darker during the shoot, then use Lightroom, Photoshop, or video color grading tools to refine the final look.
Are dark backgrounds good for product photos?
Yes, dark backgrounds can make products look premium, especially jewelry, tech, food, perfume, and luxury items. The key is to keep the product well-lit and use background darkness only to support the subject.
Written by Asanka — creator of AAAPresets (10,000+ customers).
Leave a comment
This site is protected by hCaptcha and the hCaptcha Privacy Policy and Terms of Service apply.