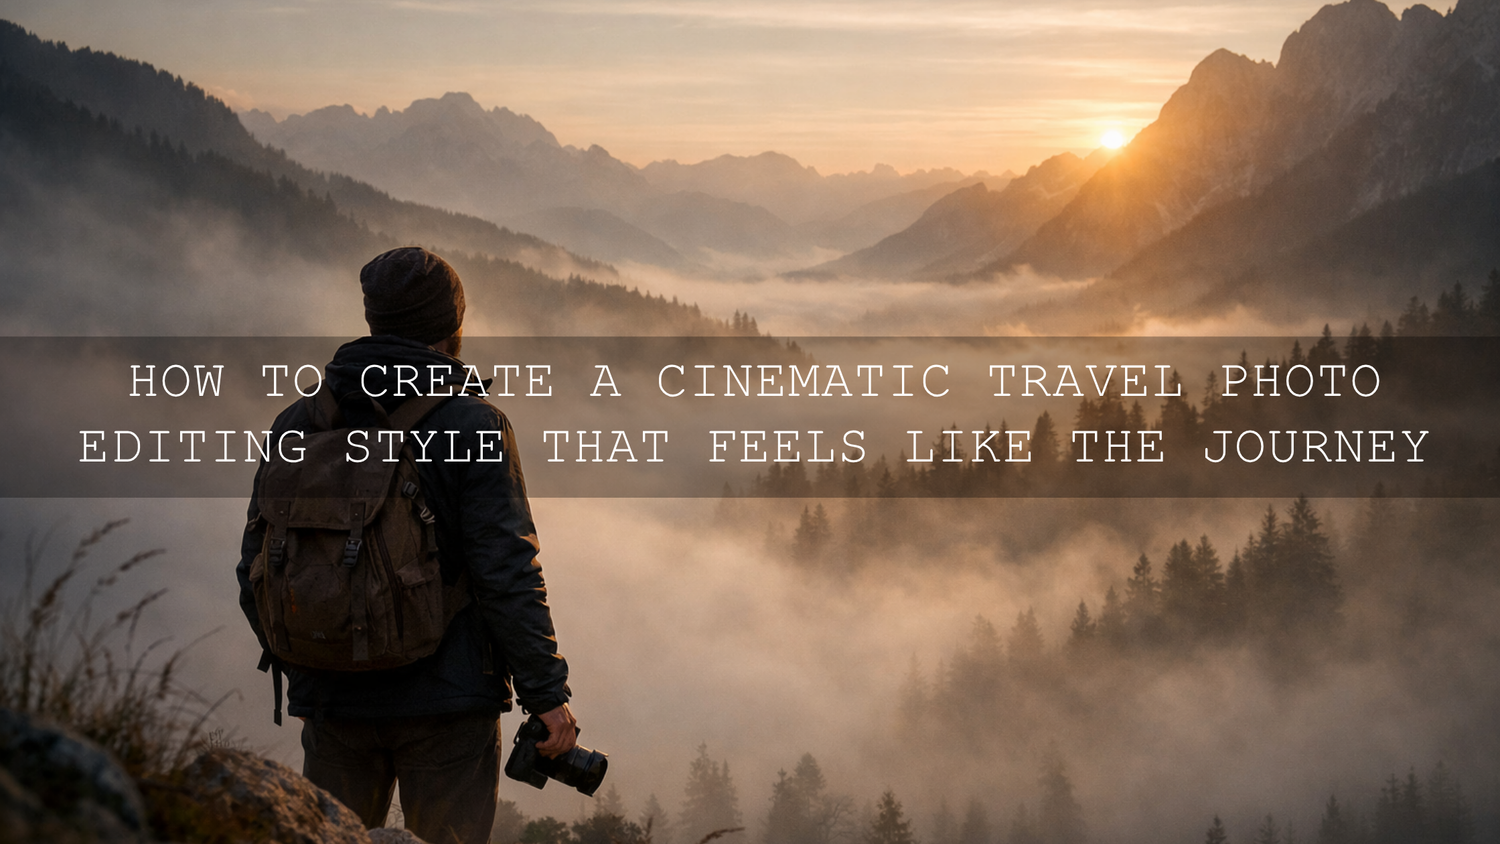
How to Create a Cinematic Travel Photo Editing Style That Feels Like the Journey
Cinematic travel photo editing is not about hiding a weak image under a heavy filter. It is about shaping light, color, depth, and mood so your travel photo feels closer to the real moment you lived. A misty mountain morning, a glowing alley after rain, or a warm coastal sunset can all look flat straight out of camera. With the right travel Lightroom presets, a few intentional adjustments, and a consistent editing approach, you can turn those frames into images that feel immersive, emotional, and memorable.
That is exactly why so many creators build a repeatable editing workflow instead of starting from zero every time. If you want a faster starting point, try the AI-Optimized Fogbound Cinematic Travel Lightroom Presets and browse the AI-Optimized Lightroom Presets collection. It is a simple way to create a cleaner cinematic travel look across different destinations, and it fits naturally with Buy 3, Get 9 FREE.
The best cinematic travel edits usually do four things well: they protect highlights, give shadows purpose, shape a clear color direction, and guide the eye to the subject. When all four work together, the photo stops feeling like a snapshot and starts feeling like a scene.
What Makes Travel Photos Feel Cinematic
Here is why this matters. Travel photography is not only about documenting a place. It is also about translating atmosphere. A strong cinematic edit helps viewers feel the cold air in a foggy valley, the warmth of sunset on stone buildings, or the pulse of a crowded street at night.
In practice, the cinematic look usually comes from a combination of controlled contrast, intentional color grading, and selective local adjustments. Adobe’s tools for masking in Lightroom Classic and profiles in Adobe Camera Raw are especially useful when you want to add mood without damaging the natural feel of the image. For color direction, Adobe Color harmony tools can help you think more clearly about warm and cool balance before you push sliders too far.
- Light: Cinematic edits protect bright skies, windows, water reflections, and sunlit skin.
- Depth: They use shadow, haze, and separation to make foreground, subject, and background feel distinct.
- Color: They build a palette instead of letting every color compete for attention.
- Story: They make the frame feel intentional, not random.
Start With the Right Preset for the Scene
Not every travel photo needs the same treatment. A foggy road trip image, a desert sunset, and a clean resort lifestyle photo all ask for different color choices and contrast levels. Presets work best when they match the location and mood you already captured.
For fog, mountains, and moody atmosphere
The AI-Optimized Fogbound Cinematic Travel Lightroom Presets are a strong fit for locations with mist, cloud layers, soft light, and atmospheric depth. They work well when you want a frame to feel quiet, cinematic, and slightly mysterious rather than bright and punchy.

I have tested this kind of look on foggy mornings and overcast viewpoints, and the biggest improvement usually comes from letting the haze stay soft while adding just enough contrast to keep the frame from looking washed out.
For sunset, heat, and emotional drama
The AI-Optimized Moody Red Cinematic Travel Lightroom Presets are better when the scene already carries warmth, city energy, or dramatic evening light. They are especially useful for travel storytelling where you want stronger emotion, richer reds, and deeper shadows.

Think desert roads, neon reflections, market scenes at dusk, or old streets lit by warm lamps. Used carefully, this look adds intensity without making skin tones feel unnatural.
For natural landscapes and balanced travel albums
If your goal is a cleaner edit with cinematic depth but more natural color, the Lightroom Presets for Landscapes & Travel are a reliable starting point. They suit wide views, beaches, forests, road trips, mountains, and mixed-destination galleries where consistency matters.

This is often the safest choice when you want a polished look without forcing a dramatic color style on every file.
For the classic movie-style color split
The Orange & Teal Cinematic Travel Moody Lightroom Presets lean into one of the most recognizable cinematic color relationships. They can be excellent for portraits in travel settings, architecture, street scenes, and tropical locations where warm highlights and cooler shadows create strong separation.

This look works best when you use it with discipline. You want the palette to feel intentional, not exaggerated.
For bright, clean travel storytelling
Some trips look better with a lighter editorial finish. That is where a clean travel-blogger style can help. It keeps detail crisp, skin tones natural, and colors lively without pushing the image into a heavy cinematic grade.

This is useful for hotel content, cafés, lifestyle portraits, city guides, and photo sets where readability matters just as much as mood.
Presets vs Manual Editing
Let’s break it down. A lot of photographers treat presets and manual editing like opposites, but the best workflow usually uses both.
- Presets are faster: They give you a solid base look in one click and help you stay visually consistent across a trip.
- Manual editing is more precise: It helps you correct exposure, white balance, skin tone, and specific problem areas in each image.
- The best workflow is hybrid: Apply the preset first, then fine-tune the image to fit that exact light and scene.
On my own test files, a strong preset usually gets the image most of the way there. The final quality comes from the small corrections after that first click.
A Simple Step-by-Step Workflow for Cinematic Travel Photo Editing
- Choose the right base image. Start with a photo that already has good composition and a clear subject. Editing cannot fix a confusing frame.
- Correct exposure first. Bring down highlights if the sky is too bright. Lift shadows only enough to reveal detail. Keep some depth.
- Apply the preset that matches the scene. Fogbound for mist, moody red for drama, landscape travel for balance, orange and teal for strong cinematic contrast.
- Adjust white balance. This step changes everything. A photo can feel expensive and cinematic or cheap and unnatural based on temperature alone.
- Refine contrast and blacks. Add depth, but avoid crushing shadow detail unless the story really calls for it.
- Use local masks. Darken bright distractions, lift your subject slightly, or add texture only where it matters.
- Control color intensity. Reduce distracting greens or overly saturated blues so the main palette stays clean.
- Finish with crop and detail. Straighten lines, sharpen selectively, and add light vignette only if it helps focus attention.
Real Before-and-After Thinking That Improves Travel Photos
A good cinematic edit usually solves a specific problem. Here are a few common examples.
- Foggy mountain shot: Before, the image feels flat and gray. After, the mist stays soft, the ridgelines separate better, and the frame feels deeper.
- Beach sunset photo: Before, the sky is bright but weak and the foreground lacks shape. After, highlights are controlled, warm tones feel richer, and the subject stands out more clearly.
- Night street scene: Before, mixed light colors compete and reflections look messy. After, the palette is cleaner, shadows feel intentional, and neon highlights guide the eye.
That is the real goal of cinematic travel editing. Not more sliders. Better decisions.
Pro Tips That Make Travel Lightroom Presets Look Better
- Do not judge the preset at full strength immediately. Fix exposure and white balance first, then evaluate the look.
- Keep one hero color. Let one dominant tone lead the story instead of boosting every color in the frame.
- Protect skin tones. Travel portraits fall apart quickly when oranges and reds become too heavy.
- Use masks to support composition. A subtle darkening on the edges or a gentle lift on the subject often feels more cinematic than global contrast.
- Stay consistent across the trip. When your images share a visual language, the whole gallery feels more professional.
If you want to go deeper into travel-specific looks, browse Top 10 Lightroom Presets for Travel Photography in 2025, Top 5 Lightroom Presets for Amazing Travel Photos in 2025, and Best Lightroom Presets for Coastal & Beach Travel in 2025. If you also want help getting presets running smoothly, the guide on how to install Lightroom presets quickly is worth saving.
How to Build a Repeatable Wanderlust Look
The strongest travel photographers are not chasing a different editing style every week. They are building a visual identity. That might mean soft fog and muted greens, warm sunset tones with deep contrast, or clean bright travel colors with controlled highlights. The important part is repeatability.
A good way to build that consistency is to start with one preset family and one browsing collection. For example, the Cinematic Film Lightroom Presets collection gives you a strong creative direction, while the Landscapes & Travel preset pack helps keep outdoor scenes balanced and usable across multiple locations.
I have found that once you stop chasing random looks and start refining one travel editing style, your photos instantly feel more professional. Even simple destination shots look stronger when they belong to the same visual world.
Bring More Feeling Into the Frame
The difference between a good travel photo and a memorable one is often emotional clarity. That is why cinematic travel photo editing matters. It helps you decide what the viewer should feel first: stillness, scale, warmth, nostalgia, tension, or wonder.
If you want a fast route to that result, start with the AI-Optimized Moody Red Cinematic Travel Lightroom Presets for dramatic scenes or the AI-Optimized Fogbound Cinematic Travel Lightroom Presets for atmospheric locations, then explore the AI-Optimized Lightroom Presets collection to shape a full travel workflow. It is an easy way to edit faster, stay consistent, and make the most of Buy 3, Get 9 FREE.
Related Reading
- Top 10 Lightroom Presets for Travel Photography in 2025
- Top 5 Lightroom Presets for Amazing Travel Photos in 2025
- Best Lightroom Presets for Coastal & Beach Travel in 2025
- Autumn Travel Photography: Mastering the Editing with Killer Presets
FAQ
Are travel Lightroom presets enough on their own?
They are the fastest starting point, but the best results usually come after small manual adjustments to exposure, white balance, and masking.
What is the best preset style for travel photography?
The best style depends on the location and mood. Foggy landscapes often suit soft atmospheric grades, while sunset cities and night scenes can handle bolder cinematic contrast.
Should I edit travel photos differently for mobile and desktop?
The core look can stay the same, but desktop editing usually gives you more precision for local adjustments, fine color work, and batch consistency.
How do I make travel photos look cinematic without overediting?
Start by controlling highlights and choosing one clear color direction. Then use subtle local adjustments instead of pushing every global slider too far.
Can cinematic travel editing still look natural?
Yes. The strongest cinematic edits usually feel believable. They enhance mood, depth, and color direction without making the destination look fake.
Written by Asanka — creator of AAAPresets (10,000+ customers).
Leave a comment
This site is protected by hCaptcha and the hCaptcha Privacy Policy and Terms of Service apply.