
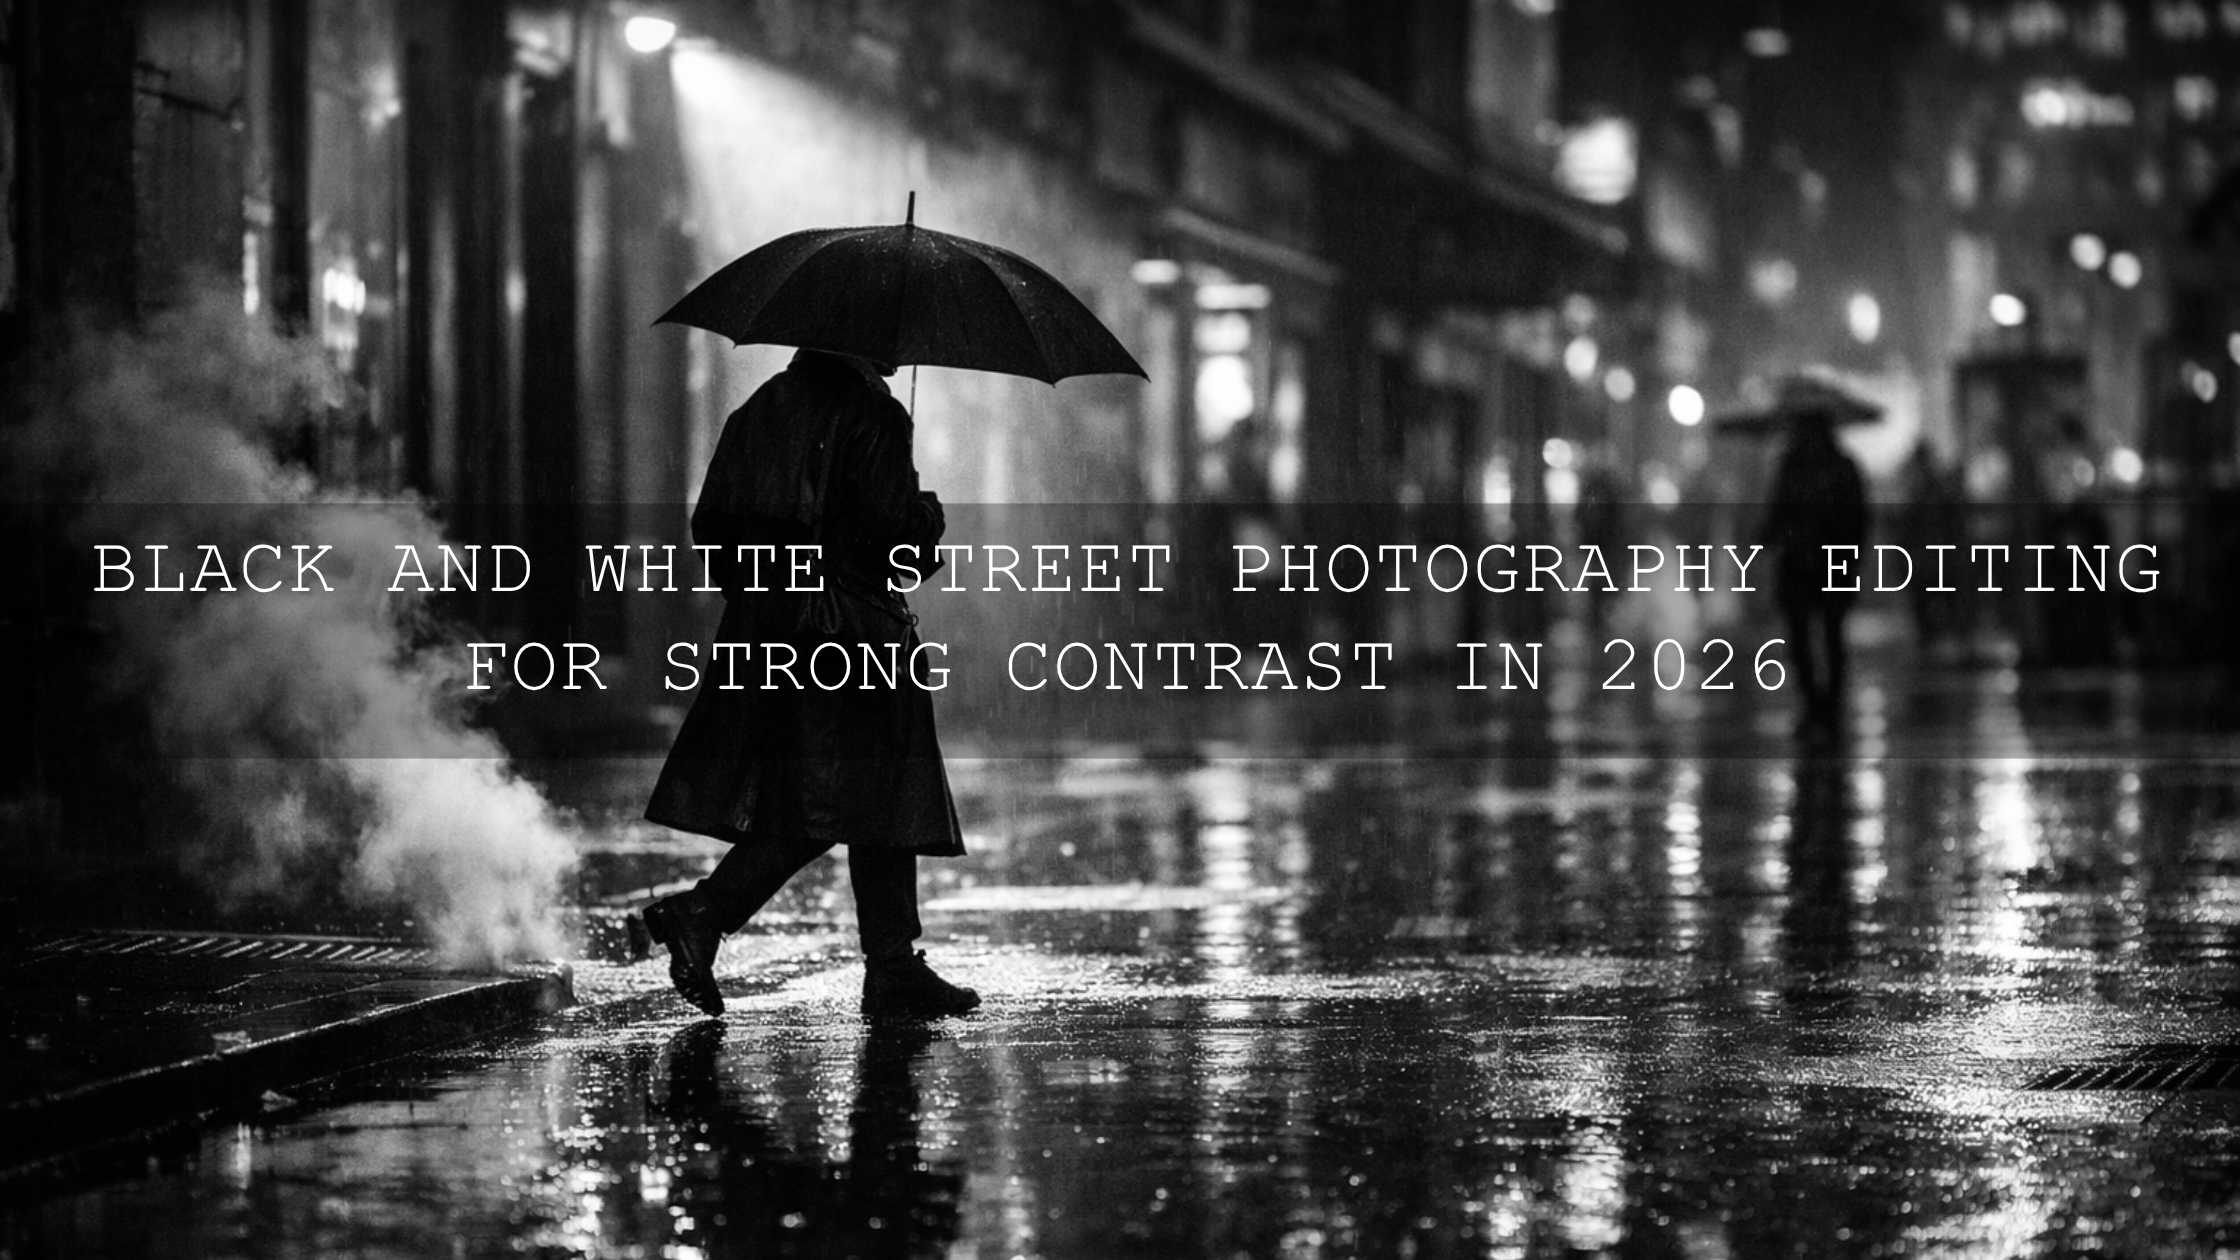
Street Photography Editing in 2026: How to Add Grit, Mood, and Story Without Losing Realism
Street photography editing in 2026 is not about crushing every shadow or pushing every frame into the same heavy look. The best street photography editing brings out grit, mood, and story while keeping the scene believable. Whether you love gritty street photography, cinematic street photography, or moody night street photography editing, the goal is the same: preserve the truth of the moment, then shape the visual language around it.
That is what makes street work different from many other genres. You are not polishing a controlled studio setup. You are working with mixed light, fast movement, reflections, weather, clutter, and emotion. A good edit helps the viewer feel the street. A bad edit makes the frame look forced. If you want a fast starting point, the AI-Optimized Cinematic Travel Street Lightroom Presets are a strong base for urban contrast and story, and the Street Photography Lightroom Presets collection gives you more looks to explore. You can also build a full editing toolkit with Buy 3, Get 9 FREE.
Why Street Photography Editing Matters More Than People Think
A strong street photo often lives or dies in the small decisions you make after capture. The difference between a forgettable frame and a memorable one is rarely one giant adjustment. It is usually a series of small moves: a more controlled black point, a cleaner crop, better highlight protection on a sign, or a cooler white balance that makes the city feel lonely instead of busy.
Here’s why this matters. Street photography is built on fleeting moments. You may only get one frame of a gesture, one reflection in a puddle, one subject crossing perfect light, or one split second when the background aligns. Editing is where you decide what the viewer should feel first. Grit gives the frame weight. Mood gives it emotion. Story gives it direction.
I have tested this kind of workflow on fast-moving city scenes where the RAW file looked flat and unremarkable at first, but a balanced preset, one crop adjustment, and two local masks completely changed the image. I have also seen strong captures fall apart when contrast, clarity, and saturation were pushed too far. In street photography, restraint often looks more professional than aggression.
How to Build Grit Without Making the Photo Look Fake
Grit is not the same as harshness. Real grit comes from texture, depth, and controlled imperfection. Think worn walls, steam, pavement reflections, old signage, layered shadows, motion blur, or a face caught in hard side light. Your edit should make those details feel tactile, not crunchy.
A good way to start is by shaping the tonal structure first:
- Lower highlights carefully so bright signs and sky patches do not pull attention away from the subject.
- Deepen blacks with control instead of crushing them, so you keep texture in jackets, hair, and asphalt.
- Add texture before clarity if you want detail without making skin or noise look rough.
- Use grain with intention only when it supports the mood. Grain should feel like atmosphere, not damage control.
The AI-Optimized Cinematic Travel Street Lightroom Presets work well here because they create a clean contrast base with enough shadow depth to make architecture, roads, and urban surfaces feel more dimensional. They are especially useful when your goal is a realistic cinematic look rather than an over-stylized social filter.
For more precise local control, use subject and background separation the way Adobe explains in Adobe’s guide to masking in Lightroom Classic. This is one of the easiest ways to make a street frame feel richer. Darken the edges, soften distracting highlights, or add subtle lift to the subject’s face without flattening the whole image.
A practical pro tip: if your shot already has natural grit, like rain residue, peeling paint, dirty glass, or harsh late-day shadows, do less. The street often gives you the texture for free. Your job is to reveal it, not manufacture it.
How to Create Mood With Color and Light
Mood is where street photography becomes emotional. A cool blue frame can feel distant and lonely. Warm sodium-vapor light can feel nostalgic. Green fluorescent spill can feel uneasy. Magenta and teal neon can feel cinematic and alive. Editing lets you decide which emotional direction the scene should take.
When I want a rainy, reflective, cinematic look, I focus on three zones first: whites, shadows, and color contamination. Wet streets can easily look muddy if the blacks are too heavy or the white balance is ignored. The AI-Optimized Rainy Street Film Lightroom Presets are useful for this because they push the frame toward a moody urban atmosphere while still keeping enough detail in reflections and light spill.
For neon-heavy night scenes, the challenge changes. You usually need to protect sign detail, stop skin from turning radioactive, and keep the color palette from becoming chaotic. The AI-Optimized Neon Street Lightroom Presets help create that electric nightlife look while keeping the image cleaner than a manual edit that relies on oversaturation.
Color choices become stronger when you understand harmony instead of guessing. Adobe’s Color Wheel and harmony tools are useful for thinking about complementary and analogous color relationships. That matters in street work because urban frames often contain many competing colors at once. If red taillights, blue signage, yellow lamps, and green reflections are all fighting each other, the image loses emotional clarity.
A simple rule helps: let one family of colors lead, let one support, and let the rest sit back. That alone can make a busy city frame feel intentional.
How to Strengthen Story in a Single Street Frame
Story is not just about subject matter. It is also about emphasis. The viewer needs to know where to look first, what to feel second, and what to notice last. Editing helps create that path.
Let’s break it down:
- Crop for tension or clarity. Remove dead space that adds nothing, or keep space that makes the subject feel isolated.
- Guide the eye with brightness. The viewer almost always notices the brightest meaningful area first.
- Reduce distractions. Busy corners, hot highlights, and oversaturated background colors weaken the story.
- Keep faces believable. Even in dark, stylized street edits, skin tone realism makes the scene feel more human.
Adobe’s crop and straighten workflow for Lightroom Classic is worth revisiting if you want cleaner framing. A small crop can completely change a street image. I often find that the story becomes clearer when one distracting sign, one extra passerby, or one empty strip of pavement is removed.
If your goal is a more film-inspired narrative, the AI-Optimized Cinematic Street Movie Lightroom Presets are a strong fit. They work especially well when you want your edit to feel like a frame from a larger story rather than a standalone snapshot.
For more inspiration, it helps to study how other street-focused edits are approached in Street Photography: Editing for Real Life & Raw Moments and Elevate Your Street Photography with These Cinematic Lightroom Presets.
Presets vs Manual Editing for Street Photography
This comparison matters because many photographers think using presets means giving up control. It does not. A strong preset is a starting structure, not a final answer.
- Use presets when you want speed and consistency. This is ideal for full city walks, travel stories, client galleries, or keeping a recognizable style across a portfolio.
- Use manual editing when the light is highly unusual. Mixed indoor and outdoor light, extreme flash, or heavy color contamination may need more custom work.
- Use both when you want the best result. Apply a preset for tone and mood, then refine white balance, crop, masking, and HSL for the specific frame.
In practice, this hybrid method is usually the smartest one. Presets save time on the big visual direction. Manual adjustments finish the image with precision. That is why Lightroom presets for street photography are most effective when treated as a base, not a shortcut that replaces judgment.
A Practical Workflow for Gritty, Moody, Cinematic Street Photography
- Start by culling for feeling, not just technical perfection. Slight blur, imperfect framing, or flare can still work if the emotion is strong.
- Apply the preset that fits the scene type. Use travel street for general urban storytelling, rainy street for wet reflective mood, neon street for nightlife color, and cinematic street movie for film-like narrative tone.
- Correct white balance before chasing style. If the base color is off, every later move gets harder.
- Fix composition next. Crop, straighten, and remove distractions so the eye lands where it should.
- Use local masking for subject emphasis. Lift the subject slightly, hold back hot backgrounds, and shape light around the story.
- Finish with restraint. Add sharpening and texture carefully. Street photos should feel alive, not over-processed.
If you shoot after dark often, it is also worth reading Top 5 Street Lightroom Presets for Captivating Cityscapes and The Best Street Photography Lightroom Presets [2026 Guide] for more street-specific inspiration.
Common Editing Mistakes That Weaken Street Photos
- Too much clarity on people. This makes skin, noise, and compression look harsh.
- Crushed blacks everywhere. Depth is good, but blocked detail kills realism.
- Over-saturated neon. Strong color should glow, not clip.
- Ignoring the crop. Many weak edits are actually framing problems.
- Making every frame identical. Consistency matters, but every street scene still needs individual judgment.
I have found that the strongest before-and-after results usually come from protecting the subject first, then shaping the environment around them. When photographers do the reverse, the image often becomes all mood and no story.
Related Reading
- The Best Street Photography Lightroom Presets [2026 Guide]
- Top 5 Street Lightroom Presets for Captivating Cityscapes
- Street Photography: Editing for Real Life & Raw Moments
- Unleash Your Inner Urban Storyteller: Mastering Street Photography with AI Mobile Presets
If you want to turn flat city frames into cleaner, moodier stories faster, start with the AI-Optimized Cinematic Travel Street Lightroom Presets for daytime and mixed-light urban work, then add the AI-Optimized Rainy Street Film Lightroom Presets or AI-Optimized Neon Street Lightroom Presets for darker, more atmospheric scenes. You can browse even more styles inside the AI-Optimized Lightroom Presets collection, and if you need help choosing the right pack for your workflow, the Contact page is there for support. Buy 3, Get 9 FREE is an easy way to build a street-ready editing set without guessing one style at a time.
FAQ
What is the best way to edit street photography without losing realism?
Start with tone and color correction before adding style. Keep skin believable, protect highlight detail, and use local masking to guide the eye instead of forcing the whole frame into a heavy edit.
Are presets good for street photography?
Yes, especially when you want speed and consistency. The best approach is to use a preset as a starting point, then fine-tune exposure, white balance, crop, and masking for each image.
How do I make street photos look gritty but still professional?
Focus on texture, contrast, and controlled shadows rather than extreme clarity or crushed blacks. Real grit comes from depth and atmosphere, not from making every detail harsh.
Which preset style works best for night street photography?
That depends on the scene. Rainy, reflective streets usually benefit from moody film-style tones, while nightlife images with signs and LEDs often look better with neon-focused color control and cleaner highlight handling.
Should I crop street photos in Lightroom?
Yes, when the crop strengthens the story. A small reframing can remove distractions, improve tension, and make the main subject feel more intentional without changing the truth of the moment.
Written by Asanka — creator of AAAPresets (10,000+ customers).

Leave a comment
This site is protected by hCaptcha and the hCaptcha Privacy Policy and Terms of Service apply.