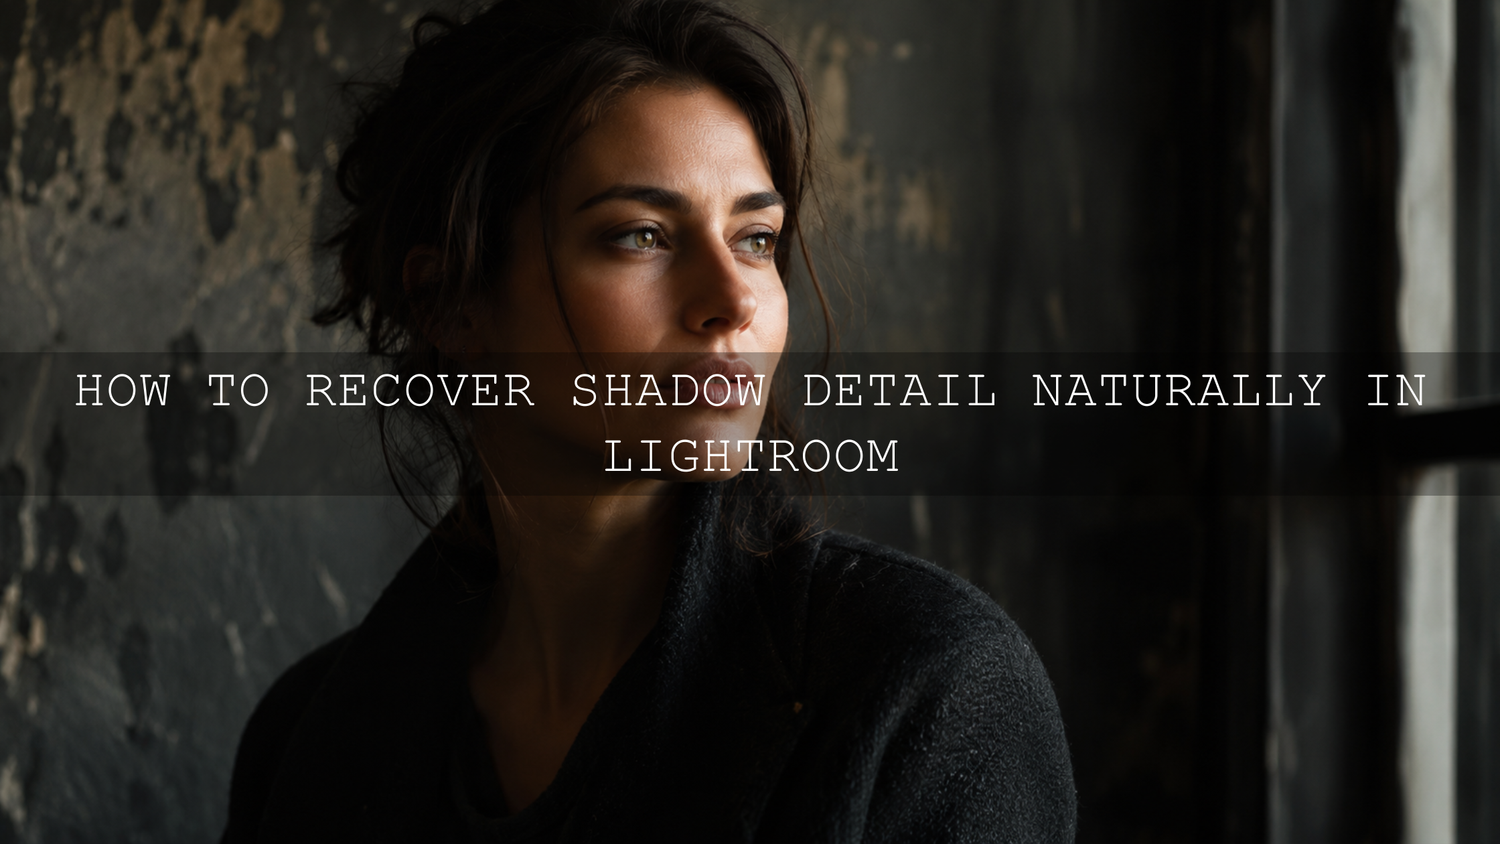
How to Recover Shadow Detail Naturally in Lightroom
Learning how to recover shadow detail naturally is one of the most useful Lightroom editing skills for photographers who want clean, realistic, professional-looking photos. Deep shadows can create mood, depth, and drama, but when they become too dark, they hide important texture in faces, clothing, landscapes, interiors, food, products, and street scenes. The goal is not to remove every shadow. The goal is to reveal useful detail while keeping the photo believable.
Here’s why this matters. If you push the Shadows slider too far, the image can quickly look flat, noisy, gray, and over-edited. But when you combine RAW files, exposure balance, shadow recovery, black point control, masking, and gentle noise reduction, you can bring back hidden detail without ruining the atmosphere of the image.
For a faster editing starting point, begin with the 1000+ Master Lightroom Presets Bundle and browse more flexible styles in the Lightroom Presets for Mobile and Desktop collection. Try these presets today, Buy 3, Get 9 FREE, then use the shadow recovery workflow below to fine-tune each photo naturally.
Why Shadows Matter in Professional Photo Editing
Shadows are not mistakes. They are one of the main reasons a photo feels dimensional. A portrait needs soft shadow shape around the face. A street photo needs contrast between bright signs and dark corners. A landscape often needs darker foreground areas to guide the eye toward the sky or subject.
The problem starts when the shadows become too heavy. A dark jacket loses fabric texture. Hair turns into a black block. A forest scene loses detail under the trees. Indoor photos become muddy because the corners and backgrounds are too dense.
In my own preset testing for AAAPresets, I often see this with moody edits. A preset may create a beautiful cinematic look, but if the original photo is underexposed, the blacks and shadows can become too strong. That is when a small manual adjustment makes the difference between a dramatic edit and an unnatural edit.
Start With the Right File: RAW Gives You More Shadow Detail
If you want the cleanest shadow recovery, shoot in RAW whenever possible. RAW files usually hold more tonal information than JPEG files, especially in dark areas. This gives Lightroom more room to recover detail before noise, banding, or strange color shifts become visible.
A JPEG can still be edited, but it is already compressed and processed by the camera or phone. When you brighten very dark JPEG shadows, Lightroom has less original information to work with. That is why the edit can look crunchy, noisy, or artificial much faster.
Adobe explains tonal control in Lightroom through the Basic panel, histogram, clipping previews, and sliders like Exposure, Highlights, Shadows, Whites, and Blacks in its official Lightroom Classic tone and color guide. Understanding those controls is the foundation of natural shadow recovery.
Presets vs Manual Editing: Which Is Better for Shadow Recovery?
Presets and manual editing are not enemies. They work best together.
- Presets give you a creative starting point: They shape the mood, contrast, color direction, tone curve, and overall style quickly.
- Manual editing customizes the result: Every photo has different light, exposure, skin tone, background, and shadow depth, so small adjustments are still needed.
- Presets save time: Instead of building the full look from zero, you apply a style and then refine the problem areas.
- Manual control protects realism: It helps you avoid noisy shadows, gray blacks, over-bright faces, and flat contrast.
For example, a dark cinematic preset may look perfect on a well-exposed street photo, but too heavy on an indoor portrait. In that case, keep the preset style, then slightly lift Exposure, Shadows, or a local mask around the face. You can also read more about this issue in why presets make photos too dark and how to recover detail.
Step-by-Step Shadow Recovery Workflow in Lightroom
1. Check the Histogram Before Moving Sliders
Before you brighten the shadows, look at the histogram. If the graph is pushed heavily to the left, the photo may be underexposed or the blacks may be clipped. Clipping means some areas are so dark that detail is hard or impossible to recover.
Use Lightroom’s clipping indicators to see if large parts of the image are falling into pure black. A little black clipping is normal in dramatic images. Too much clipping can make the edit feel blocked and heavy.
Pro tip: Do not try to make the histogram perfectly centered. A moody photo should still have darker tones. Use the histogram as a warning tool, not a rule that every image must look bright.
2. Fix Overall Exposure First
Start with the Exposure slider before you push Shadows. If the entire image is too dark, lifting Shadows alone can create a strange HDR look because the darkest areas brighten while the midtones stay dull.
Raise Exposure slightly until the main subject feels balanced. Then check highlights and skin tones. If the bright areas become too strong, pull Highlights down a little. This creates a cleaner base before you recover shadow detail.
A simple order works well:
- Adjust Exposure for the full image.
- Reduce Highlights if bright areas become too strong.
- Lift Shadows only enough to reveal useful detail.
- Set Blacks to keep depth and contrast.
- Use masks for local shadow problems.
3. Use the Shadows Slider Gently
The Shadows slider is the main tool for recovering dark detail. Move it slowly. In many photos, a small lift is enough. If you push it too far, the image can lose depth and start to look washed out.
Watch three things while adjusting Shadows:
- Texture: Are you revealing real detail or just muddy brightness?
- Noise: Are speckles appearing in the dark areas?
- Realism: Does the light still match the original scene?
Here’s why this matters. Shadows are supposed to be darker than midtones. If every dark corner becomes bright, the image loses its natural shape. Keep some darkness in the frame so the photo still has contrast and atmosphere.
4. Control Blacks After Lifting Shadows
After you lift Shadows, the photo may look too soft or gray. This is where the Blacks slider helps. The Shadows slider opens dark detail, while the Blacks slider sets the deepest dark point.
Move Blacks slightly to the left if the photo needs more depth. Move it slightly to the right only if the shadows are too crushed. The key is balance. You want visible detail, but you also need true dark tones for a professional finish.
For moody edits, this step is especially important. If you use a style like Dark Moody New Look Lightroom Presets Pack, keep the deep mood but soften only the areas that need detail, such as faces, hair, clothing, or foreground texture.
5. Use Masking Instead of Brightening the Whole Photo
One of the biggest mistakes in shadow recovery is brightening the entire image when only one area needs help. Lightroom masking lets you adjust specific parts of a photo, such as a face, subject, background, sky, object, or dark corner.
Adobe’s official Lightroom masking guide explains how masking tools can select subjects, skies, backgrounds, people, and objects for local adjustments. This is perfect for natural shadow recovery because you can brighten only the areas that matter.
For example, if a bride’s face is slightly underexposed but the wedding background looks perfect, do not raise the full Exposure slider. Create a soft mask around the face and lift Exposure or Shadows gently. If a street photo has a dark doorway with interesting texture, mask only that doorway instead of changing the entire scene.
Pro tip: When using masks, use small changes. A local shadow lift should blend into the scene, not look like a spotlight painted onto the image.
6. Reduce Noise Without Removing Natural Texture
When you recover shadow detail, noise often becomes more visible. This is normal, especially in high ISO photos, low-light scenes, phone images, and underexposed files.
Use noise reduction carefully. Too little noise reduction can leave the image rough. Too much can make skin, fabric, trees, and walls look plastic. Adobe’s Lightroom detail and noise reduction guide explains how noise reduction and detail controls work together to reduce noise while preserving image texture.
A practical approach is to zoom to 100%, adjust Noise Reduction slightly, then compare before and after. If important texture disappears, reduce the strength. For portraits, protect skin texture. For landscapes, protect leaves, rocks, grass, and architecture. For food photography, protect surface detail because texture is part of what makes the image feel appetizing.
Common Shadow Recovery Mistakes to Avoid
- Lifting Shadows too much: This creates flat, gray, unnatural images.
- Ignoring the Blacks slider: Without a controlled black point, the edit can lose depth.
- Brightening every shadow: Some shadows should stay dark to keep mood and shape.
- Overusing noise reduction: Heavy smoothing removes natural detail and makes photos look fake.
- Forgetting the original light direction: Recovered shadows should still match the scene’s real lighting.
Many preset problems come from expecting one click to solve every exposure situation. A preset is a strong creative base, but the final image still needs small adjustments. If your presets look different across photos, this guide on why Lightroom presets look different on every photo will help you understand the bigger workflow.
Real Editing Examples: How to Recover Shadows Naturally
Example 1: Moody Street Photography
Imagine a city street photo taken at sunset. The neon signs look beautiful, but the subject’s jacket and face are too dark. First, apply a cinematic base such as AI-Optimized Aesthetic Moody Lightroom Presets. Then lift Exposure slightly, raise Shadows only enough to reveal the jacket texture, and use a mask on the face if needed. Keep the background dark so the street atmosphere stays strong.
For more inspiration, explore cinematic Lightroom presets for street photography, especially if you like deep contrast and dramatic urban tones.
Example 2: Indoor Window Light Portrait
Indoor portraits often have bright window light on one side and deep shadow on the other. If you brighten the whole photo, the window side may become too bright. Instead, balance Exposure first, reduce Highlights if needed, then use a soft mask on the darker side of the face. A portrait-friendly pack like AI-Optimized Skin Retouch Portrait Lightroom Presets can help create a clean base while keeping skin tones natural.
This is also where white balance matters. If shadows become too blue, green, or muddy, adjust Temperature and Tint carefully. Shadow recovery is not only about brightness. It is also about keeping believable color.
Example 3: Landscape With Dark Foreground
Landscape photos often have a bright sky and dark foreground. If you lift the whole image, the sky can lose mood. A better method is to reduce Highlights, recover some Shadows in the foreground, and use a linear mask from the bottom of the frame. Keep a little darkness near the edges to guide the viewer’s eye into the scene.
If you often edit travel, outdoor, and nature photos, browse the Lightroom Presets for Moody Photography collection for looks that preserve depth while giving your photos a polished creative tone.
Best Settings for Natural Shadow Recovery
There is no perfect universal setting, but these safe starting points work for many photos:
- Exposure: Raise slightly only if the whole image is too dark.
- Highlights: Lower gently if bright areas become distracting.
- Shadows: Increase in small steps until useful detail returns.
- Blacks: Adjust after Shadows to restore depth.
- Contrast: Add back carefully if the edit becomes flat.
- Noise Reduction: Use lightly, then check texture at 100% zoom.
- Masking: Use for faces, clothing, dark corners, foregrounds, and subject separation.
Let’s break it down simply. If the whole photo is dark, start with Exposure. If only the dark areas are too heavy, use Shadows. If the photo becomes gray, fix Blacks. If only one area is too dark, use masking. If noise appears, reduce it gently without destroying texture.
Related Reading
- How to adapt Lightroom Mobile presets to different lighting
- How to edit cinematic photos with dark aesthetic Lightroom presets
- Why presets make photos too dark and how to recover detail
- Why Lightroom presets look different on every photo
Final Shadow Recovery Checklist
Before exporting your photo, use this quick checklist:
- Does the main subject have enough visible detail?
- Do the shadows still feel natural and believable?
- Did you preserve some deep blacks for contrast?
- Is noise controlled without removing texture?
- Does the light direction still make sense?
- Does the edit look good before and after applying the preset?
Recovering shadow detail naturally is about control, not brightness. You are not trying to make every dark area visible. You are choosing which details support the story of the photo. That is what separates a clean professional edit from an over-processed image.
For a faster and more flexible Lightroom workflow, try the 1000+ Master Lightroom Presets Bundle, explore moody looks like Dark Moody New Look Lightroom Presets Pack, and browse the full Lightroom Presets for Mobile and Desktop collection. Try these presets today, Buy 3, Get 9 FREE, and use this shadow recovery workflow to make every edit feel cleaner, deeper, and more natural.
FAQ
How do I recover shadow detail naturally in Lightroom?
Start with overall Exposure, then lift the Shadows slider gently, adjust Blacks to restore depth, and use masking for specific dark areas. Avoid pushing Shadows too far because it can make the photo look flat and noisy.
Should I use Shadows or Exposure first?
Use Exposure first if the entire photo is too dark. Use Shadows if the overall brightness is good but the darker areas need more detail. For the cleanest result, adjust Exposure, Shadows, Blacks, and masks together.
Why do my shadows look noisy after editing?
Noise becomes more visible when dark areas are brightened, especially in underexposed or high ISO photos. Use gentle noise reduction and check the image at 100% zoom so you reduce noise without removing natural texture.
Can Lightroom presets recover dark shadows automatically?
Presets can improve tone and style quickly, but every photo has different lighting. After applying a preset, you may still need to fine-tune Shadows, Blacks, Exposure, and masks for a natural final result.
Is it better to shoot RAW for shadow recovery?
Yes. RAW files usually give you more editing flexibility than JPEG files, especially in shadows and highlights. This makes it easier to recover hidden detail while keeping the image clean and realistic.
Written by Asanka — creator of AAAPresets (10,000+ customers).


Leave a comment
This site is protected by hCaptcha and the hCaptcha Privacy Policy and Terms of Service apply.