
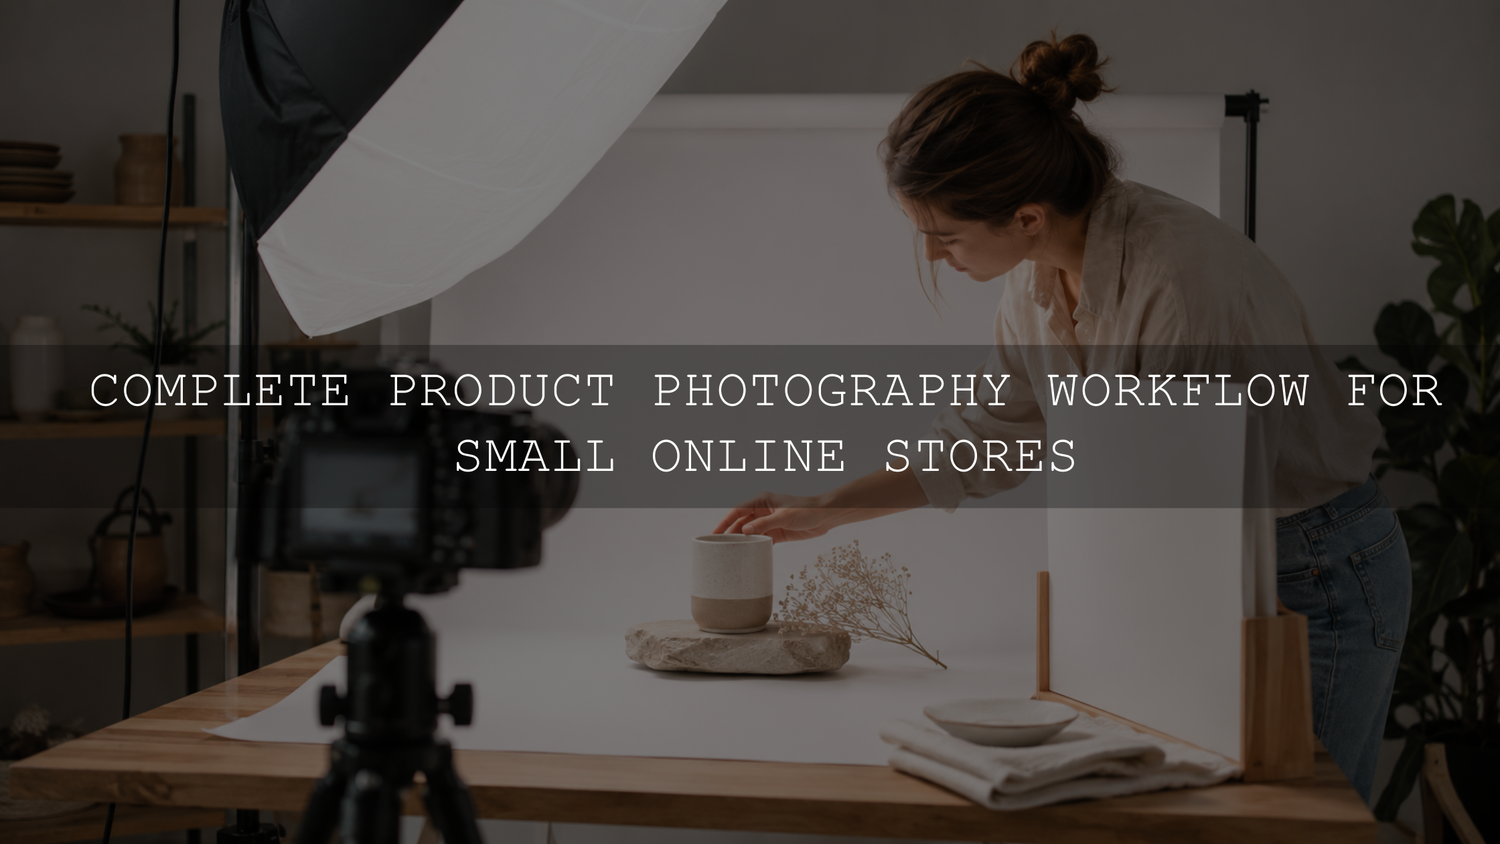
A reliable product photography workflow has seven parts: plan the required images, prepare the products, build a repeatable lighting setup, capture a complete shot set, edit images in controlled batches, check product accuracy and export platform-ready files. The camera matters, but controlling these variables usually has a greater effect on consistency than repeatedly buying new equipment.
This guide explains how a small business can turn a spare room, office or tabletop into a practical product photography system. The aim is not to produce one impressive image. It is to create a catalog in which every product is clear, believable and recognizably part of the same brand.
Start With Deliverables, Not Camera Settings
Before setting up a camera or phone, decide exactly what the shoot must produce. A vague plan such as “take product photos” often results in missing angles, inconsistent crops and another shoot later.
Create a shot list containing:
- The product name, SKU or internal reference
- Every color, size or packaging variation that must be photographed
- The required hero, alternate-angle, detail, scale and lifestyle images
- The platforms on which the images will appear
- Any horizontal, vertical or square crops needed for banners, ads or social media
- Props, models, surfaces or accessories required for each setup
Organize the shoot by lighting setup rather than photographing products in a random order. For example, capture all white-background catalog images first, then all close-up detail images, followed by styled lifestyle scenes. This reduces repeated lighting changes and makes the editing batches easier to manage.
Build a Small Product Photography Setup You Can Repeat
A useful home-studio setup does not need to be complicated. It needs to be stable enough that you can rebuild it next week and produce a similar result.
Camera or smartphone
A recent smartphone can be suitable for many small products when the lighting is controlled and the final image does not require an extreme crop. A camera with interchangeable lenses offers more control over focal length, depth of field and RAW files, but it does not replace careful lighting or preparation.
Tripod and remote release
Use a tripod or secure phone mount to keep the camera height, angle and framing consistent. A short self-timer, remote shutter or tethered capture can help prevent movement when the photograph is taken.
One large, diffused light source
Begin with one window, softbox or diffused LED panel and add a white reflector on the opposite side. A larger light source relative to the product generally creates softer transitions and more manageable reflections.
Turn off unrelated room lights when possible. Mixing daylight, warm ceiling lights and cool LEDs can produce different color casts across the product, background and shadows.
Background sweep
Curve a sheet of white, gray or colored paper from the vertical surface onto the table instead of folding it at a hard angle. This creates a continuous background without a visible horizon line.
Pure white is not the only useful choice. Off-white, light gray and muted brand colors can preserve edge definition more effectively for pale or transparent products. The clean-background product photography guide covers this decision in more detail.
Reflectors, flags and cleaning tools
White foam board can lift a dark side of the product by reflecting light. Black foam board can deepen an edge or control unwanted reflections on glass and metal. Keep microfiber cloths, lint rollers, compressed air and suitable product-safe cleaning materials nearby. Removing dust before capture is usually easier than retouching it from dozens of images.
Document the Setup Before Photographing the Full Catalog
Once the first test product looks correct, record the setup. A simple studio record should include:
- Camera or phone height
- Camera-to-product distance
- Focal length or phone lens used
- Light height, direction, power and distance
- Reflector or flag position
- Background material
- White-balance setting or reference
- Camera exposure settings
- Final crop ratio
Take a behind-the-scenes reference photograph of the complete setup. Mark tripod, table and light positions with removable tape when the studio needs to be dismantled between sessions.
This record becomes especially valuable when a new color or replacement product must be added to an existing catalog months later.
Prepare and Test One Product Before Starting the Batch
Clean the product, align labels, remove protective film and inspect packaging before it reaches the set. Clothing may need steaming, bottles may need fingerprints removed and handmade products may need loose fibers or adhesive residue cleaned.
Photograph one representative product and review the images at full size before proceeding. Check:
- Whether labels and fine details are sharp
- Whether bright areas retain texture
- Whether dark surfaces retain separation
- Whether the product color appears believable
- Whether reflections reveal the camera, room or photographer
- Whether the chosen crop leaves enough consistent space around the item
Correcting the setup after one product prevents the same problem from being repeated across the entire collection.
Capture a Complete Product-Page Image Set
One attractive image rarely answers every question a customer may have. Build a consistent set that explains appearance, detail, size and use.
- Hero image: A clear primary view with minimal distractions.
- Three-quarter or alternate view: Shows depth, construction and shape that may be hidden from the front.
- Detail image: Reveals texture, finish, stitching, controls, hardware, labels or craftsmanship.
- Scale image: Places the item beside a familiar object, in a hand or on a model when appropriate.
- Lifestyle image: Shows how or where the customer might use the product.
- Packaging or included-items image: Clarifies what arrives with the order.
Use the same angle sequence for every comparable product. A predictable image order makes the store easier to browse and gives the production team a checklist that is difficult to misinterpret.
Shopify supports images, videos and 3D models as product media. Video and 3D display depends on a compatible theme, and products that depend on movement, assembly or viewing from several directions may benefit from more than still photography.
Batch the Capture Without Making Every Image Identical
Batching works best when the products share a similar size, surface and lighting requirement. Photographing a matte ceramic cup, a polished silver necklace and a transparent bottle under an unchanged setup is unlikely to produce equally useful results.
Create separate batches for categories such as:
- Small matte products
- Reflective jewelry and metal
- Transparent glass or plastic
- Clothing and fabric
- Large products
- White or pale products
- Dark products
Keep the background, camera position and overall visual style consistent, but adjust diffusion, flags and exposure when the product material requires it. Consistency should create a recognizable system, not prevent necessary technical corrections.
Edit Product Images in Two Separate Passes
A strong product edit separates correction from creative styling.
Pass one: build an accurate base
- Correct white balance and remove obvious color casts.
- Balance exposure while protecting labels, texture and reflective highlights.
- Apply suitable lens corrections.
- Remove visible dust and temporary surface defects.
- Straighten the product and establish a consistent crop.
- Compare the product against neighboring images in the catalog.
Pass two: apply the brand finish
- Apply a suitable preset or saved base treatment.
- Refine contrast and tonal balance.
- Adjust individual colors only where required.
- Use masks for the product, background or specific reflective areas.
- Apply sharpening and noise reduction conservatively.
- Review the complete image group together rather than judging every image in isolation.
Adobe Lightroom Classic can copy and paste selected editing settings across multiple photographs. Synchronize settings only across images captured under comparable conditions. Review crop, Remove or Heal, geometry and mask results after synchronization because product position and shape can make local adjustments unsuitable even when Lightroom recalculates an AI mask. Adobe’s copy-and-paste editing guide explains the current Lightroom Classic workflow.
For indoor catalog and lifestyle batches, the AI-Optimized Home Studio Clean Lightroom Presets provide eight DNG presets for Lightroom Mobile and eight XMP presets for Lightroom Classic, Lightroom Desktop and Adobe Camera Raw. Use them as an adjustable starting point, then refine exposure, white balance and individual product colors for the actual lighting and subject.
Protect Product Color and Material Accuracy
A creative edit should not make a blue product appear teal, turn silver into blue-gray or make warm wood look orange. Product color is affected by the light source, white balance, camera profile, surrounding surfaces and editing choices.
For more dependable results:
- Include a neutral reference at the beginning of each lighting setup.
- Correct white balance before making strong creative color changes.
- Compare edited products with the physical item under neutral lighting.
- Check whites, grays, skin tones and brand colors across the full batch.
- Avoid applying the same saturation or luminance adjustment to every product color.
- Use local masks when a reflection or color cast affects only part of the image.
RAW files normally provide more adjustment latitude than JPEG files, particularly when recovering highlights, correcting white balance or refining shadows. JPEG images can still be used, but aggressive adjustments are more likely to reveal compression, banding or limited tonal information.
The product-editing preset system guide explains how to build related clean, lifestyle and detail treatments without forcing one preset onto every image.
Adapt the Lighting to Difficult Product Materials
Reflective metal and jewelry
Reflections reveal the shape and size of the light source. Use larger diffusion surfaces, reposition the camera and use white or black cards to design the reflections rather than trying to remove all of them. A completely reflection-free metal surface can lose its shape and appear flat.
White products on white backgrounds
Leave enough tonal difference to preserve the edges. Side lighting, a slightly darker background or a black flag outside the frame can create the separation needed without making the product look dirty.
Dark products
Use a lighter background or controlled edge light to separate the silhouette. Lift exposure carefully while watching glossy highlights and retaining the depth that makes the product appear dark.
Transparent products
Backlighting or lighting through a diffused surface can define the edges and reveal liquid or glass structure. Check for doubled reflections, fingerprints and unwanted objects visible through the product.
Fabric and clothing
Prepare the fabric before the shoot. Wrinkles, dust and loose threads can become more visible after clarity and sharpening are applied. Directional side light can reveal texture, while softer frontal light may be better when smooth color is more important.
Export Shopify-Ready Product Images
Keep a high-resolution master file and create separate web exports rather than repeatedly resizing an already compressed image.
For Shopify product images:
- Export in sRGB for broadly predictable web color.
- Use a consistent aspect ratio across comparable products.
- Balance image dimensions and compression so details remain visible without creating unnecessarily heavy pages.
- Check the product gallery on both desktop and mobile.
- Create separate crops for social media, ads and banners instead of forcing one crop onto every placement.
Shopify currently permits product and collection images up to 5000 by 5000 pixels or 25 megapixels, with files below 20 MB, and notes that 2048 by 2048 pixels usually works well for square product images. Review the current Shopify product-media requirements before establishing permanent export presets.
Use Descriptive Filenames and Accurate Alt Text
Rename exported images according to the product and view rather than leaving generic camera names. For example:
- blue-ceramic-coffee-mug-front.jpg
- blue-ceramic-coffee-mug-handle-detail.jpg
- blue-ceramic-coffee-mug-in-hand.jpg
Filenames provide search systems with a small amount of contextual information, but they should not be treated as a substitute for useful page content. Write alt text that accurately describes the visible product and view. Do not repeat a keyword list or add details that cannot be seen. Google’s image SEO guidance recommends short, descriptive filenames and relevant alt text.
Create a Final Quality-Control Routine
Before publishing, inspect the images as a complete product gallery.
- Does every product have the required image types?
- Are framing, scale and spacing consistent?
- Are colors believable across all variants?
- Are highlights, labels and fine details visible?
- Have dust, fingerprints and distracting reflections been corrected?
- Does the image order explain the product clearly?
- Do lifestyle images match the product being sold?
- Are filenames and alt descriptions accurate?
- Do the images remain clear on a mobile screen?
Store the final setup record, master files, exported files and shot list together. The next shoot should begin with this system instead of beginning with an empty room and another round of guesswork.
Related Reading
- Exporting product images for Shopify and Pinterest
- Choosing Lightroom presets for e-commerce product images
- Editing lookbook images for online shops and catalogs
Build a System That Improves With Every Shoot
A dependable product photography workflow is not based on finding one camera, light or preset that solves every situation. It comes from planning the required images, controlling the setup, grouping similar products, editing from an accurate base and documenting decisions that should be repeated.
Start with one product category, create a lighting and editing reference, test the complete gallery on your store and refine the process before expanding it to the rest of the catalog. For additional editing styles, browse the Lightroom presets for mobile and desktop. The Buy 3, Get 9 FREE offer can be used when several distinct product, lifestyle or detail treatments are required.
Written by Asanka — founder of AAAPresets.


Leave a comment
This site is protected by hCaptcha and the hCaptcha Privacy Policy and Terms of Service apply.