

To prevent motion blur in action photos, start with a shutter speed fast enough for the subject, use continuous autofocus to keep it in focus, and raise ISO when the light is too dim. Around 1/500 second can work for moderate movement; 1/1000 second is a useful starting point for running children, active dogs and many sports; and 1/2000 second or faster may be necessary for exceptionally quick action. These are starting points, not guarantees. The right settings depend on how fast and how close the subject is, which direction it moves, and how much light is available.
If your photos still look soft, do not automatically increase shutter speed. A blurry moving subject, an out-of-focus subject and a photograph blurred by camera shake can look similar at first glance, but each problem needs a different fix.
Choose a shutter speed that matches the action
Shutter speed controls how long your camera records light. Shorter exposures capture less of a subject's movement, so they are usually the first adjustment to make when the goal is to freeze action.
- Around 1/250 second: Try this for ordinary walking or fairly gentle movement in good light.
- Around 1/500 second: A useful starting point for brisk movement, slower cycling and less demanding action.
- Around 1/1000 second: Try this for running children, energetic pets, field sports and cyclists moving quickly through the frame.
- 1/2000 second or faster: Consider this for rapid sports movements, birds in flight, splashing water or other action where fine details move exceptionally quickly.
If an athlete's hands or a dog's paws still show streaks at 1/1000 second, try 1/2000 second and compare. If the photograph is already sharp at 1/500 second, there is no need to choose a faster setting simply because the camera allows it. For the basic relationship between time and exposure, see what shutter speed means in photography. Nikon also provides illustrated examples of freezing and intentionally blurring motion.
Set up your camera to track moving subjects
- Select Shutter Priority (S or Tv) if you are starting out. Set the shutter speed yourself and let the camera choose an aperture. Enable Auto ISO if the camera supports it and the light changes. If the lens reaches its widest aperture or your ISO limit is too restrictive, the image may still become underexposed.
- Use continuous autofocus. Look for AF-C, Continuous AF or Servo AF (called AI Servo on some older Canon cameras), depending on the model. Unlike single-shot autofocus, this mode keeps adjusting focus as the subject changes distance. Check the precise name and operating method in your camera's manual.
- Choose a suitable focus area. Zone, expanded-point or subject-tracking areas can help with unpredictable motion. Face, eye or animal detection may help on compatible cameras, but recognition is not infallible. Against a busy background, a smaller selectable area may give you more control over which subject is tracked.
- Turn on continuous or burst shooting. Capture short sequences around the peak moment instead of relying on one frame. Burst mode improves your chances of catching a good expression or position, but it does not compensate for a shutter speed that is too slow. Long bursts can also fill your camera's buffer.
- Follow the subject steadily. Keep your stance balanced, use the viewfinder when practical and begin tracking before the decisive moment. Image stabilization may reduce blur caused by camera shake, but it cannot stop a running subject from moving during the exposure.
Autofocus options vary by model. For a concrete example of the distinction between a focus area and active subject tracking, consult Sony's official subject-tracking guide. The exact menu names in that guide apply to the documented camera, not necessarily to every camera brand.
If you prefer controlling depth of field as well as shutter speed, try Manual exposure with Auto ISO on a compatible camera. Set the shutter speed for the action and aperture for the amount of the subject you need sharp, while allowing ISO to respond to changing light.
Why are your action photos still blurry?
Zoom in on an important detail, such as a face, eye, jersey number or bicycle frame, and compare it with a stationary object in the same photograph. The pattern of softness can point to the likely cause.
The background is sharp but the moving subject has streaks
This is a common sign of subject-motion blur. The subject changed position while the image was being recorded. Increase shutter speed, especially when the subject crosses the frame or moves close to the camera. A tripod will not solve this type of blur.
The background is sharp but focus landed behind the subject
The problem may be missed focus rather than shutter speed. Check whether the camera focused on the grass, crowd or wall instead of the person or animal. Switch to continuous autofocus, start tracking earlier, and select a focus area that is less likely to jump to the background. A very wide aperture can also make small focusing errors more obvious.
Stationary details throughout the frame look smeared
Camera movement may be the cause. Try a faster shutter speed, brace the camera, improve your stance or use appropriate stabilization. Camera shake is easier to notice with longer focal lengths and when images are viewed or cropped closely.
The face is sharp but hands or feet are blurred
Different parts of a person or animal can move at different speeds. A runner's face may be relatively stable while a swinging hand moves rapidly. Raise shutter speed if those details matter. If the softness is caused by parts of the subject being outside the focus plane, a narrower aperture may help instead.
Keep a fast shutter speed in low light
A shutter speed of 1/1000 second records light for only half as long as 1/500 second. That can be a major trade-off at indoor sports venues, under cloud cover or around sunset.
- Open the aperture when possible. A lower f-number such as f/2.8 admits more light than f/5.6, but it also reduces depth of field at the same focal length and distance. Make sure enough of the subject remains in focus.
- Raise ISO or use Auto ISO. Higher ISO can produce a brighter-looking result at the same shutter speed and aperture, although noise may become more visible. Raising ISO does not physically add light to the exposure.
- Look for better light. Move to a brighter location, use available daylight or add appropriate lighting when the scene allows it.
- Check the exposure instead of trusting the mode alone. In Shutter Priority, the camera cannot open a lens beyond its maximum aperture. If the available light is insufficient, the image may be too dark despite having the shutter speed you selected.
For a more detailed explanation of these trade-offs, read how aperture, shutter speed and ISO work together. In many action situations, a reasonably exposed photo with visible noise is more useful than a cleaner-looking but heavily blurred frame.
Account for distance, direction and focal length
A runner moving sideways across your frame often shows more visible displacement during an exposure than the same runner moving toward you at a similar distance. Subjects that are close to the camera can also move across more of the image in a fraction of a second than distant ones.
Using a long telephoto lens magnifies small movements and makes handheld technique and tracking particularly important. If you cannot maintain both adequate exposure and a sufficiently fast shutter, change your position, photograph a slightly less demanding part of the movement, or wait for better light rather than forcing an unusable setting.
Anticipate the action instead of reacting too late
Following movement is easier when you know where it is likely to happen. At a sports event, watch the play develop and begin tracking before the pass, jump or sprint. With a dog chasing a toy, aim at the area where it tends to turn or leap. Shoot a short burst around that moment, then review which frame has the sharpest important details.
For a predictable event at a fixed distance, you can also focus in advance on the place the subject is expected to reach. This works only if the subject passes through that focus plane. For subjects moving unpredictably toward or away from you, continuous autofocus is generally the more flexible option.
When motion blur is intentional: try panning
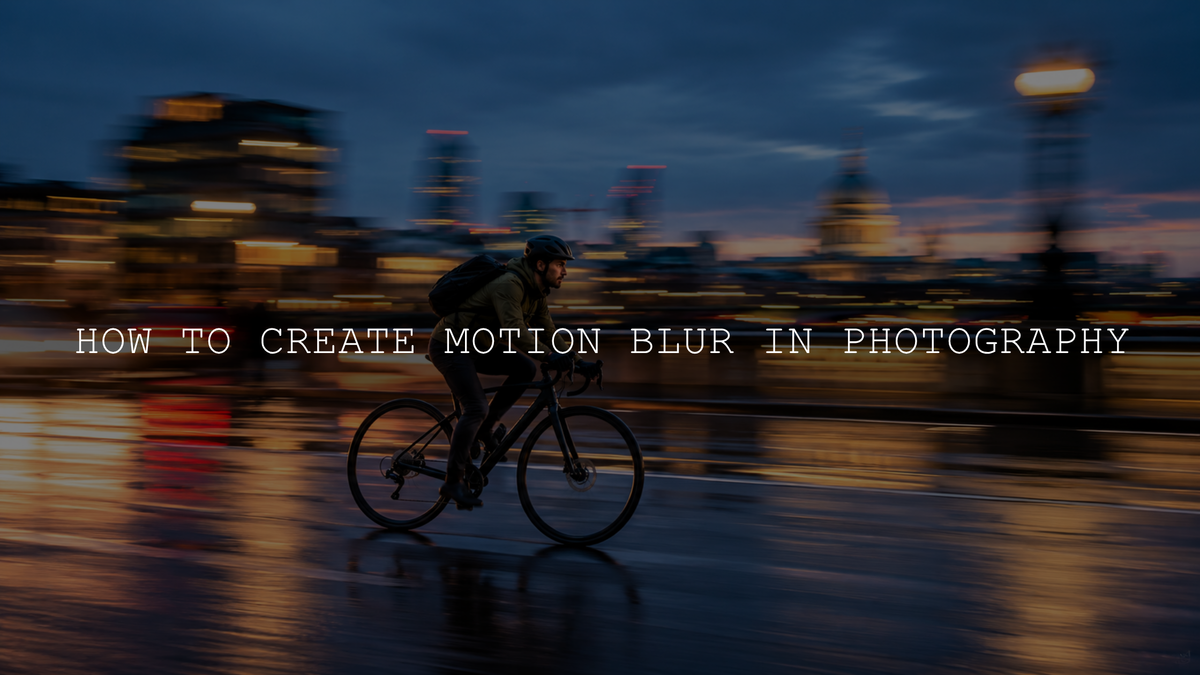
Sometimes the goal is a relatively sharp cyclist or car against a streaked background. That is panning, which deliberately uses a slower shutter speed while the camera follows the moving subject. Try around 1/60 to 1/125 second as an initial experiment, track smoothly and continue the movement as you press the shutter.
Panning is a creative alternative, not a way to remove every trace of movement. Parts of the subject may blur and your first attempts may have a low keeper rate. If you want sharp wheels, hands and backgrounds together, return to a faster shutter speed instead.
How to reduce motion blur with a smartphone
Phone cameras do not all offer the same controls. Start by shooting in bright light, tap or select the moving subject for focus where supported, and use a burst, sports or action mode if your phone provides one. Some camera apps offer manual shutter-speed control, while others make most exposure decisions automatically.
Avoid assuming that a phone will freeze an indoor sprint simply because the image looks bright on screen. Inspect the captured frame at full size, and move to better light if the phone keeps choosing exposures that show blur.
Can you fix motion blur after taking the photo?
Sharpening and AI-assisted editing tools may improve the appearance of some soft photographs. Adobe documents AI Sharpen, powered by Topaz, in Lightroom desktop; it uses generative credits, and results depend on the original image. See Adobe's guidance on AI sharpening. Severe streaking or missed focus may not be recoverable accurately, so getting the essential detail sharp in camera remains the better approach.
Once you have selected a genuinely sharp frame, editing can refine exposure, white balance, contrast and color without pretending to recreate detail that was not captured. The AAAPresets sports photo editing workflow covers those next steps.
A quick practice exercise for sharper action photos
- In good daylight, choose a repeatable moving subject, such as a cyclist passing the same spot. Work from a safe position without obstructing anyone.
- Set 1/500 second, continuous autofocus, a suitable tracking area and burst shooting. Take a short sequence.
- Repeat at 1/1000 second and, if needed, 1/2000 second. Let ISO adjust so you can compare useful exposures.
- Compare the same important detail at a similar viewing magnification in each series. If streaks decrease as shutter speed rises, motion was likely the main problem. If the subject is soft while a background object remains crisp, review autofocus and focus-area choices.
The goal is not to use the fastest shutter speed on every occasion. Choose enough shutter speed to hold the details that matter, keep the subject in focus, and balance the remaining settings around the available light. Those decisions will produce more consistent action photographs than relying on any single camera mode or editing fix.
Written by Asanka, creator of AAAPresets.


Leave a comment
This site is protected by hCaptcha and the hCaptcha Privacy Policy and Terms of Service apply.