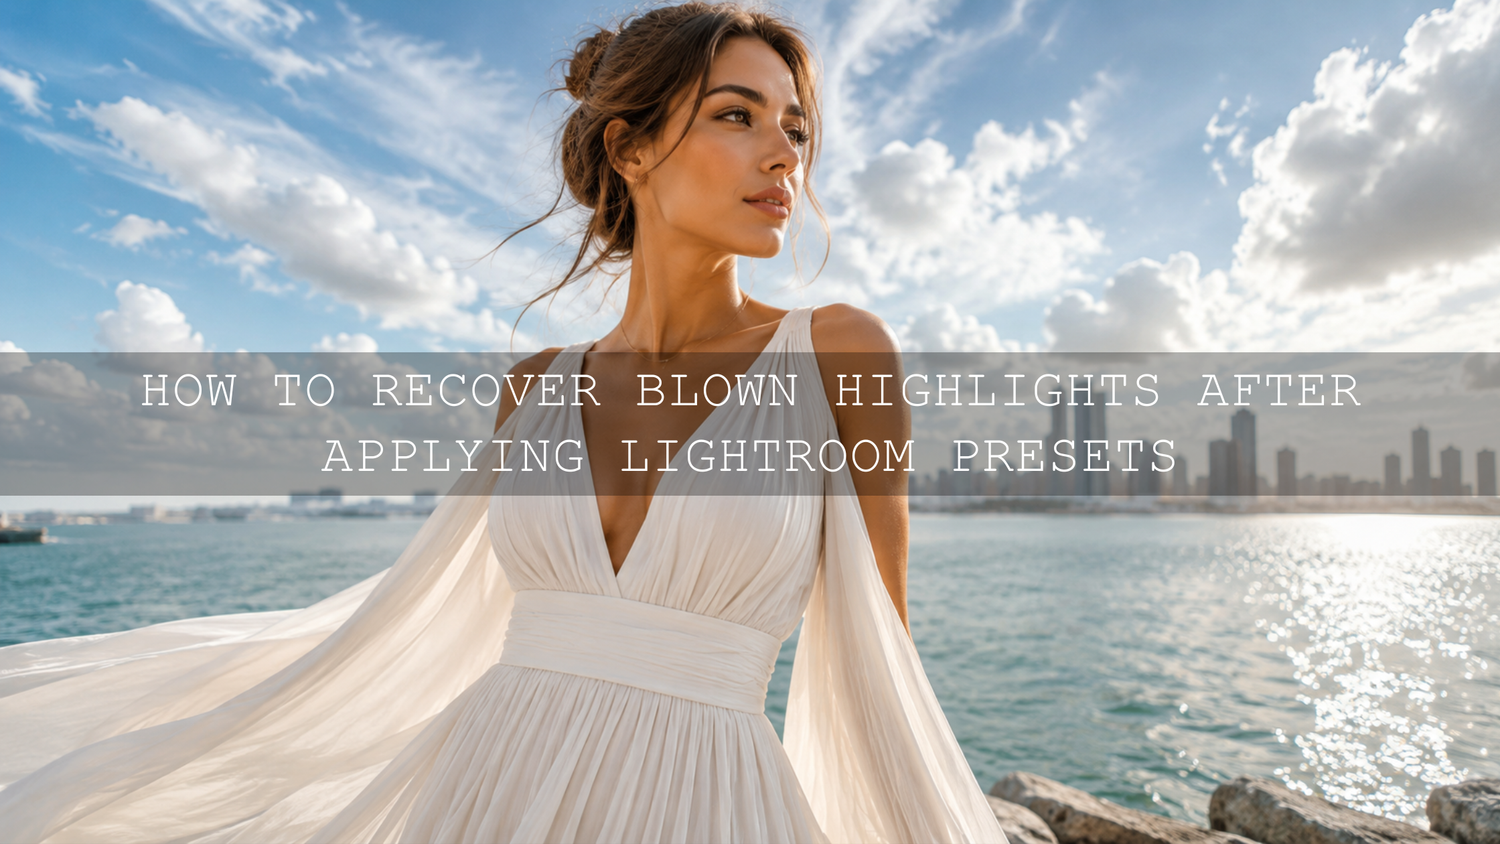
How to Recover Blown Highlights After Applying Lightroom Presets
Learning how to recover blown highlights after applying Lightroom presets is one of the most important editing skills for clean, professional-looking photos. A preset can add beautiful contrast, color, mood, and cinematic depth, but if the original image already has bright skies, reflective surfaces, white clothing, or sunlit skin, the edit can push those areas too far. The result is usually the same: harsh white patches with little or no visible detail.
Here’s why this matters. Blown highlights can make an otherwise strong photo feel unfinished. A wedding dress can lose texture, a travel sky can turn flat white, or a product photo can lose the clean detail that makes it look premium. The good news is that highlight recovery is often fixable, especially when you start with a RAW file and use Lightroom’s exposure, highlights, whites, tone curve, and masking tools in the right order.
For a faster and more flexible editing workflow, start with the 1000+ Master Lightroom Presets Bundle and browse more styles in the Lightroom Presets for Mobile and Desktop collection. Try these presets today, Buy 3, Get 9 FREE, then use the steps below to control highlights, protect detail, and finish every edit with confidence.
Why Presets Can Blow Out Highlights
Lightroom presets are pre-made editing settings that can adjust exposure, contrast, color, saturation, color grading, and more. Adobe explains presets as predefined settings that apply specific adjustments to photos, which is why one click can change the whole image very quickly through Adobe’s guide to editing photos with presets in Lightroom.
The problem is that presets are not reading your photo like a human editor. They apply a style to the file. If your image already has bright areas, such as a noon sky, shiny water, glass, white walls, a bride’s dress, or harsh sunlight on skin, a high-contrast preset can push those tones past the safe range.
In real editing, I see this often with outdoor portraits and travel photos. A preset may make the colors look beautiful, but the sky or forehead highlight becomes too strong. When I test AAAPresets looks across different photos, the best results usually come from applying the preset first, then correcting exposure and highlights before touching extra contrast or clarity.
What Blown Highlights Actually Mean
Blown highlights happen when the brightest parts of a photo lose visible detail and become pure or near-pure white. In Lightroom, this is also called highlight clipping. You may still see a bright area, but there is no useful texture left to recover if the original file does not contain that information.
Think of a cloudy sky. If the clouds still show soft shape and texture, you can usually recover them. If the sky is completely white with no cloud detail, Lightroom may darken the white area, but it cannot rebuild missing cloud texture from nothing. That is why shooting carefully and checking the histogram matters before editing.
If you want a deeper workflow for choosing images that respond well to presets, read how to pick photos that work well with Lightroom presets. It pairs perfectly with this highlight recovery process because the edit always starts with the quality of the original capture.
Start With the Histogram Before Moving Sliders
The histogram is your fastest warning system. If the graph is heavily pushed against the far-right edge, the photo has highlight clipping. In Lightroom Classic, Adobe recommends using the histogram and clipping previews as visual guides while adjusting tone and color through Adobe’s guide to image tone and color in Lightroom Classic.
Here’s a simple way to read it:
- Right side: Highlights and whites.
- Middle: Midtones, skin, natural subject brightness, and general exposure.
- Left side: Shadows and blacks.
- Hard wall on the right: Possible blown highlights.
Pro tip: Do not judge the photo only by the screen. Some displays make highlights look softer than they really are. The histogram gives you a more honest view of tonal data, especially when editing bright outdoor images.
Step 1: Lower Highlights First
The Highlights slider should usually be your first correction after applying a preset. It targets the bright parts of the image without darkening everything equally. This makes it more useful than the Exposure slider when only the sky, shirt, dress, window, or reflection is too bright.
Start by pulling Highlights down slowly. Do not drag it straight to the lowest value unless the photo truly needs it. A small move can often bring back cloud texture, skin detail, or fabric texture while keeping the image natural.
For example, on a beach portrait, lowering Highlights can bring detail back into the sky and water while keeping the subject bright. On a wedding photo, it can help recover soft detail in a white dress without making the whole image dark and heavy.
Step 2: Adjust Exposure Only If the Whole Photo Is Too Bright
Exposure changes the overall brightness of the image. That means it affects shadows, midtones, and highlights together. Use it when the full photo feels too bright after applying a preset, not just when one small area is overexposed.
A good order is:
- Apply the preset.
- Check the histogram.
- Lower Highlights first.
- Lower Exposure only if the entire image still feels too bright.
- Use Shadows or the Tone Curve to restore balance.
This order keeps the edit cleaner. If you lower Exposure too early, you may darken the subject and then overcorrect with Shadows, which can create noise or a flat look.
Step 3: Use the Whites Slider Carefully
The Whites slider controls the brightest white point in the photo. It is stronger and more sensitive than the Highlights slider. If Highlights brings back most of the detail but the brightest areas still feel too harsh, gently lower Whites.
Use the Whites slider with care because lowering it too much can remove the sparkle from your photo. A clean edit still needs some bright areas. White highlights on jewelry, water, glass, or eyes can make a photo feel alive. The goal is not to remove brightness completely. The goal is to control brightness without losing detail.
This is especially useful for product photography, landscape images, wedding dresses, white shirts, drone skies, and city photos with reflective buildings. For landscape-focused edits, you can also explore the Professional Lightroom Presets for Landscape Photography if you want looks that work well with skies, greens, clouds, and natural light.
Step 4: Bring Back Balance With Shadows and Blacks
After recovering highlights, your image may feel a little dull or dark. This is normal. When you pull down bright tones, the photo sometimes loses energy. That is where Shadows and Blacks help.
Raise Shadows slightly if the subject has become too dark. Then adjust Blacks carefully to rebuild contrast. This gives the photo depth again without re-blowing the highlights you just recovered.
A simple rule:
- Highlights down: Recover bright detail.
- Shadows up: Bring back subject visibility.
- Blacks down slightly: Restore depth and contrast.
- Whites adjusted gently: Set a clean bright point.
If your preset still feels too intense after these steps, read how to tame overly powerful Lightroom presets for subtle edits. That guide is useful when contrast, saturation, or clarity becomes too strong after one click.
Presets vs Manual Editing: Which Is Better for Highlight Recovery?
Presets and manual editing are not enemies. They work best together.
Presets are ideal for speed, style, color direction, and consistency. They help you find a mood quickly, especially when editing many photos from a shoot. Manual editing is where you adapt that look to the actual image. This is where you correct exposure, recover highlights, refine shadows, protect skin tones, and adjust local areas.
Here’s a practical comparison:
- Preset only: Fast, stylish, but may create blown highlights on difficult lighting.
- Manual only: Full control, but slower when editing many images.
- Preset plus manual correction: Best balance of speed, consistency, and professional quality.
That is why a preset should be treated as a starting point, not the final edit. Apply the look, then correct the photo. This is the same reason Lightroom presets can look different across images. If you want to understand that better, read why Lightroom presets look different on every photo and how to fix it.
Step 5: Use the Tone Curve for More Natural Highlight Control
The Tone Curve gives you more precise control than basic sliders. If the Highlights and Whites sliders make your image look too flat, use the curve to gently soften the brightest tones while keeping the midtones alive.
In Lightroom, focus on the upper-right part of the curve. That area controls the brightest tones. Pull it down slightly to reduce harsh highlights. Then add a small point around the midtones to protect the subject brightness.
Try this simple curve method:
- Add one point in the upper-right highlight area.
- Pull it down slightly to soften extreme brightness.
- Add one point near the center to protect midtones.
- Avoid making the curve too flat, or the photo may look gray.
This method is excellent for golden hour portraits, wedding photos, travel images, and bright street scenes. It gives a smoother result than simply dragging Highlights all the way down.
Step 6: Fix Local Highlight Problems With Masking
Sometimes only one part of the photo is too bright. Maybe the sky is blown out, but the subject looks perfect. Maybe a white shirt is too bright, but the background is fine. In those cases, global sliders are not enough. Use masking.
Adobe describes masking as a way to apply local adjustments to selected areas, including exposure, highlights, whites, curves, texture, clarity, and more in Adobe’s guide to masking for local adjustments in Lightroom.
Use masks for:
- Bright skies: Select Sky, lower Highlights, and slightly lower Exposure.
- White clothing: Brush over the fabric, lower Highlights, and protect texture.
- Sunlit faces: Use a soft brush and reduce Highlights gently.
- Window light: Apply a linear gradient and pull down Exposure or Whites.
- Reflections: Use a small brush mask to reduce harsh glare.
Pro tip: Feather your mask edges. Hard mask edges can make the correction look obvious. Soft transitions help the edit blend naturally into the rest of the image.
Step 7: Use Dehaze and Clarity Only When Needed
Dehaze and Clarity can help bring back perceived detail, but they are not true highlight recovery tools. They work by increasing local contrast. That can make washed-out areas look more defined, but too much can create harsh edges, noisy skies, or crunchy skin.
Use Dehaze lightly on:
- Hazy skies
- Foggy mountain photos
- Drone landscapes
- Backlit travel scenes
Use Clarity carefully on:
- Architecture
- Textured landscapes
- Product details
- Street scenes
Avoid heavy Clarity on faces because it can make skin look rough. For portraits and weddings, highlight recovery should stay soft and realistic. If you edit many wedding photos with bright dresses and changing light, the 150+ Gorgeous Lightroom Presets for Wedding Photography can be a strong starting point, especially when you still fine-tune highlights and skin tones after applying the preset.
Step 8: Shoot RAW Whenever Possible
The best highlight recovery starts before Lightroom. If your camera allows it, shoot RAW. RAW files keep more tonal information than JPEG files, giving you more room to recover highlights and shadows during editing.
JPEG photos can still be edited, but they are already processed and compressed in-camera. That means aggressive highlight recovery can cause banding, strange colors, or muddy tones. RAW gives you a wider safety margin, especially for weddings, landscapes, drone shots, outdoor portraits, and commercial photography.
For drone photographers, this is especially important. Skies and water can clip quickly from aerial angles. If you edit drone photos often, try the 50+ AI-Optimized Cinematic Drone Lightroom Presets Bundle and browse the Lightroom Presets for Aerial and Drone Photography collection for styles built around skies, landscapes, and outdoor color.
A Simple Highlight Recovery Workflow You Can Follow Every Time
Here is a repeatable workflow you can use after applying any Lightroom preset:
- Apply the preset first. Choose the creative look before making corrections.
- Check the histogram. Look for clipping on the far-right side.
- Lower Highlights. Recover bright detail without darkening the entire photo.
- Adjust Exposure only if needed. Use it when the whole image is too bright.
- Refine Whites. Set the brightest point carefully.
- Balance Shadows and Blacks. Bring back depth and subject separation.
- Use the Tone Curve. Smooth harsh highlights and protect midtones.
- Mask problem areas. Fix skies, clothing, skin, windows, or reflections locally.
- Zoom in and inspect. Check for noise, banding, color shifts, or unnatural gray highlights.
- Compare before and after. Make sure the image still feels bright, natural, and alive.
I tested this kind of workflow on bright outdoor portraits where the preset made the colors look cinematic but pushed the sky too far. The best fix was not one extreme adjustment. It was a combination of Highlights, Whites, a soft sky mask, and a small curve correction. The result kept the mood of the preset while bringing back a much cleaner sky.
Common Mistakes to Avoid
- Lowering Exposure too much: This can make the whole image dull and underexposed.
- Pulling Highlights to the minimum every time: This can create gray, lifeless whites.
- Ignoring the Whites slider: Sometimes the brightest point needs separate control.
- Using too much Dehaze: This can make skies look dirty or noisy.
- Forgetting local masks: Global edits can damage parts of the photo that already look good.
- Trying to recover impossible detail: If the data is fully gone, Lightroom cannot recreate the original texture naturally.
If you often edit in changing light, especially on mobile, read how to adapt Lightroom Mobile presets to different lighting. It will help you make better decisions when highlights, shadows, and white balance change from photo to photo.
When a Small Blown Highlight Is Acceptable
Not every bright white area is a problem. Some highlights are natural. A sparkle on water, a small reflection on glass, a catchlight in the eye, or bright sunlight at the edge of the frame can add energy. The goal is not to make every part of the image full of detail. The goal is to make the important highlights look intentional.
Ask yourself:
- Is the blown area distracting from the subject?
- Does it remove important texture, like a dress, product, or skin?
- Does it make the edit look harsh?
- Does it still feel natural for the lighting situation?
If the highlight supports the mood, keep it. If it damages the subject or makes the edit look unfinished, recover it.
Related Reading
- The Ultimate Guide to Picking Photos That Play Nicely with Presets
- Mastering Subtle Edits: Tame Overly Powerful Presets
- Why Lightroom Presets Look Different and How to Fix It
- Mastering Lightroom Mobile Presets: Adapting to Any Lighting
- Why Your Presets Look Flat and How to Add Depth and Pop
Final Thoughts on Recovering Blown Highlights After Presets
Recovering blown highlights after applying Lightroom presets is really about control. Presets give you speed and style, but your final adjustments make the edit professional. Start with the histogram, lower Highlights first, refine Whites carefully, balance Shadows and Blacks, then use Tone Curve and Masking for precision.
For a complete preset workflow, explore the 1000+ Master Lightroom Presets Bundle, try wedding-friendly options like 150+ Gorgeous Lightroom Presets for Wedding Photography, and browse the full Lightroom Presets for Mobile and Desktop collection. Try these presets today, Buy 3, Get 9 FREE, and use this highlight recovery workflow to create cleaner, brighter, more natural edits.
FAQs
Can Lightroom recover completely blown highlights?
Lightroom can recover highlight detail only if the original file still contains usable data. If the area is fully clipped to pure white with no texture, Lightroom can darken it, but it cannot naturally recreate missing detail.
Should I lower Exposure or Highlights first?
Lower Highlights first when only the brightest areas are too strong. Use Exposure only when the entire photo is too bright after applying the preset.
Why do presets blow out skies?
Presets can increase contrast, exposure, whites, highlights, clarity, or tone curve strength. If the sky was already bright, those adjustments can push it into clipping.
Is RAW better for highlight recovery?
Yes. RAW files usually keep more tonal information than JPEG files, so you have more room to recover bright skies, white clothing, reflections, and sunlit areas.
Can masking fix blown highlights?
Masking is very useful when only one part of the image is too bright. You can select the sky, clothing, face, window, or reflection and reduce Highlights, Whites, or Exposure only in that area.
Written by Asanka — creator of AAAPresets (10,000+ customers).


Leave a comment
This site is protected by hCaptcha and the hCaptcha Privacy Policy and Terms of Service apply.