AI-Assisted Culling: How to Save Time Without Losing Creative Control
AI-assisted culling can make your Lightroom culling workflow faster, cleaner, and less stressful, especially when you are reviewing hundreds or thousands of photos after a wedding, travel shoot, portrait session, event, or content day. The real question is not whether AI can choose photos for you. The better question is how to use AI culling as a smart first pass while keeping your human eye, creative taste, and storytelling decisions in control.
Here’s why this matters: photographers do not lose their style because they use better tools. They lose consistency when they rush, over-edit weak images, or spend too much energy deciding between near-duplicates. AI can help remove the noise. You still decide which image has the emotion, timing, composition, and final story.
After you finish culling, your editing stage becomes much easier. A focused gallery works better with presets because you are applying your style to stronger images from the start. For a faster post-culling workflow, start with the 1000+ Master Lightroom Presets Bundle and browse flexible looks inside the Lightroom Presets for Mobile and Desktop collection. Try these presets today — Buy 3, Get 9 FREE.
What Is AI-Assisted Culling?
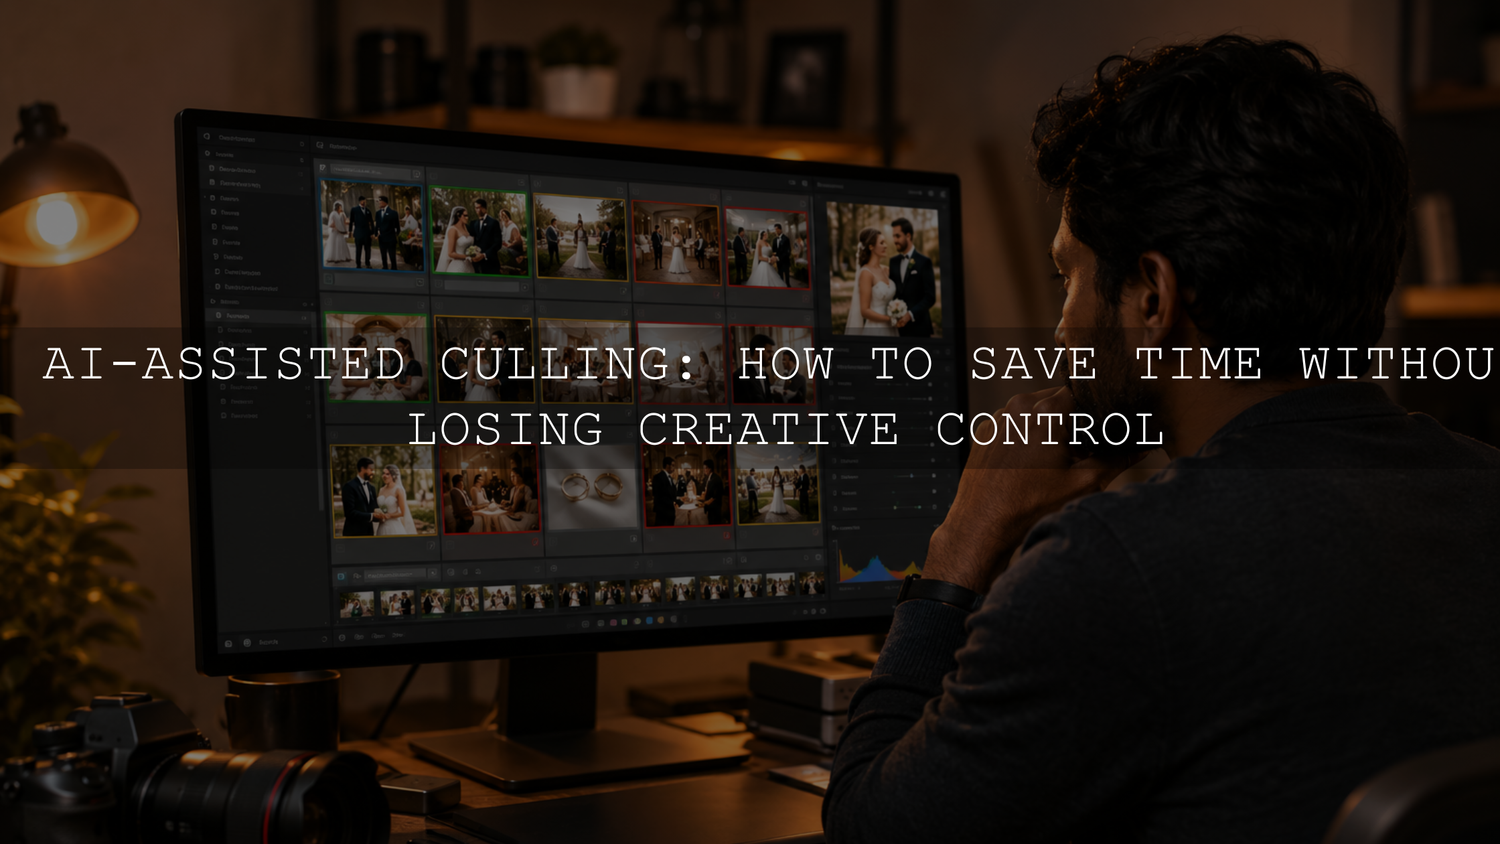
AI-assisted culling is the process of using artificial intelligence to analyze a photo set and help identify the strongest images, weaker images, duplicates, missed focus, closed eyes, exposure problems, and similar frames. Instead of manually checking every image one by one from the beginning, you let AI organize the first layer of decision-making so you can review smarter.
In Adobe Lightroom, Assisted Culling is designed to help photographers organize large collections by identifying top images, rejecting low-quality photos, and allowing manual adjustments to the selection. Adobe also explains that Assisted Culling can use factors such as subject focus and eye focus, which makes it especially useful for portraits, weddings, families, and events where expressions and sharpness matter. You can learn more from Adobe’s guide to Assisted Culling in Lightroom.
But here is the important part: AI culling is not a replacement for taste. It is not your art director, gallery curator, or client storyteller. It is your assistant. It helps you move faster through technical decisions so you can spend more time on the creative decisions that actually define your work.
Why Photographers Hesitate to Use AI Culling
Many photographers feel uncomfortable letting software judge their photos. That feeling makes sense. You remember the exact moment you pressed the shutter. You remember the light, the expression, the movement, and the reason you kept shooting. When AI marks a photo as weak, your first reaction might be, “But that image has feeling.”
And sometimes, you are right.
A slightly soft candid photo can be more powerful than a perfectly sharp but emotionally empty frame. A motion-blurred dance floor shot can feel alive. A darker documentary image can carry more mood than a bright, safe exposure. This is why AI-assisted culling should never become an automatic delete button.
The best way to think about it is simple: AI helps with technical sorting, while you protect the artistic story.
AI Culling Workflow vs Manual Culling
Manual culling gives you full control, but it can also drain your energy before editing even begins. AI culling speeds up the first pass, but it still needs human review. The strongest workflow uses both.
- Manual culling is best for: emotional storytelling, final gallery taste, client priorities, subtle expression changes, brand style, and creative risk.
- AI culling is best for: missed focus, closed eyes, near-duplicates, exposure issues, repeated frames, and large galleries that need fast organization.
- The best workflow is: AI first pass, human review second pass, manual final selection before editing.
Let’s break it down with a real example. Imagine you photographed a wedding and came home with 2,500 images. Manually reviewing every frame can take hours. AI can group similar shots, highlight sharp frames, and remove obvious technical misses. Then you review the shortlist and decide which photos tell the couple’s story best: the emotional first look, the parent’s reaction, the candid laugh, the quiet hand detail, and the dance floor energy.
That is not AI replacing artistry. That is AI protecting your time so your artistry has more room.
How to Keep Creative Control When Using AI-Assisted Culling
1. Start With a Clear Goal for the Gallery
Before you let AI analyze anything, decide what the final gallery needs to achieve. A wedding gallery needs emotion and complete storytelling. A product shoot needs sharpness, accuracy, and clean angles. A travel blog gallery needs variety, atmosphere, and location details. A portrait session needs expression, flattering light, and skin tone consistency.
When your goal is clear, you can judge AI recommendations properly. You are not simply asking, “Is this photo technically good?” You are asking, “Does this photo belong in the story?”
2. Use AI as a First Pass, Not a Final Answer
The safest AI culling workflow is to use AI only for the first pass. Let it identify obvious rejects, similar images, sharp options, and possible keepers. Then review the results yourself before deleting, rating, or delivering anything.
Adobe’s Lightroom organization tools also support manual rating, flagging, and filtering, so you can combine AI suggestions with your own photo selection system. Adobe explains how to rate and flag photos inside Lightroom in Adobe’s guide to organizing photos in Lightroom.
My personal rule is simple: AI can suggest, but I decide. I tested this approach on a large portrait session where many frames looked almost identical. AI helped me move past the repeated shots faster, but the final selects still came down to expression, posture, eye connection, and the emotional feel of the image.
3. Protect the “Imperfect but Powerful” Photos
Some photos are technically imperfect but creatively important. These images often appear in documentary, street, wedding, travel, sports, and family photography. They may have motion blur, dramatic shadows, grain, or a non-traditional composition, but they still carry feeling.
During your review, create a separate mental category for “story images.” These are photos you do not judge only by sharpness. Ask yourself:
- Does this image show a moment that cannot be repeated?
- Does it add emotion or context to the gallery?
- Would the story feel weaker without it?
- Can the image be improved with careful editing?
If the answer is yes, keep it for a second review. AI might not understand why a blurry dance shot or quiet behind-the-scenes frame matters, but your client or audience might love it.
4. Use Flags, Stars, and Labels After AI Review
Once the AI pass is complete, use a clear human rating system. This keeps your gallery organized and prevents you from second-guessing every choice.
- Pick flag: strong image worth reviewing again.
- Reject flag: obvious miss, duplicate, blink, or unusable frame.
- 3 stars: possible keeper.
- 4 stars: strong final candidate.
- 5 stars: hero image for portfolio, client preview, blog, or social media.
- Color labels: separate categories such as portraits, details, ceremony, products, travel scenes, or social content.
For more practical selection habits, the related AAAPresets guide on Lightroom Mobile mistakes and better flagging workflows is useful if you edit across mobile and desktop.
Presets vs Manual Editing After AI Culling
Presets and manual editing are not enemies. They work best together, especially after a clean culling workflow. AI helps you choose stronger photos. Presets help you apply a consistent creative direction. Manual editing helps you fine-tune each important image.
Here is the difference:
- Presets: speed up your base look, mood, color tone, contrast, and style consistency.
- Manual editing: fixes image-specific needs such as exposure, white balance, skin tone, cropping, masking, and local adjustments.
- AI culling: reduces the number of weak images before you spend time editing.
A strong workflow looks like this: cull first, apply presets second, refine manually third. Adobe explains that Lightroom presets are predefined settings that can apply adjustments like exposure, contrast, saturation, and color grading. You can read more in Adobe’s guide to editing photos with presets in Lightroom.
When I test presets on real galleries, the best results almost always come after culling. A preset applied to 80 strong images looks more professional than the same preset applied to 400 mixed-quality images. The preset is not doing less work; it is working on better material.
A Step-by-Step AI Culling Workflow for Lightroom Users
Step 1: Import and Back Up Your Photos
Before you begin culling, make sure your files are safely imported and backed up. Do not delete anything permanently during the first review. Keep your original files safe until the project is delivered and approved.
Step 2: Let AI Analyze the Full Set
Use AI-assisted culling to scan for technical problems, repeated frames, focus issues, and obvious rejects. This is where AI can save serious time. For high-volume shoots like weddings, sports, conferences, travel days, or family sessions, this first pass can reduce your mental load quickly.
Step 3: Review the AI Shortlist Manually
Do not accept the shortlist blindly. Review the selected images and check the rejected group too. Look for emotional frames, storytelling details, and creative photos that AI may have misunderstood.
Step 4: Rate Your Final Selects
Use flags, stars, or labels to create a clean selection structure. Keep it simple. Too many categories can slow you down again. For most shoots, Pick, Reject, 3-star, 4-star, and 5-star ratings are enough.
Step 5: Edit Only the Strongest Images First
Start editing your 4-star and 5-star photos first. This gives you a clear visual direction before you spend time on secondary images. If you want a broad editing toolkit for different shoot types, the 1000+ Master Lightroom Presets Bundle gives you flexible styles for portraits, weddings, travel, street, lifestyle, and social media edits.
Step 6: Apply Presets, Then Refine Manually
Apply your chosen preset as a creative base, then fine-tune exposure, white balance, contrast, skin tones, and crop. If the preset feels too strong, reduce the intensity or adjust the key sliders. For portrait-heavy sessions, the AI-Optimized Skin Tone Safe Pro Portrait Lightroom Presets can help you move faster while keeping the final look more natural.
Pro Tips for Better AI Photo Selection
- Do not delete too early: Mark rejects first, then delete later after a second review. This prevents accidental loss of emotional images.
- Check near-duplicates carefully: AI may choose the sharpest frame, but the best expression might be one frame before or after.
- Use gallery purpose as your filter: A portfolio image, client gallery image, Instagram post, and blog image may need different selection standards.
- Separate technical quality from emotional value: A technically perfect image is not always the strongest image.
- Edit a small test batch first: Apply your preset style to 10 selected images before editing the full gallery.
If you want to improve the editing stage after selection, read how to adjust exposure, contrast, and whites so presets work better. It pairs well with any AI culling workflow because cleaner selects make editing decisions easier.
Best Photography Types for AI-Assisted Culling
AI-assisted culling is useful for almost any photographer, but it becomes especially powerful when you shoot in high volume.
- Wedding photography: Quickly reduce duplicates, blink shots, and missed focus while protecting emotional storytelling moments.
- Portrait photography: Find sharp eyes, strong expressions, and clean poses faster.
- Travel photography: Organize large shoot days into hero images, supporting details, and rejects.
- Event photography: Move through repeated stage, audience, and candid shots more efficiently.
- Street photography: Sort technical misses while keeping space for mood, timing, and imperfect human moments.
- Content creation: Choose the best images for reels covers, carousels, blogs, thumbnails, and product pages.
For travel and storytelling workflows, the AAAPresets guide on building a faster travel preset workflow gives a helpful next step after culling. If your shoot includes city scenes or documentary-style images, the AI-Optimized Cinematic Travel Street Lightroom Presets can help create a polished look quickly after your final selects are ready.
Common AI Culling Mistakes to Avoid
Letting AI Make the Final Decision
This is the biggest mistake. AI can help you identify technical issues, but it cannot fully understand your client, brand, story, or emotional intention. Always review before finalizing.
Ignoring Rejected Images Completely
Always scan the rejected group before deleting. Sometimes the most meaningful frame is not the most technically perfect one.
Editing Before Culling
Editing too early slows everything down. Cull first, then edit. This makes your preset choices easier and your gallery more consistent.
Using Too Many Rating Rules
A complicated rating system can become another problem. Keep your process simple enough to repeat on every shoot.
Forgetting the Client or Audience
Your favorite artistic image may not be the only image your client needs. Balance creative taste with practical delivery: key people, important details, product angles, location context, and story flow.
How AI Culling Helps Your Preset Workflow
Presets work better when your selected images are already strong. If your gallery includes too many weak frames, your edit may feel inconsistent even if the preset is good. A clean photo selection workflow gives you better exposure consistency, stronger compositions, fewer distractions, and a clearer visual story.
For example, if you cull a wedding gallery down from 2,000 images to 500 strong selects, you can apply a wedding preset style more confidently. Then you manually refine the hero images. If you are editing a full wedding set, the 150+ Gorgeous Lightroom Presets for Wedding Photography can help keep the final gallery romantic, polished, and consistent.
If you want more options for different client styles, browse the AI-Optimized Lightroom Presets for Mobile and Desktop collection. It is a smart match for photographers who want faster editing after AI-assisted culling while still keeping manual control over the final look.
Related Reading
- 2026 travel preset workflow guide for faster edits
- Lightroom Mobile mistakes to avoid when rating and organizing photos
- How to make presets work better with exposure and contrast adjustments
- Why every photographer needs a Lightroom presets bundle
Final Thoughts: AI Should Support Your Eye, Not Replace It
AI-assisted culling is not about removing creativity from photography. It is about removing the repetitive parts of the selection process so you can focus on the images that truly matter. Use AI to find technical issues, group similar photos, and speed up the first pass. Then use your own eye to protect emotion, story, timing, and style.
The future of photography workflow is not human versus AI. It is human taste supported by smarter tools. When you combine AI culling, clear rating habits, Lightroom presets, and careful manual refinements, you can build a faster workflow without making your final gallery feel automated.
Once your best images are selected, give them a consistent, professional finish with the 1000+ Master Lightroom Presets Bundle, or explore more creative options in the Lightroom Presets for Mobile and Desktop collection. Build your editing toolkit today — Buy 3, Get 9 FREE.
FAQs
What is AI-assisted culling in photography?
AI-assisted culling uses artificial intelligence to analyze large photo sets and help identify sharp images, weak images, duplicates, missed focus, closed eyes, and possible keepers. It speeds up the first pass, but the photographer should still make the final creative selection.
Can AI culling replace manual photo selection?
No. AI culling should not replace manual selection because it cannot fully understand emotion, client expectations, storytelling, or creative intention. The best approach is to use AI as a first-pass assistant, then review the shortlist yourself before editing or delivering images.
Does AI culling work well with Lightroom presets?
Yes. AI culling can improve your Lightroom presets workflow because you edit fewer weak images and focus on stronger selects. After culling, presets can help apply a consistent style faster, while manual adjustments refine exposure, color, skin tones, and final details.
Should I delete AI-rejected photos immediately?
No. It is safer to mark rejected photos first and delete later after a second review. AI can sometimes reject images that are technically imperfect but emotionally valuable, especially in weddings, street photography, events, and documentary-style work.
What is the best AI culling workflow for photographers?
The best workflow is to import and back up your photos, let AI complete the first pass, review the AI selections manually, use flags or star ratings, edit the strongest images first, apply presets, and finish with manual refinements for a polished final gallery.
Written by Asanka — creator of AAAPresets (10,000+ customers).


Leave a comment
This site is protected by hCaptcha and the hCaptcha Privacy Policy and Terms of Service apply.