
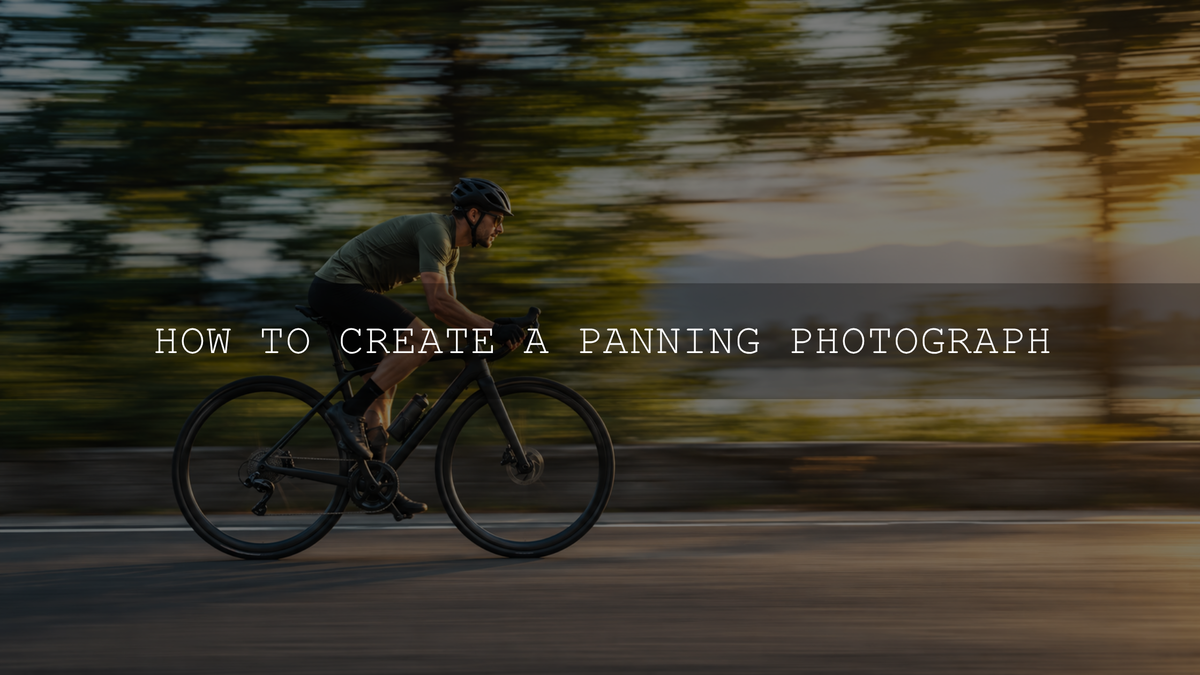
Panning photography lets you photograph a moving subject with a relatively sharp appearance while the background stretches into directional motion blur. The technique is simple to describe: follow the subject with your camera during a deliberately slow exposure. The challenge is matching its movement smoothly enough to keep the important details clear.
For your first attempt, try Shutter Priority mode (S or Tv), a shutter speed around 1/60 second, and a cyclist or car moving steadily across your view. Follow the subject before, during, and after the exposure. Once you can keep it relatively sharp, slow the shutter to make the background blur more dramatic.
What Is Panning in Photography?
Panning means moving the camera to track a subject as it travels through the scene. Instead of holding the camera still and letting the subject blur, you rotate the camera so the subject stays in approximately the same position in your frame during the exposure. The stationary surroundings then move across the image sensor and appear as streaks.
A successful panning photo does not have to be sharp everywhere. The body of a cyclist might be relatively crisp while the spinning wheels and pedaling legs remain blurred. A race car can have readable bodywork and blurred wheels. This contrast between stable and moving details helps communicate speed.
Panning works especially well when the subject moves from one side of your view to the other. A subject approaching directly toward the lens is harder to photograph with the classic horizontally streaked background because its movement across the frame is much smaller.
Best Camera Settings for Panning Photography
- Exposure mode: Start with Shutter Priority (S on many cameras, Tv on Canon). You choose the shutter speed while the camera adjusts aperture. Manual exposure is useful when the light is consistent and you want direct control of aperture and shutter speed.
- Shutter speed: Begin around 1/60 second for manageable action. Try 1/30 second for stronger streaks, or 1/125 second if a fast subject is too difficult to hold sharp. These are testing points, not universal rules.
- Autofocus: Use continuous autofocus, commonly called AF-C or Servo, with a tracking area suited to the subject. If the subject follows a completely predictable path, pre-focusing on the point where it will pass can also work.
- Drive mode: Try a short continuous burst, if your camera supports it, to capture several points in the movement. Keep your tracking motion smooth throughout the burst.
- ISO and aperture: Start with a low practical ISO in bright conditions and watch the exposure. If working in Manual mode, a moderate aperture such as f/5.6 or f/8 may help keep more of the subject within acceptable focus, provided the light allows it. For more on exposure trade-offs, see how aperture, shutter speed, and ISO work together.
- Stabilization: Check whether your camera or lens has a panning-aware stabilization setting. Different systems behave differently, so use your equipment's manual rather than assuming stabilization always needs to be switched off.
A standard zoom can be easier to handle while learning than a very long telephoto lens. Set your framing before the subject reaches the shooting point instead of changing focal length during the pan. A monopod or smoothly moving tripod head can help with heavy equipment, but neither is required.
What Shutter Speed Should You Use for Panning?
The best speed depends on how quickly the subject crosses the frame, its distance from you, focal length, and how much background blur you want. A close subject may move through your view faster than a more distant subject traveling at the same actual speed. If shutter speed is new to you, see our beginner guide to shutter speed.
- Walking people: Try approximately 1/8 to 1/15 second when their movement is predictable.
- Bicycles and slow-moving vehicles: Start around 1/15 to 1/30 second.
- Cars and motorcycles at ordinary road speeds: Start around 1/30 to 1/60 second.
- Very fast vehicles: Begin around 1/125 second, then try slower speeds once your tracking improves.
These ranges are starting points consistent with Canon's guide to creating a panning effect. They are not settings that guarantee a sharp subject. For erratic runners, pets, or subjects that change direction, starting with a faster shutter speed may be more practical than trying to create maximum background blur immediately.
How to Take a Panning Photo in 7 Steps
- Choose a safe shooting position. Find a place where cars, cyclists, or runners cross your view without obstacles. Stay out of roads, bike lanes, racecourses, and the path of moving subjects.
- Choose a background with visible detail. Trees, buildings, barriers, or other textured surroundings make motion streaks easier to recognize. An empty sky gives the eye much less evidence of panning.
- Set your exposure and focus. Choose Shutter Priority at 1/60 second, turn on continuous autofocus if appropriate, and check that the camera is not overexposing the scene.
- Prepare your stance. Stand with your feet comfortably apart, keep your arms steady, and turn your torso toward the direction the subject is coming from. Rotate from your upper body instead of trying to track with small, jerky wrist movements.
- Begin tracking before the photograph. Pick a visible point on the subject, such as the cyclist's helmet or the car's door, and keep that point in roughly the same location in the viewfinder.
- Release the shutter while still moving. Make the exposure when the subject is in your chosen part of the frame, keeping your tracking motion as even as possible. A short burst can increase your choices.
- Follow through and review. Keep turning smoothly after the shutter fires. Inspect the important detail at a larger magnification, then decide whether the next attempt needs a faster or slower shutter speed, steadier tracking, or better focus.
That final follow-through is especially important. Nikon's panning guidance emphasizes beginning the camera movement before the shot and continuing afterward instead of stopping abruptly at the shutter press.
Why Some Panning Photos Have More Background Blur
Shutter speed is not the only influence. Stronger streaks usually appear when the camera tracks through a noticeable angle during the exposure and the background contains recognizable detail. Distance, subject path, focal length, and how smoothly you rotate all change the result.
For practice, use a route that subjects pass repeatedly and choose one background. This makes it easier to compare 1/125, 1/60, and 1/30 second without confusing the effects of different angles and locations. Do not assume that a longer lens or a slower shutter automatically makes a better photograph; both can make accurate tracking more demanding.
Common Panning Mistakes and How to Fix Them
- The subject is blurry but the background is sharp: You may not be moving with the subject, or the camera may have focused on the background. Begin tracking earlier and check where the focus landed. Repeated, directional edges on the subject can suggest a tracking mismatch; a clearly focused background can suggest missed focus.
- Everything looks smeared: The shutter may be too slow for your current tracking technique, or the camera may be wobbling vertically. Try 1/125 or 1/60 second and turn your torso more evenly.
- The subject and background are both sharp: The exposure may be too brief to show much movement, or the background may lack detail. Test a slower shutter speed and look for a more textured background.
- The body is sharp but wheels or limbs are blurred: This is often a normal and attractive result. Those parts move independently of the subject's overall path, so the pan cannot keep every part equally sharp.
- The image is overexposed in daylight: Lower ISO to a suitable value and check whether the lens can stop down sufficiently. If a slow shutter still lets in too much light, a neutral-density filter can help. In Shutter Priority mode, pay attention to aperture or exposure warnings.
- Focus keeps jumping to the background: Try a smaller tracking area, choose a clear subject detail, or pre-focus at a predictable passing point. Autofocus options depend on your particular camera.
How to Edit a Panning Photo Without Losing the Motion
Start by selecting a frame where the important subject detail is acceptably sharp. Editing can refine contrast, color, crop, and mild softness, but it cannot reliably recover detail that was never recorded clearly during the exposure.
- Crop and straighten: Keep enough space in the direction of travel to suggest movement, unless a tighter editorial crop better suits the scene.
- Correct light and color: Adjust exposure, highlights, shadows, and white balance before applying a strong creative look. Protect bright reflections on vehicle paint or light-colored clothing.
- Keep sharpening selective: Review the subject at full size. Excessive global sharpening or clarity can make intentional background streaks look harsh. A Lightroom preset can be a color-grading starting point, but it does not replace correct timing or camera movement.
For the current desktop editing controls, see Adobe's Lightroom photo-editing guide. The same overall editing principle applies in other photo editors: improve the subject and tonal balance without trying to eliminate the blur that gives the photo its energy.
A Simple Panning Photography Practice Exercise
Photograph the same safe, repeatable movement three times: first at 1/125 second, then at 1/60 second, then at 1/30 second. Use similar framing and track from the same starting point. Afterward, compare three things: how sharp the main subject looks, how clearly the background streaks, and whether the exposure is balanced.
Choose the slowest setting that still gives you enough sharpness for the photograph you want. Repeat the exercise with a cyclist or runner at a different distance. You will see why one fixed shutter-speed recommendation cannot cover every panning situation.
Final Thoughts
Great panning photographs come from balancing two competing goals: enough shutter time to make the surroundings streak, and steady enough tracking to hold the important part of the subject sharp. Start with repeatable movement, practice at manageable shutter speeds, and change one variable at a time. The sharpest frame is not always the most exciting one; the best result is the frame where sharpness and motion work together.
Written by Asanka, creator of AAAPresets.


Leave a comment
This site is protected by hCaptcha and the hCaptcha Privacy Policy and Terms of Service apply.