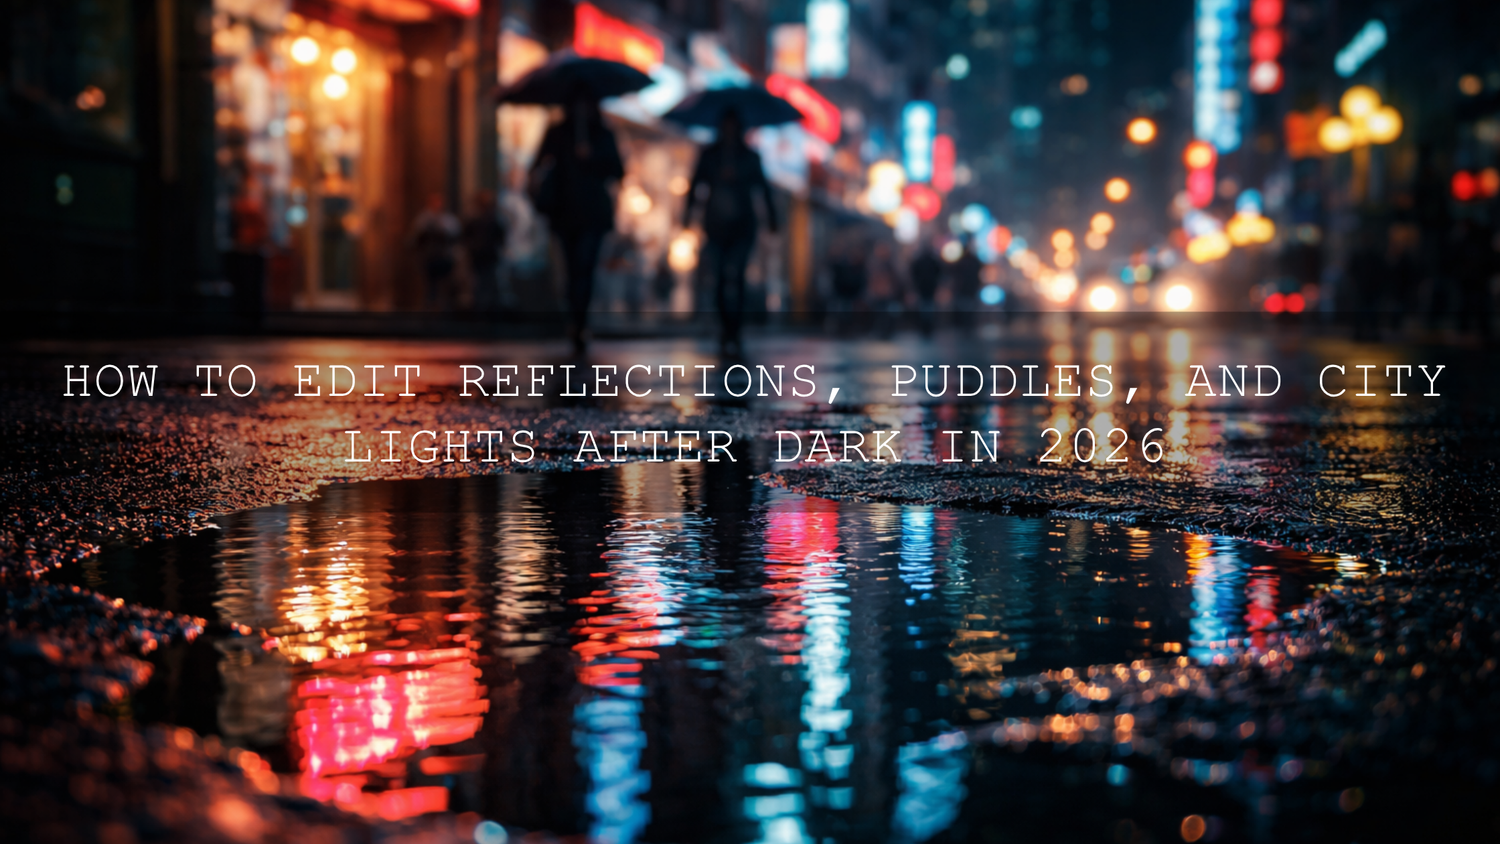
How to Edit Reflections, Puddles, and City Lights After Dark in 2026
Night photography editing in 2026 is not just about making a dark file brighter. It is about shaping reflections, puddles, and city lights so the frame keeps its atmosphere while gaining depth, contrast, and color separation. When you edit nighttime street photos well, wet asphalt looks alive, neon reflections feel intentional, and distant city lights carry mood instead of turning into messy glare. The goal is not to fake the scene. The goal is to reveal what the camera almost captured, then guide the viewer’s eye through the frame.
I have tested night-focused looks on rainy street scenes, neon storefronts, and low-light city portraits, and the biggest difference always comes from controlling highlights before pushing color. If you want a faster starting point, try Night City Neon Light Presets for glowing reflections and pair them with Lightroom Presets Collection. Buy 3, Get 9 FREE makes it easier to build a complete night-editing workflow without starting from scratch.
Why Night Reflections and Puddles Matter So Much
Reflections are one of the easiest ways to make night photos feel cinematic. They add symmetry, visual depth, and a second layer of light to the composition. A simple sidewalk scene becomes more dramatic when a neon sign repeats in a puddle. A moody alley feels richer when wet ground carries the glow of passing headlights. The challenge is that reflections often come into post-production looking flat, underexposed, or muddy.
That usually happens for three reasons. First, night scenes often have extreme contrast, so your camera protects highlights and leaves the reflected areas darker than they looked in real life. Second, mixed lighting can create ugly color casts, especially under street lamps, LEDs, and neon signs in the same frame. Third, raising shadows too aggressively can make puddles look noisy and lifeless.
Here is why this matters: viewers are drawn to light first, then structure, then color. If your reflected light has shape and color separation, the whole image feels more polished even before you touch the rest of the frame.
A Clean Workflow for Editing Night Photos in Lightroom or Camera Raw
A strong edit usually follows a simple order. Get exposure under control, fix color temperature, clean up noise, then shape the reflections and lights with local adjustments. Adobe’s official tools are useful here, especially Adobe’s guide to masking in Lightroom Classic, Adobe’s Lightroom tone and color controls, and the Adobe Color wheel when you want a more intentional neon palette.
1. Start by protecting highlights
Before you add drama, make sure bright lights are still readable. Lower highlights first, then check whites. If the brightest sign in the frame is still a featureless blob, your final image will never feel premium no matter how much contrast you add later. I usually begin by pulling highlights down, setting whites carefully, and only then opening shadows a little.
- Lower highlights to recover detail in signs, windows, and street lamps.
- Adjust whites slowly so bright edges still glow without clipping.
- Open shadows just enough to reveal texture on the ground and in buildings.
- Use blacks for depth, but avoid crushing reflected detail completely.
2. Fix white balance before pushing saturation
Night scenes often look too green, too orange, or strangely magenta depending on the lighting mix. If you push vibrance before correcting temperature and tint, the result usually feels artificial. Start by finding a believable neutral point, then decide whether you want the final mood cooler, warmer, or more stylized.
For rainy neon scenes, cooler overall tones often help the bright pinks, cyans, reds, and blues stand out. For cinematic urban work, a slight blue shift in the shadows combined with controlled warm highlights can look especially strong.
3. Apply careful noise reduction
Night photo editing always involves a trade-off between cleanliness and texture. Too much noise reduction makes wet streets look like plastic. Too little leaves distracting grain in the shadows. The best approach is subtle reduction first, followed by selective sharpening where you actually need detail, such as building edges, road texture, or the outline of a reflection.
If you want a smoother low-light base, Lightroom Presets for Night Photos can help you get rich blacks and controlled highlights faster while still leaving room for manual fine-tuning.
4. Use masking to sculpt reflections and puddles
This is the step many people skip, but it is where night photography editing becomes more advanced. Instead of editing the entire image the same way, isolate puddles, reflective roads, or the lower half of the frame. Then add localized exposure, contrast, texture, and saturation only where the reflected light needs to come alive.
For example, if a red neon sign is reflecting on wet pavement, mask the reflected area and slightly raise exposure, add a touch of clarity or texture, and increase the luminance of reds just enough to give shape to the reflection. That keeps the glow strong without blowing out the original sign above it.

5. Shape the city lights instead of oversaturating them
Good city-light editing is usually about separation, not maximum color. You want each light source to feel distinct. Neon should glow. Street lamps should feel warm or neutral. Window lights should not all merge into one bright mess. Use HSL or color grading to fine-tune individual channels rather than pushing global saturation too hard.
- Increase luminance on the main neon color to give it more glow.
- Reduce distracting greens or yellows if they make the frame feel messy.
- Use color grading to cool the shadows and keep highlights slightly warm when needed.
- Add contrast carefully so light sources stay crisp but not harsh.
The Best Editing Approach for Different Night Scenes
Rainy streets and puddle reflections
Rain changes everything. It adds highlight streaks, mirrored color, and extra mood, but it also makes exposure harder. On these shots, the ground is often the main visual feature. Raise the reflected areas slightly, deepen surrounding blacks, and watch for unwanted brown or green casts in the water. This is where Night City Neon Light Presets work especially well because they are designed for rain-slick streets, neon signs, and controlled highlight rolloff.
Dense urban neon scenes
Busy city frames need structure. If every sign and every light is competing equally, the eye has nowhere to rest. Pick a dominant light source, strengthen that color story, and let secondary lights support the mood. For this look, AI-Optimized Tokyo City Lightroom Presets are a strong fit for bold urban contrast, cool shadows, and electric neon separation.

Moody cinematic night edits
Some images do not need maximum glow. They need atmosphere. In those cases, keep saturation more controlled, deepen the blacks, and let only a few key lights shine. This works beautifully for storytelling images, quiet streets, and film-inspired urban frames. If you also work with video, Night Cinematic Film Look LUTs Pack is a strong option for adding depth, moody contrast, and a polished cinematic finish.
Presets vs Manual Editing for Night Photography
Both approaches work. The best workflow usually combines them.
When presets help most
- You want a fast, consistent base for a full set of nighttime images.
- You need help balancing neon color, contrast, and low-light mood quickly.
- You want a polished starting point before doing local masks and custom adjustments.
When manual editing matters most
- Your scene has difficult mixed lighting and needs custom white balance work.
- The reflections need selective editing to separate water, pavement, and light sources.
- You are trying to match a very specific brand, film, or cinematic mood.
Here is the practical truth: presets save time, but manual editing finishes the image. I often start with a preset to establish contrast and color direction, then use masks to refine puddles, signs, and shadow areas. That hybrid workflow is usually faster than building everything from zero and stronger than relying on one click alone.
Pro Tips That Instantly Improve Night Photo Edits
- Edit the brightest light first. Once that area looks controlled, the rest of the frame becomes easier to balance.
- Give reflections their own treatment. A puddle should not always receive the same settings as the wall, road, or sky around it.
- Watch the blacks carefully. Rich blacks create mood, but blocked blacks kill subtle detail in wet surfaces.
- Use color with intention. Two or three dominant colors often look more premium than a frame full of equally saturated tones.
- Do not sharpen the whole image equally. Sharpen structure and important edges, not every noisy shadow.
- Zoom out often. Night edits can look great at 100% and still feel unbalanced as a full composition.
Building a More Cinematic Night Editing Style
If you want your work to stand out in 2026, do not only think in terms of brightness and saturation. Think in terms of story. Is the image energetic, lonely, futuristic, nostalgic, or quiet? Your editing choices should support that feeling. Cooler shadows, deeper contrast, and stronger neon separation can make a frame feel urban and modern. Softer contrast, controlled glow, and muted colors can make it feel more reflective and cinematic.
I tested this approach on a rainy city frame with a shallow puddle in the foreground, and the edit only started to work once the reflection became part of the composition instead of an afterthought. That is the shift that changes a decent night photo into a memorable one.
If your style leans into city energy, bold contrast, and glowing signs, it also makes sense to explore Street Photography Lightroom Presets Collection and Storytelling Through Light: Golden Hour, Blue Hour, and Beyond for ideas on how light direction and mood can shape your final edit.
Related Reading
- How to Use Grain and Fade in Street Photography for a Timeless Film Look
- How to Edit Urban Architecture and Lines for Graphic Impact in 2026
- Adobe Color vs Camera Matching Profiles: Decoding Presets for Stellar Photos in 2026
- How to Install Lightroom Presets
Bring Your Night Photos to Life With a Faster Workflow
If you want your reflections, puddles, and city lights to feel cleaner, richer, and more cinematic, start with a strong base like Night City Neon Light Presets or AI-Optimized Tokyo City Lightroom Presets, then refine the frame with local masking and color control. You can also continue browsing Lightroom Presets Collection to build a night-editing toolkit that fits your style. Buy 3, Get 9 FREE is a simple way to test more looks across different city scenes without slowing down your workflow.
FAQ
How do I make puddle reflections stand out in Lightroom?
Use masking to isolate the reflected area, then raise exposure slightly, add controlled contrast, and fine-tune the reflected colors with HSL or color grading. Avoid lifting shadows too much or the puddle can turn noisy and flat.
Why do my night photos look too orange or too green?
Mixed lighting is common in city scenes. Correct temperature and tint before increasing saturation. Street lamps, LEDs, and neon signs can all push color in different directions, so white balance is usually the first major fix.
Are presets enough for editing night photography?
Presets are an excellent starting point for contrast, mood, and color direction, but the best results usually come from combining presets with manual adjustments like masking, highlight recovery, and selective color control.
What is the biggest mistake when editing city lights after dark?
The most common mistake is pushing global saturation and contrast too hard. That often makes neon signs clip, shadows become muddy, and the image lose realism. Controlled highlights and selective color edits create a cleaner result.
Should I add grain to night photos?
A small amount of grain can work well if you want a film-inspired look, but add it after noise reduction and only if it supports the mood. Grain should enhance atmosphere, not hide weak editing.
Written by Asanka — creator of AAAPresets (10,000+ customers).

Leave a comment
This site is protected by hCaptcha and the hCaptcha Privacy Policy and Terms of Service apply.