
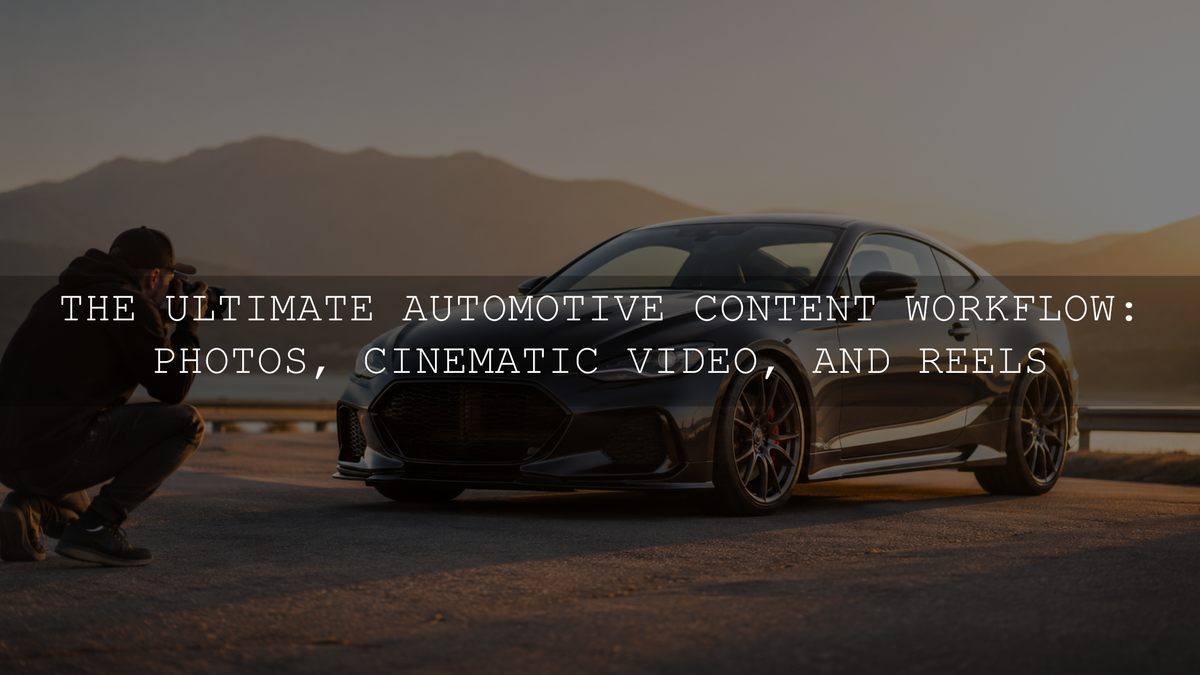
A reliable automotive content creation workflow turns one planned vehicle shoot into hero photographs, detail images, rolling footage, cinematic sequences, vertical clips and promotional assets. A practical system defines the story and required deliverables first, prepares the car and location, captures each format in a deliberate order, corrects technical problems before adding a creative style and exports separate versions for every destination.
This guide is designed for automotive photographers, videographers, car creators, dealerships, detailers, rental companies and vehicle brands that need polished content without rebuilding the entire production process for every shoot.
Automotive Content Creation Workflow at a Glance
- Define the audience, story and required deliverables.
- Prepare the vehicle, location, permissions and production equipment.
- Create a shot matrix covering static photographs, movement, details, interiors, sound and vertical content.
- Plan the shoot around the direction and quality of the available light.
- Capture technically accurate photographs before applying a creative style.
- Record cinematic video, clean audio and platform-specific variations.
- Organize and back up the original files before formatting memory cards.
- Correct exposure, white balance, color space and shot differences.
- Apply a consistent photo preset and video LUT direction, then refine each asset.
- Export, label and archive separate versions for websites, advertisements and social platforms.
1. Define the Story Before Choosing the Gear
Begin by deciding what the finished content needs to communicate. A luxury sedan, vintage coupe, rally car, family SUV and modified off-road vehicle should not automatically receive the same lighting, location, camera movement or editing style.
Create a short production brief containing:
- Audience: Who needs to care about the vehicle?
- Main message: Is the focus performance, design, practicality, craftsmanship, restoration or lifestyle?
- Required assets: List website images, dealership photographs, landscape video, vertical clips, thumbnails and campaign variations.
- Visual direction: Define a few useful mood words such as clean, aggressive, refined, nostalgic or adventurous.
- Accuracy requirements: Identify paint colors, materials, accessories or product details that must remain realistic.
- Next action: Decide whether the viewer should request a quote, book a test drive, follow the creator or simply remember the vehicle.
This brief prevents a common production mistake: capturing attractive material that does not answer the client’s needs or fit the final placements.
2. Prepare the Car, Location and Production Day
Clean paint, glass, wheels and interior surfaces are easier to light and require less retouching. However, preparation should match the story. A restored classic may need careful detailing, while an off-road campaign may intentionally retain controlled mud or dust.
Inspect the vehicle before the shoot and look for:
- Fingerprints on glossy trim and touchscreens
- Dust around vents, badges and wheel spokes
- Water marks on glass or paint
- Uneven tire dressing
- Personal items inside the cabin
- Temporary stickers, plates or dealer labels that should not appear
- Warning lights or screen information visible in interior photographs
Scout the location at approximately the same time of day as the planned shoot. Check the sun direction, reflective buildings, traffic, public access, background clutter, parking restrictions and safe places for the crew to stand.
Motion sequences should be captured only where the vehicle can be operated legally and safely. Use experienced drivers, secured equipment and controlled roads, private property or closed locations when required. Do not build a shot around a risky driving maneuver simply because it looks dramatic.
3. Build an Automotive Shot Matrix
A shot matrix is more useful than a loose list of camera angles because it connects each shot with its intended format and purpose.
Static Hero Photographs
- Front three-quarter view
- Rear three-quarter view
- Full side profile
- Low front or rear angle
- Elevated environmental view
- Wide photograph showing the vehicle in its location
Exterior Details
- Headlights and taillights
- Wheel, tire and brake details
- Badges and model lettering
- Grille, exhaust and aerodynamic elements
- Paint texture, reflections and body lines
- Carbon fiber, chrome or restoration details
Interior and Human Interaction
- Complete dashboard and cockpit
- Steering wheel and instrument display
- Seats, stitching and materials
- Gear selector, controls and infotainment details
- Driver entering, fastening the seat belt or operating controls
- Doors, storage areas and practical features when relevant
Motion and Video Coverage
- Vehicle entering the scene
- Low tracking movement
- Front, side and rear rolling views
- Wheel movement and suspension details
- Driver point-of-view material
- Road, landscape and location establishing shots
- Vehicle stopping and final hero position
Vertical and Short-Form Variations
- Vertical reveal of the complete car
- Fast sequence of five to eight exterior details
- Interior feature demonstration
- Cold start or lighting sequence
- Before-and-after editing or detailing material
- Behind-the-scenes clips showing the production process
Capture intentional horizontal and vertical versions when both are required. Continually cropping one finished landscape shot into every format can remove the front of the car, wheels, mirrors or important background context.
4. Choose Equipment According to the Shot
A high-resolution camera, expensive lens or advanced stabilizer cannot replace planning and controlled light. Build the kit around the actual deliverables.
- Standard zoom: Useful for environmental views, interiors and flexible general coverage.
- Telephoto lens: Helps compress the background and isolate the vehicle from a distracting location.
- Wide-angle lens: Useful in small interiors and tight locations, but requires careful positioning to avoid distorted proportions.
- Tripod: Supports precise static compositions, exposure bracketing and repeatable commercial photographs.
- Gimbal or supported rig: Helps stabilize walking and tracking movement when used correctly.
- Circular polarizing filter: Can reduce selected reflections on paint and glass, depending on the light and camera angle.
- ND filters: Help control exposure when a slower video shutter is required in bright conditions.
- LED lighting: Useful for interiors, details and controlled highlights at dusk.
- Audio recorder and microphones: Allow engine, exhaust, doors and cabin sounds to be recorded separately.
- Reliable storage: Use media rated for the resolution, codec, bit depth and frame rate selected in the camera.
A polarizer should not be treated as an automatic reflection-removal button. Reflections help reveal the shape of a glossy vehicle. Rotate the filter while watching the body panels and stop before the paint becomes unnaturally flat or different panels receive noticeably uneven treatment.
5. Capture Clean Automotive Photographs
Choose Settings for the Required Depth
There is no universal aperture that produces maximum sharpness for every car photograph. The correct setting depends on the lens, distance, sensor, angle and amount of the vehicle that must remain in focus.
For a static three-quarter view, begin with a moderate aperture and inspect the front grille, closest wheel, cabin and rear bodywork. Close the aperture when more depth is required, but remember that very small apertures can reduce fine detail through diffraction.
Use the lowest practical ISO when the vehicle and camera are stationary. A tripod allows a slower shutter speed without increasing noise. For moving cars, prioritize a shutter speed and focusing method that can produce the intended amount of sharpness or motion blur.
Control Reflections Before Retouching
Automotive photography is largely the photography of reflections. Before trying to repair the image in software, adjust the physical scene:
- Move the car slightly in relation to the light.
- Raise or lower the camera position.
- Remove bright objects reflected in the doors or windows.
- Use large diffusion or negative fill when available.
- Rotate a polarizer carefully rather than maximizing its effect.
- Keep crew members and tripods outside the reflected body lines.
Check every major panel separately. The hood, side doors, windshield and curved fenders may reflect entirely different areas of the location.
Protect Paint and Interior Color
Automatic white balance can shift between frames when the car moves or the composition changes. Set a controlled white balance when practical and capture a neutral reference when color accuracy is important.
Paint may also look different under direct sunlight, shade, street lighting and LEDs. Judge color using the vehicle itself rather than making the entire scene neutral at the expense of an accurate finish.
Use Bracketing Selectively
Exposure bracketing can be useful for a locked-off exterior or interior scene containing bright windows and deep shadows. It is less suitable when the vehicle, people, foliage or reflections move between exposures because blending can create ghosting and inconsistent edges.
Do not use bracketing as a substitute for controlled lighting. Capture a strong base exposure first, then use additional frames only when they solve a specific dynamic-range problem.
Capture RAW When Editing Flexibility Matters
RAW files generally provide more flexibility for adjusting white balance, highlights, shadows and camera profiles than processed JPEG files. JPEG can still be useful when fast delivery and smaller files are more important, but the camera has already applied part of the processing.
Adobe’s current Lightroom editing guide explains how profiles and editing controls create a starting point for RAW and non-RAW photographs.
Approach Rolling Photographs Carefully
A rolling photograph combines subject sharpness with controlled background and wheel blur. The required shutter speed depends on vehicle speed, focal length, road surface, camera distance and stabilization.
A range around 1/30 to 1/125 second can be tested as a starting point, but it is not a fixed formula. Begin conservatively, use continuous autofocus and burst capture, review sharpness frequently and adjust one variable at a time.
Do not operate a camera from an unsafe position or attach equipment to a vehicle without an appropriately rated and secured system.
6. Record Cinematic Automotive Video
Choose Frame Rate According to the Edit
Higher frame rates are useful when action needs to be slowed down, but they are not automatically more cinematic. Normal-speed dialogue, driving and environmental material may be better captured at the project’s delivery frame rate.
Use 50, 60, 100 or 120 fps only when the camera, recording format, available light and final slow-motion requirement support it. Higher frame rates can require faster shutter speeds, more light, faster media and additional storage.
A shutter speed with a denominator near twice the frame rate is a useful starting point for natural-looking motion—for example, about 1/50 second at 25 fps or 1/60 second at 30 fps—but it is not a rule that must be followed in every creative situation. ND filters can help maintain the chosen shutter speed in bright daylight.
Capture a Complete Sequence
A cinematic edit needs visual progression rather than a random collection of gimbal clips. Capture:
- An establishing view of the location.
- A wide reveal of the vehicle.
- A strong static hero angle.
- Medium shots showing body movement and design.
- Tight details of wheels, lights, badges and controls.
- Driver interaction and interior material.
- Tracking or rolling movement.
- A clear ending shot or departure.
Repeat important actions from several distances. A door opening may be recorded as a wide action, a medium driver shot and a close detail of the handle or interior light.
Use Movement to Support the Car
Camera movement should reveal shape, speed or scale. A slow controlled slide can suit a luxury vehicle, while stronger tracking movement may support a performance car. Constant whip pans, speed ramps and digital zooms can make every shot feel equally important and reduce the impact of the vehicle itself.
Record some locked or slowly moving shots. They give the viewer time to study the design and provide useful pacing between faster sequences.
Record Automotive Sound Separately
Sound design can make a simple sequence feel more physical and believable. Capture clean versions of:
- Engine start and shutdown
- Idle and controlled revs
- Exhaust from a safe position
- Door, bonnet and boot movement
- Indicators, switches and seat belts
- Gear selection and interior controls
- Tires on the road surface
- Natural ambience from the location
Avoid recording excessive engine noise in an enclosed or poorly ventilated area. Monitor audio levels so loud starts and exhaust sounds do not clip.
7. Capture the Shoot in a Light-Aware Order
A practical order protects the best light and reduces unnecessary resets:
- Capture interior details while the cabin is clean and undisturbed.
- Record product features, badges and mechanical details.
- Shoot static exterior coverage in open shade or controlled daylight.
- Capture wider environmental photographs as the light becomes more directional.
- Use golden hour for the main hero photographs and cinematic reveals.
- Record dusk material when the headlights, taillights and interior lighting become visible.
- Capture night or city-light sequences only when the location remains safe and appropriate.
Review essential shots before leaving each setup. It is easier to correct a reflection, focus problem or dirty panel on location than to reconstruct it later.
8. Organize and Back Up the Files
Create at least two verified copies of the original material before formatting a card. Dual-card recording can reduce risk during capture, but it does not replace a separate backup after the shoot.
A simple project structure could contain:
- 01 Original Photos
- 02 Original Video
- 03 Original Audio
- 04 Selects
- 05 Lightroom Catalog or Photo Project
- 06 Premiere or Video Project
- 07 Proxies
- 08 Music and Sound Effects
- 09 Graphics
- 10 Review Exports
- 11 Final Exports
- 12 Archive
Use file names that identify the vehicle, shoot date, content type and version. A name such as porsche-911-reel-v03.mp4 is easier to manage than final-edit-new-2.mp4.
9. Correct the Technical Image Before Styling It
Build a Reference Edit for the Photographs
Select one representative hero photograph and correct:
- Camera profile
- White balance and tint
- Overall exposure
- Highlight and shadow detail
- Lens distortion and perspective
- Paint and interior color accuracy
- Distracting reflections
- Noise and sharpening
Use this image as a visual reference for the set. Synchronize only adjustments that should genuinely be shared. Cropping, geometry, healing and local masks usually need to be reviewed individually.
For more precise local work, use Lightroom masking to separate the vehicle, background, windows or individual reflections. The Lightroom masking guide explains how selective adjustments can refine specific areas without changing the complete photograph.
Use Presets as Adjustable Starting Points
A Lightroom preset can establish contrast, color relationships and a recognizable mood, but the result still depends on the original exposure, white balance, camera profile, file type and lighting.
The AI-Optimized Car Lightroom Presets include eight XMP preset files for desktop workflows and eight DNG preset files for Lightroom Mobile. Apply a suitable starting look, then refine exposure, white balance, highlights, shadows and individual paint colors for the vehicle.
Prepare Video Through the Correct Color Pipeline
Identify whether each clip was recorded in a standard color space, Log profile, RAW format, HLG or another HDR format. Incorrectly interpreted footage can look washed out, overly contrasty or unusually saturated before creative grading begins.
Adobe’s Premiere color-management overview explains how Premiere can color-manage supported raw and Log media through working and output color spaces.
Avoid applying two technical conversions to the same clip. For example, do not allow an automatic Log transformation and then apply another conversion LUT unless the workflow specifically requires both.
Create Proxies When High-Resolution Media Is Slow
High-resolution, high-frame-rate and computationally intensive codecs may not play smoothly on every editing system. Proxies are lower-resolution or otherwise easier-to-process copies used during editing while the original full-resolution media remains connected for finishing and export.
Adobe’s current Premiere proxy guide explains how to create and attach lower-resolution editing media.
Correct, Match, Grade and Refine
Use this order for automotive video:
- Confirm the input color space or technical transform.
- Correct exposure and white balance.
- Match brightness, contrast and color between shots.
- Apply the creative LUT or grading direction.
- Reduce or refine the creative effect.
- Protect paint, skin and important brand colors.
- Review highlights, reflections and dark body panels with video scopes and the Program Monitor on a suitable display.
The Cinematic Automotive LUTs Pack provides .CUBE LUTs for compatible applications including Premiere Pro, DaVinci Resolve, Final Cut Pro and After Effects. Treat a LUT as a creative base rather than a replacement for exposure correction, color management or shot matching.
Match Photographs and Video by Visible Characteristics
A Lightroom preset and a video LUT do not control all the same properties. Instead of trying to copy slider values, match the characteristics viewers can recognize:
- Overall contrast
- Black level and shadow depth
- Highlight warmth
- White balance
- Paint-color treatment
- Green, blue and red saturation
- Grain or texture strength
- Brightness of the main vehicle against the background
The goal is a connected campaign, not mathematically identical files.
10. Retouch and Clean Without Misrepresenting the Car
Remove temporary distractions such as litter, sensor dust, unwanted crew reflections or traffic cones when they do not change the vehicle itself. Be more cautious with dents, panel gaps, paint condition, tire wear and product features, especially when the content is being used to sell a specific car.
For commercial or dealership work, agree in advance on what may be retouched. A visually polished image should not create a false description of the vehicle’s condition or included equipment.
11. Export Separate Deliverables
Keep a high-quality master version before creating compressed platform files. The exact dimensions, codec and frame rate should be selected according to the destination rather than copied from one universal export preset.
A typical delivery may include:
- Full-resolution photographs for print and archive
- Web-optimized landscape photographs
- Vertical photographs for Stories and Pinterest
- High-quality landscape video master
- Website or advertising video
- Vertical 9:16 clips for Reels, Shorts and TikTok
- Thumbnail and cover photographs
- Clean versions without music or captions
- Captioned social versions
Watch each exported video from beginning to end. Check for crushed blacks, clipped highlights, color changes, missing audio, incorrect crops, spelling errors and compression damage.
12. Turn Each Shoot Into a Reusable Content Library
Do not organize the final assets only by platform. Also label them by subject and purpose so they remain useful when platforms and campaigns change.
Useful categories include:
- Hero exterior
- Exterior details
- Interior features
- Performance and motion
- Lifestyle and driver
- Vertical social
- Behind the scenes
- Evergreen website material
- Launch or promotion-specific material
Track where each asset has been published and which usage rights apply. This prevents the same hero image from being overused and makes it easier to find unused material for a future campaign.
Common Automotive Content Workflow Mistakes
- Shooting without deliverables: Attractive footage may still be unusable when the required orientations or features are missing.
- Using one camera angle repeatedly: A complete story needs wide, medium and detailed coverage.
- Removing every reflection: Reflections communicate body shape and surface quality.
- Trusting automatic white balance: Paint and interior colors can shift between otherwise similar frames.
- Using high frame rates for everything: This increases storage and light requirements without improving every shot.
- Applying a LUT before technical correction: Creative grading can exaggerate incorrect exposure, white balance or color-space problems.
- Overusing transitions: Effects should connect shots rather than compete with the car.
- Ignoring sound: Weak or clipped audio can make expensive visuals feel unfinished.
- Formatting cards too early: Verify separate backups before deleting the original media.
- Retouching vehicle condition inaccurately: Commercial polish should not misrepresent a car being offered for sale.
Pre-Delivery Checklist
- Are all required horizontal and vertical formats present?
- Is the vehicle clean and free from accidental distractions?
- Are the main body panels and wheels sharp where required?
- Do reflections describe the car without hiding important details?
- Does the paint remain believable across the complete set?
- Are interior screens, materials and controls represented accurately?
- Are moving shots stable and captured safely?
- Is engine and environmental audio clean and free from clipping?
- Have RAW, Log or HDR files been interpreted correctly?
- Were exposure and white balance corrected before applying presets or LUTs?
- Do photographs and video share a recognizable visual direction?
- Have all exports been reviewed on an appropriate display?
- Are the original files stored in at least two verified locations?
Frequently Asked Questions
What are the best camera settings for automotive photography?
There is no single setting for every vehicle or shot. Static photographs can use a low ISO, tripod and aperture chosen for the required depth. Rolling photographs need a shutter speed that balances subject sharpness with controlled motion blur. Test the settings according to vehicle speed, focal length and distance.
Should automotive video be recorded at 24, 30 or 60 fps?
Choose the frame rate according to the final delivery and whether slow motion is required. Record normal-speed footage at the project’s primary frame rate and use a higher frame rate for selected action that will genuinely be slowed down.
How can reflections be reduced on a car?
Begin by changing the car position, camera angle, light direction and nearby objects. A circular polarizer can reduce selected reflections, but it will not remove every reflection evenly. Preserve enough reflection to show the vehicle’s body shape.
Can the same preset or LUT be used on every automotive project?
A related family of looks can create consistency, but each shoot still needs adjustment. Exposure, white balance, camera profile, paint color, weather and location influence the result. Use presets and LUTs as starting points, then refine each photograph or clip.
Build an Automotive Workflow You Can Repeat
Professional automotive content depends less on collecting random cinematic shots and more on making repeatable decisions. Define the story, prepare the vehicle, capture a complete shot matrix, protect the best light, record clean sound, organize the original files and correct technical problems before applying the final style.
For a connected photo-and-video editing toolkit, combine the AI-Optimized Car Lightroom Presets with the Cinematic Automotive LUTs Pack. Adjust both for the lighting, camera and vehicle rather than expecting identical one-click results. Eligible products can also be combined through the Buy 3, Get 9 FREE offer.
Written by Asanka — creator of AAAPresets, serving more than 10,000 customers.


Leave a comment
This site is protected by hCaptcha and the hCaptcha Privacy Policy and Terms of Service apply.