
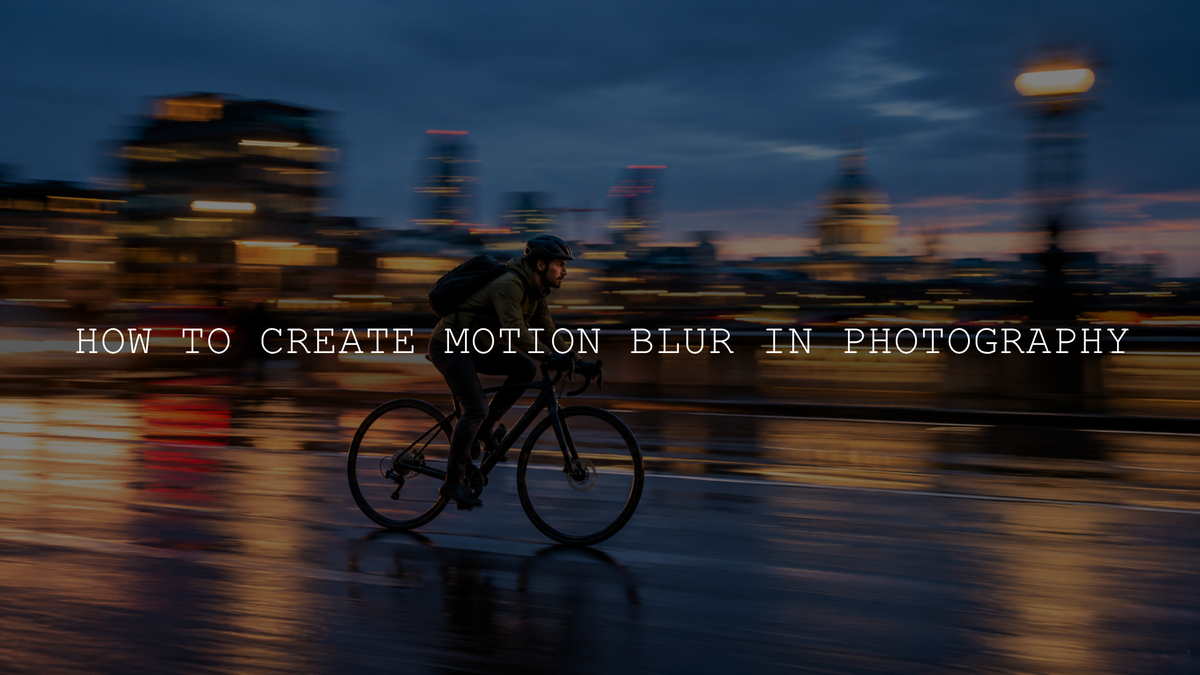
To create motion blur in photography, use a shutter speed slow enough to record movement during the exposure. For silky water, start around 1/4 to 2 seconds with the camera on a tripod. For a moving car or cyclist with a streaked background, try panning at 1/30 to 1/60 second. For traffic light trails, begin around 2 to 10 seconds after dark. These are starting points, not fixed rules: the best exposure depends on how quickly the subject moves, the available light, and how much blur you want.
What Creates Motion Blur in a Photo?
Motion blur happens when something changes position while the camera records an exposure. A fast shutter speed captures a short slice of that movement; a slower speed records more of its path. The result can communicate speed, soften moving water, or turn individual lights into continuous streaks.
First, decide what should stay sharp and what should blur. When you keep the camera still and the focus and support are sound, moving subjects blur against a relatively sharp environment. When you pan the camera with a vehicle, the vehicle can remain recognizable while the background streaks. With intentional camera movement (ICM), you move the camera deliberately so even a stationary scene can become abstract.
That distinction matters. Camera shake is unwanted when you are trying to keep buildings or rocks sharp, but camera movement is part of the technique when panning or making an ICM photograph.
Best Shutter Speeds for Different Motion Blur Effects
Use these ranges as a first test, then review the result and adjust:
- Panning cars, cyclists, or runners: 1/30 to 1/60 second. Try 1/125 second if the subject keeps blurring too much, or 1/15 second for stronger streaks when you can track smoothly.
- Flowing streams and waterfalls: 1/4 to 2 seconds to soften the water while keeping stationary rocks sharp. Slower exposures may create a more mist-like look.
- Night traffic light trails: 2 to 10 seconds as an initial range, depending on traffic speed, brightness, and the length of the path through the frame.
- Soft clouds or smooth ocean water: several seconds to a minute or longer when conditions and your camera allow; a strong ND filter may be needed in daylight.
- Intentional camera movement: approximately 1/4 to 1 second for deliberate sweeps, or shorter exposures if the movement becomes too chaotic.
Motion blur is affected by more than shutter speed. A fast subject moving sideways across the frame may blur more than a slow subject moving toward the camera. Distance, focal length, background detail, and your tracking accuracy also change the visible result. If these controls are new to you, start with our guide to shutter speed.
How to Set Up Your Camera for Motion Blur
- Pick a scene with noticeable movement. Flowing water, passing bicycles, moving crowds, and road traffic are useful subjects. Include a stationary object when you want the blur to contrast with something sharp.
- Choose Shutter Priority (S or Tv) for quick experiments. Select the shutter speed while the camera adjusts aperture and, depending on your Auto ISO settings, possibly ISO. Use Manual mode when you want direct control of shutter speed and aperture; set ISO yourself or select Auto ISO deliberately.
- Choose a suitable ISO and aperture. For tripod-based daylight exposures, begin near your camera's base ISO and try f/8 or f/11 when you need depth of field. Avoid automatically using f/16 or f/22 because very small apertures can reduce fine detail through diffraction. See how aperture, shutter speed, and ISO work together if you need help balancing exposure.
- Stabilize only when the technique requires it. A tripod and two-second timer or remote release are useful for sharp landscapes with blurred water or traffic. Handheld panning and ICM require controlled camera movement instead.
- Focus, shoot, and inspect. Magnify a stationary edge or the main subject on playback. Ask whether the blur came from the motion you intended, camera vibration, missed focus, or excessive exposure time.
If Shutter Priority cannot use your chosen slow speed in bright daylight without overexposing, you may have reached the lens's smallest available aperture or minimum practical ISO. Use an ND filter, move into less intense light, or switch techniques rather than forcing a smaller aperture indefinitely.
For tripod work, follow your camera or lens manufacturer's guidance on stabilization. Some systems recognize a tripod automatically, while others have specific settings for supported cameras and lenses. Turning stabilization off is not a universal requirement. Likewise, if you add weight to a tripod in wind, secure it so the weight cannot swing and introduce vibration.
Technique 1: Make Water Look Silky with a Long Exposure
A waterfall or rocky stream is a practical place to start because the moving water contrasts naturally with stationary surroundings. The goal is not always to make the water completely white. A shorter long exposure often preserves lines and texture that communicate flow.
- Compose the photograph from safe, stable ground, placing rocks, trees, or a riverbank in the frame as sharp reference points.
- Mount the camera on a tripod. Set a low ISO, choose around f/8 to f/11, and focus on the stationary scene.
- Start around 1/4 second. Take a test photograph and check the water's texture and the sharpness of the rocks.
- Try 1 second and then 2 seconds to see how the flowing water becomes smoother.
- If the scene is too bright at the desired shutter speed, use a neutral-density (ND) filter rather than narrowing the aperture indefinitely.
An ND filter reduces the light reaching the camera so you can keep the shutter open longer without overexposing the image. For example, if a correctly exposed photograph meters at 1/125 second, a six-stop ND filter allows roughly 1/2 second at the same aperture and ISO. A ten-stop filter allows roughly 8 seconds. Real-world exposures may require small corrections, so review the histogram and highlight warnings.
For inspiration and examples of how different exposure lengths change water, see Nikon's long-exposure photography guide.
Technique 2: Pan with a Moving Car or Cyclist
Panning makes speed visible without turning the whole subject into an indistinct smear. Instead of locking the camera in place, smoothly follow the moving subject during the exposure. The background gains horizontal streaks while the subject can stay relatively sharp.
- Choose a safe position where the subject will move across your field of view. Never stand in traffic or obstruct a track or cycle path.
- Set Shutter Priority to around 1/60 second and use continuous autofocus or your camera's suitable tracking mode.
- Begin following the car or cyclist before taking the photograph, keeping the focus point on a consistent part of the subject.
- Press the shutter while continuing the same smooth motion. Keep following the subject after the exposure finishes.
- Review the result. If the vehicle is too smeared, test 1/125 second. If the background looks almost frozen, test 1/30 second.
You will not get a perfect keeper every time. The most effective test is to photograph several passes at different speeds and compare the relationship between subject sharpness and background streaking. Canon's EOS R10 panning guidance also emphasizes smooth tracking and following through after the shutter is released.
Technique 3: Capture Glowing Light Trails at Night
Light trails form when moving headlights and taillights travel through the frame during one exposure. A bridge, a permitted viewpoint above a road, or a safe city sidewalk can provide strong leading lines without requiring you to stand near moving vehicles.
- Set the camera on a tripod and frame the road with a stationary landmark, buildings, or an interesting curve.
- Use Manual mode, a low ISO, and an aperture around f/8 as a starting point.
- Begin with a 4-second exposure. Use a timer or remote to avoid moving the camera.
- Inspect the photograph for clipped bright lights and for trails that stop too soon. Adjust the exposure time, aperture, or ISO accordingly.
- Try again as traffic moves through different parts of the composition. The pattern depends on the vehicles that pass during the exposure.
Shooting around blue hour can help retain color in the sky while streetlights and vehicle trails become visible. Do not assume that the longest possible exposure is best: more seconds may cause distracting overlapping trails or washed-out highlights.
To experiment with light painting instead, keep the camera still in a safe, dark location and move a small light through the frame during a multi-second exposure. Never aim bright lights toward drivers or other people.
Technique 4: Try Intentional Camera Movement (ICM)
ICM reverses the usual goal of keeping the camera steady. You purposely move the camera while exposing to turn the scene into streaks, layers, or painterly shapes. Forests, rows of lights, and repeating architecture can work especially well because they have recognizable lines.
- Find a subject with repeated shapes, such as tall trees or vertical columns.
- Begin around 1/4 second in Shutter Priority or Manual mode.
- Move the camera vertically in one smooth direction while the exposure is being made.
- Repeat with slower and faster movements, changing only one variable at a time.
- For a different effect, try a horizontal sweep or gentle rotation. Review the shapes rather than judging the image by conventional sharpness.
Because the full frame can be blurred intentionally, the important question is whether the movement creates a pleasing pattern, not whether a stationary object remains tack-sharp. If daylight makes your chosen exposure too bright, an ND filter can help here too.
Common Motion Blur Problems and How to Fix Them
- Everything is blurry, even the stationary background: For water or traffic trails, check tripod stability, focus, shutter triggering, and moving leaves or branches. For panning and ICM, some background blur is expected.
- The panned subject is too blurry: Increase shutter speed, track the same point more consistently, and try a subject moving in a predictable direction.
- There is not enough visible motion: Slow the shutter, allow the moving subject more time to cross the frame, or include a detailed background that makes streaks easier to see.
- The long exposure is overexposed: Use base ISO, an appropriate aperture, or an ND filter. Check the histogram rather than trusting screen brightness alone.
- The water looks like a featureless white patch: Use a somewhat faster shutter speed to restore the lines and texture of the flow.
- The photograph looks soft despite a tripod: Check focus, diffraction from very small apertures, vibration, and whether the supposedly stationary subjects are moving in the wind.
If a strong ND filter makes focusing difficult, compose and focus before attaching it, then take care not to knock the focus ring while mounting the filter.
How to Edit Motion Blur Photos in Lightroom
The key blur effect should be made in camera. Lightroom can refine exposure, contrast, color, and selective detail, but ordinary sharpening and clarity adjustments cannot recover all of the detail lost when an important subject was recorded as a strong smear.
- Start with the original RAW file when available. It generally gives you more flexibility for adjusting highlights, shadows, and white balance than a heavily processed JPEG.
- Protect bright areas first. In a waterfall image, check the highlights in white water. In a night image, check illuminated signs and the brightest part of the light trails.
- Keep the motion looking natural. Add only modest Clarity or Dehaze if the image needs definition. Raising these across the entire photograph can make silky water look harsh or produce distracting edges.
- Adjust stationary elements selectively. In Lightroom Classic, use Masking and its Brush or other suitable selection tools to refine rocks, buildings, or the panned subject without unnecessarily altering the blur.
- Finish the color grade. Adjust white balance and contrast to support the mood, then review the photograph at a realistic viewing size rather than judging only a magnified crop.
Adobe's current Lightroom Classic Masking guide explains how to make selective, non-destructive adjustments. These edits improve the presentation of a motion-blur photograph; they do not replace getting the exposure and movement right during capture.
A Simple Motion Blur Practice Exercise
For a practical comparison, photograph the same stream from the same tripod position at 1/125 second, 1/4 second, and 2 seconds, adjusting exposure with an ND filter when needed. Compare not only how smooth the water becomes, but also whether the rocks, foliage, and highlights remain convincing.
On another day, try panning a cyclist or car from a safe location at 1/125, 1/60, and 1/30 second. Review which frame best balances subject recognition with the feeling of speed. Recording your settings and selecting the strongest results will teach you more than searching for one universal motion-blur setting.
Final Thoughts
Good motion blur comes from choosing a purpose for movement before pressing the shutter. Keep the camera stable to soften water or record light trails, follow the subject to show speed through panning, or move the camera deliberately for abstract ICM effects. Start with a practical shutter speed, review what actually blurred, and refine one setting at a time.
Written by Asanka — creator of AAAPresets.


Leave a comment
This site is protected by hCaptcha and the hCaptcha Privacy Policy and Terms of Service apply.