
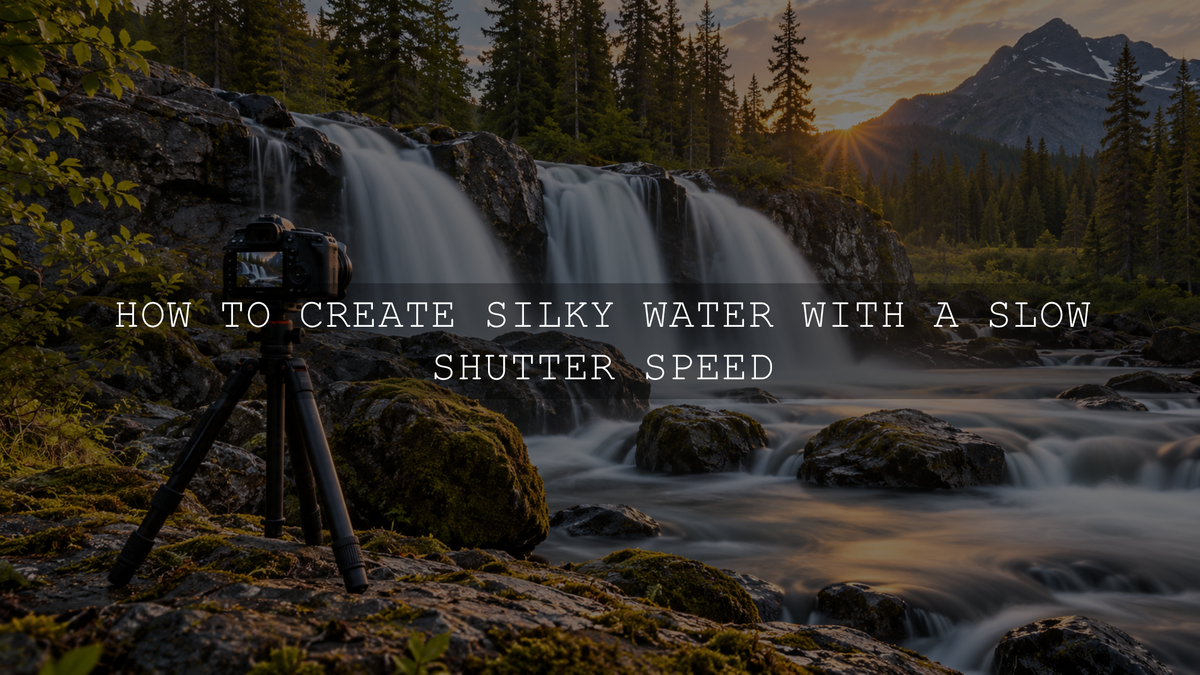
To photograph silky water, place your camera on a stable tripod, use a low native ISO, choose an aperture around f/8 to f/11, and start with a shutter speed between 1/2 and 2 seconds. The longer exposure blurs moving water while rocks and other stationary details remain sharp. If the image becomes too bright at that shutter speed, use a neutral density (ND) filter to reduce the incoming light.
There is no single perfect exposure time for every waterfall, stream, or shoreline. The speed and direction of the water, the available light, and the amount of texture you want to preserve all affect the result. The following settings and workflow will help you find the right balance in the field.
Why a Slow Shutter Speed Makes Water Look Silky
Shutter speed is the length of time your camera records an exposure. At 1/1000 second, a waterfall may show distinct droplets and splashes. At one or two seconds, water changes position repeatedly during the exposure, and that movement records as soft streaks or a flowing veil. Solid, unmoving rocks can remain detailed because they stay in the same place throughout the exposure. For the fundamentals, see our guide to shutter speed in photography.
This is deliberate subject-motion blur, not a special filter added during editing. Nikon's guide to photographing moving water illustrates how different exposure lengths and lighting conditions change the result.
Best Shutter Speeds for Silky Water Photography
Use these ranges as starting points, then review the actual water texture rather than following a fixed number:
- 1/15 to 1/4 second: Introduces visible streaks while preserving much of the shape and energy of fast-moving water.
- 1/2 to 2 seconds: A useful starting range for the classic silky waterfall effect, with flowing ribbons of water and some remaining texture.
- 3 to 8 seconds: Produces a smoother, more continuous appearance in many waterfalls and streams, although fast whitewater may begin to lose definition.
- 10 to 30 seconds: Can turn sustained water movement into a misty or glassy surface, particularly in coastal scenes. The effect may be too featureless for a powerful waterfall.
A fast cascade may look silky after half a second, while a gently moving stream may require several seconds. For waves, timing the exposure relative to incoming or receding water also changes the shape of the blur. Photograph the same scene at several speeds to decide whether you prefer silky detail or a softer, more abstract look.
Equipment You Need for Long-Exposure Water Photos
- Camera with shutter-speed control: A mirrorless camera, DSLR, or another camera that permits longer exposures will work. Some phones also offer manual or computational long-exposure modes, but their controls and results vary.
- Stable tripod: This helps keep rocks, branches, and shorelines sharp during exposures lasting a fraction of a second or longer. Set it on firm ground and avoid unstable streambeds.
- ND filter when light is too bright: A neutral density filter makes longer exposures possible without forcing an unnecessarily small aperture. It is useful in daylight but may not be needed in deep shade or near dawn.
- Two-second timer or remote release: Triggering the camera without touching it reduces the risk of shake.
- Clean microfiber cloth: Mist, spray, and rain can leave droplets on the lens or filter, especially close to waterfalls.
A circular polarizing filter is optional. It can reduce some reflections on wet rocks and foliage, and it also reduces the amount of light reaching the sensor. It does not replace an ND filter when you need a much longer shutter time.
Camera Settings to Start With
- Exposure mode: Manual (M) gives direct control over aperture, shutter speed, and ISO. Shutter Priority (S or Tv) can also work, but the camera may run out of aperture range in bright light.
- ISO: Start at your camera's normal base ISO, often ISO 100 or ISO 64. Avoid assuming that an extended low ISO mode offers the best highlight range.
- Aperture: Begin around f/8 or f/11 to keep important landscape details in focus. Do not automatically select f/22; very small apertures can reduce fine detail through diffraction.
- Shutter speed: Begin around one second for moving water, then adjust according to the desired texture and actual exposure.
- File format: Shoot RAW if your camera supports it so you have more flexibility when adjusting white balance, bright water, and shadowed rocks later.
- Focus: Focus carefully on an important stationary part of the scene. When using a very dark ND filter, it can help to focus before fitting the filter and then prevent the camera from refocusing.
If you use image stabilization on a tripod, follow your camera and lens manufacturer's guidance. Some systems recognize tripod use automatically; others may need a different setting.
How to Photograph Silky Water Step by Step
- Choose a safe position and composition. Keep your tripod away from strong currents and unstable, slippery edges. Use rocks, fallen logs, or a shoreline to give the smooth water a clear visual frame. Never risk entering fast water for a lower camera angle.
- Secure the camera. Spread the tripod legs on firm ground, keep the setup stable, and use a timer or remote to avoid shaking it when the exposure begins.
- Set the exposure basics. Select Manual mode, normal base ISO, and approximately f/8 to f/11. Compose and focus before attaching a very dark filter.
- Measure the light without the ND filter. Take a test photograph and check the bright parts of the water. This gives you an exposure baseline and reveals whether the surrounding rocks are receiving enough light.
- Choose the look you want. Try one second first. If that exposure is too bright, fit an ND filter with enough light reduction to make the chosen time practical.
- Take a test shot without touching the camera. Use the self-timer or remote. Review the histogram or highlight warnings and magnify the rocks to check focus and camera movement.
- Compare several shutter speeds. Try approximately 1/2, 1, 2, and 4 seconds, adjusting the filter or other exposure controls when necessary. Keep the framing as consistent as possible so you can compare the water rather than the composition.
If the water looks like a flat white patch at four seconds, try a shorter exposure. If the flow still looks too busy at half a second, try a longer one. The best result is the exposure that preserves the visual character you want.
Which ND Filter Strength Should You Use?
ND filters are measured in stops. Each stop halves the incoming light, so a 3-stop filter reduces it by a factor of eight, a 6-stop filter by 64, and a 10-stop filter by approximately 1,024. With aperture and ISO unchanged, that allows the shutter to stay open correspondingly longer for a similar exposure.
For example, suppose your correctly exposed test shot is 1/60 second at f/8 and ISO 100. Adding these filters would give approximate equivalent shutter times:
- 3-stop ND: 1/8 second, useful for a modest amount of water blur.
- 6-stop ND: About 1 second, a practical starting point for silky waterfalls.
- 10-stop ND: About 17 seconds, useful when you want a much smoother effect.
These are exposure calculations, not guaranteed settings for every scene. Measure the available light first, then choose a filter that gets you close to the shutter speed you actually want. If the waterfall is already shaded enough for a one-second exposure, you may not need a filter at all. Very dark filters can complicate focusing, and some filters can introduce color shifts or vignetting.
How to Keep Rocks Sharp and Water Highlights Detailed
Long exposures depend on contrast between moving and stationary parts of the scene. Check the edges of rocks at full magnification. If they are soft, the cause may be camera movement, missed focus, or an aperture that does not provide enough depth of field, rather than the water's motion.
Bright foam is often much lighter than wet rocks and surrounding forest. Review highlight warnings when available, but remember that some naturally bright white water is expected. If important texture has clipped, reduce the exposure or use a more suitable ND filter while preserving the shutter time that creates your desired look. RAW editing can improve recoverable highlight detail but cannot reliably restore information that was never recorded.
Overcast weather and shaded waterfalls can make both exposure and color balance easier. If the wind is moving leaves and branches during a long exposure, consider shortening the exposure or adjusting the composition rather than expecting every part of the frame to stay perfectly sharp.
Common Problems and How to Fix Them
- Everything looks blurry: Inspect tripod stability, focus, wind, and shutter-trigger movement. Magnify a stationary rock to determine whether the problem affects the whole image.
- The water still looks frozen: Lengthen the exposure or photograph a faster-flowing section of the stream. Use an ND filter if daylight prevents the longer exposure.
- The water has become a featureless white area: Shorten the shutter time to preserve shape, and separately check whether bright highlights are overexposed.
- Dark rocks are lost in shadow: Try softer light, reconsider your composition, or work with a properly exposed RAW file. Avoid brightening shadows so aggressively that the image becomes noisy or flat.
- Water spots appear across the frame: Inspect and carefully clean the front of the lens or filter between exposures.
- Colors look unnatural: Review white balance and the ND filter's possible color cast before increasing saturation.
Editing Silky Water Photos in Lightroom
Start with the best exposure you captured in-camera. In Lightroom, adjust overall exposure and white balance, then refine Highlights and Whites so the brighter flow does not overpower the scene. Raise Shadows selectively if the surrounding rocks need detail, and avoid adding so much global Clarity or Texture that the water loses its soft appearance.
For more control, Lightroom desktop's Masking tools let you edit individual regions. In supported versions, Select Landscape can identify Water as a separate element; if the selection is incomplete, refine it or use a Brush mask. This makes it easier to soften or balance the water without flattening the texture of moss, stones, and foliage.
A landscape Lightroom preset can be a useful starting point for color and contrast after these exposure corrections, but different photos may still need adjustments to highlights, white balance, and greens. A preset does not replace the movement recorded during a real long exposure. For additional post-processing ideas, see our guide to editing waterfalls, rivers, and lakes.
Final Takeaway
Start with a stable tripod, base ISO, f/8 to f/11, and roughly a one-second exposure. Add an ND filter only when the available light prevents that shutter time, and compare several exposures before leaving the location. Preserving a little water texture often produces a more expressive photograph than making every waterfall as smooth as possible.
Written by Asanka — creator of AAAPresets.

Leave a comment
This site is protected by hCaptcha and the hCaptcha Privacy Policy and Terms of Service apply.