
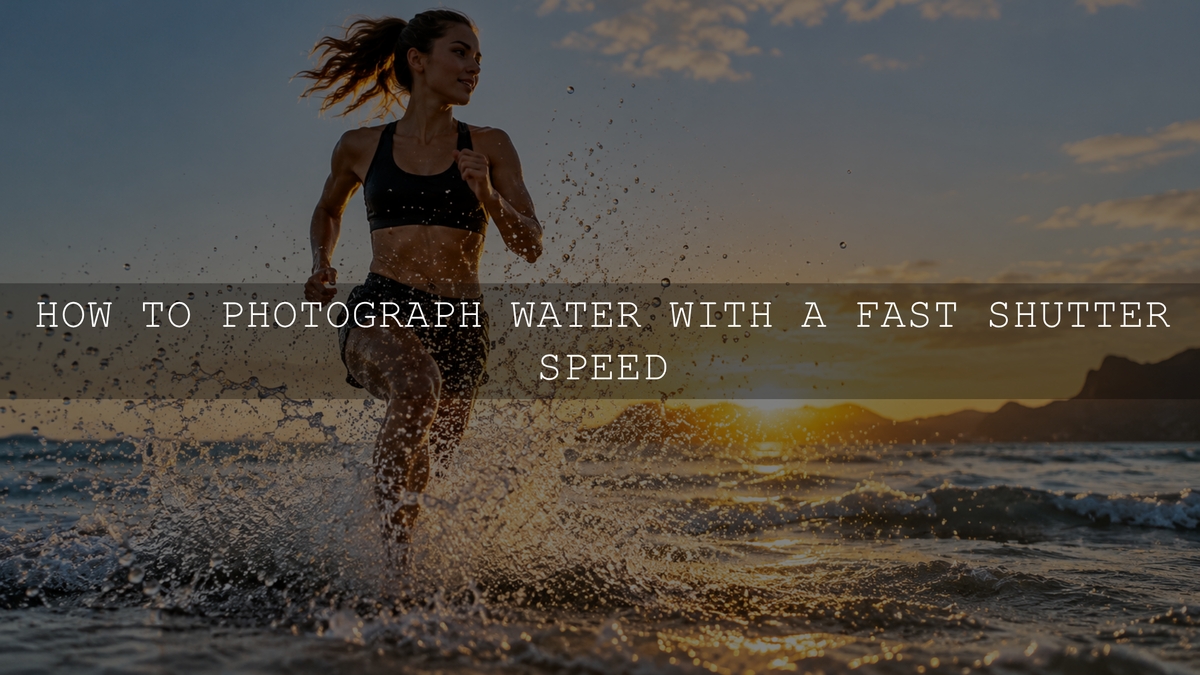
To freeze splashing water in a photograph, start around 1/1000 second in bright daylight. Slower splashes may look sharp at 1/500 second, while fast surf and fine airborne spray can need 1/2000 to 1/4000 second or faster. These are starting points, not guaranteed settings: the water's speed, shooting distance, light and focus accuracy all affect the result.
There is one important exception. For tiny water-drop collisions in a controlled indoor setup, a short flash pulse can freeze movement more effectively than the camera's shutter speed. This guide explains both methods so you can choose the right approach for waves, fountains, pool splashes and individual droplets.
Best Shutter Speeds for Water Splashes
The shorter the exposure, the less distance moving water travels while the image is recorded. If you are new to exposure time, see our guide to what shutter speed means in photography. Use the following ranges to choose your first test shot:
- 1/500 second: A useful starting point for gentle splashing, moderate fountain movement and some crashing waves, particularly when individual micro-droplets are not the priority.
- 1/1000 second: A practical general starting point for running water, pool splashes, breaking waves and active subjects moving through water.
- 1/2000 second: Try this for energetic surf, fast spray, water sports or droplets that remain slightly streaked at 1/1000 second.
- 1/4000 second or faster: Experiment with fine spray or very fast motion in strong light, remembering that each increase in shutter speed reduces the time available to collect light.
These ranges are consistent with real photographic examples, not a universal formula. Canon's guide to water photography uses approximately 1/500 second as a way to freeze crashing waves, while Nikon's shutter-speed guide includes a wave photographed at 1/4000 second. The desired level of detail determines how much speed you need.
Recommended Camera Settings for Water Action Outdoors
In good daylight, this is a practical setup to test first. Adjust the settings after examining your own results.
- Shooting mode: Shutter Priority (S or Tv) for a quick start, or Manual mode when you want to control both shutter speed and aperture.
- Shutter speed: Begin at 1/1000 second. Move toward 1/2000 second if important droplets are still blurred.
- Aperture: Try f/5.6 to f/8 when several parts of a splash need to remain in focus. Use f/2.8 or f/4 when light is limited and the shallower depth of field suits your composition.
- ISO: Start low in bright light, then raise ISO or use Auto ISO if necessary to maintain the shutter speed and aperture you need.
- Focus: Use continuous autofocus for a moving person, dog or surfer. For repeatable splashes hitting the same spot, pre-focus on the impact area instead.
- Drive mode: Use continuous shooting for unpredictable action, while checking that your camera can maintain the selected exposure and focus.
- File format: RAW when available, especially when bright reflections and white spray may need careful tonal adjustments later.
For example, when photographing ocean surf, you might begin with 1/1600 second, f/5.6 and Auto ISO. For a repeatable close-up splash, you might choose 1/2000 second and f/8, provided enough light is available. These are hypothetical setups, not camera settings tested by AAAPresets.
How to Photograph Sharp Water Splashes Step by Step
- Find clean, directional light. Side light or backlight can make spray stand out, especially when you photograph against a darker background. Avoid aiming the camera directly into intense sunlight.
- Choose a safe position. Get low for a stronger viewpoint, but stay clear of breaking waves, slippery rocks, spray and any area that could flood your gear.
- Set an initial shutter speed. Try 1/1000 second in Shutter Priority. If the camera reaches its widest aperture and the image remains too dark, increase ISO or move to better light.
- Focus on the action. Track an active subject with continuous autofocus, or pre-focus where a repeated splash will land. Keep enough depth of field for the part of the spray that matters.
- Watch the brightest highlights. White foam and reflected sunlight can lose texture when overexposed. Review the histogram or highlight warning if your camera provides one.
- Time the peak moment. Shoot a short burst as the wave breaks or the subject enters the water. A burst increases your chances but does not guarantee the ideal frame.
- Inspect detail and adjust. Zoom in on the drops. If their edges streak, try a faster shutter; if the wrong plane is sharp, correct focus or increase depth of field.
Why the Widest Aperture Is Not Always Best
A wide aperture lets in more light, which helps you use a fast shutter speed. But shooting every splash at f/1.8 or f/2.8 can leave too little depth of field, especially when water is moving toward and away from the camera.
For a broad wave or an active subject splashing through a pool, f/4 to f/8 can be a useful range depending on the composition and available light. For close-up water droplets, f/8 or f/11 may make it easier to keep more of the splash in acceptable focus. A smaller aperture demands more light, so avoid stopping down automatically.
ISO is a trade-off rather than a setting that must always remain at 100. Raising ISO can help preserve a sufficiently short exposure, although noise may become more visible. It is often more useful to capture the spray sharply with moderate noise than to keep ISO low and record unwanted motion blur. For more on the exposure trade-offs, read our guide to balancing aperture, shutter speed and ISO.
How to Freeze Tiny Water Drops With Flash
Outdoor shutter-speed advice does not transfer directly to tabletop water-drop photography. A small droplet may move so quickly that even a very fast available-light exposure leaves visible blur. In a dark or carefully controlled setting, a brief flash pulse can become the effective motion-freezing exposure.
- Build a repeatable setup. Place a shallow bowl under a dropper or syringe. Put the camera on a stable support, with a plain background behind the impact point.
- Set focus before the splash. Hold a small object at the exact point where the drop will land, focus there, then switch to manual focus so the camera does not search during every attempt.
- Choose depth of field. Begin around f/8 to f/11 and ISO 100 to 400. Adjust for the light available from your flash and the size of the splash.
- Keep within normal flash sync. For a conventional focal-plane shutter and a standard flash pulse, use a shutter speed at or below your camera's specified flash-sync limit, often around 1/160 to 1/250 second. Confirm the value in your camera manual.
- Reduce ambient exposure. Make the room dark enough that the splash is not recorded significantly by continuous light. In this situation, the brief flash pulse does most of the work of freezing motion.
- Try lower manual flash power. On many speedlights, reduced power produces a shorter pulse that is helpful for very fast droplets. Check your flash's specifications because duration varies by model.
- Repeat and refine timing. Trigger the flash at impact or use a compatible drop or flash trigger. Adjust the delay until the splash forms the shape you want.
Canon's high-speed water-splash tutorial demonstrates this short-flash approach. High-speed sync (HSS) is different: it is designed to work with shutter speeds above normal sync, often by using a series of pulses. HSS is not automatically the best way to obtain the shortest motion-freezing flash duration.
Keep mains-powered lighting, cords and outlets well away from water. A water-resistant camera is not the same as a waterproof camera, and household plastic wrapping is not a substitute for a rated waterproof housing.
Autofocus, Manual Focus and Burst Timing
Choose focus and timing according to how predictable the action is:
- Moving subject through water: Continuous autofocus can track a dog jumping into a pool, a surfer crossing the frame or a child running through spray. Focus on the primary subject rather than expecting every flying droplet to remain sharp.
- Same splash point every time: Manual pre-focus is often more consistent for a dripping tap, a bowl or a repeated fruit splash. Mark the impact position so the composition stays the same.
- Unpredictable peak action: Burst shooting can capture several moments of a breaking wave, but the exact peak can still fall between frames. With flash, recycling time may limit how quickly each shot can be illuminated.
If the water looks soft despite a fast shutter, check whether the focus landed behind the splash before increasing shutter speed again. Camera stabilization and a tripod help with camera movement, but neither stops droplets from moving during an exposure.
Lenses and Lighting That Make Splash Photography Easier
You do not need a special lens to start. A standard zoom is useful for fountains, pool splashes and waves close to shore. A telephoto zoom lets you frame distant surf from a safer position. A macro lens is helpful when you want a single drop or a tiny crown-shaped splash to fill the image, although close focusing reduces depth of field.
Light direction usually matters more than buying a faster lens. Try positioning the water between the camera and a light source so the droplets catch highlights against a darker background. Keep the brightest reflected areas under control, because clipped white spray can lose the texture that makes a frozen-water photograph interesting.
Troubleshooting Blurry or Dark Water Photos
- Droplets look like streaks: The exposure may be too long for their speed. Increase shutter speed in available light, or use a shorter flash pulse in a controlled dark setup.
- Only one small part looks sharp: Depth of field may be too shallow or focus may be misplaced. Try stopping down and focusing where the splash will occur.
- The entire image is dark: Fast shutter speed has reduced the exposure. Increase the light, open the aperture if depth of field allows, or raise ISO.
- White spray has no detail: Inspect exposure warnings and reduce exposure when highlights are clipping. RAW capture can offer more editing flexibility, but completely clipped texture may not be recoverable.
- Flash-lit drops have faint trails: Ambient light may be recording motion alongside the flash. Reduce ambient exposure or use a shorter flash pulse if your equipment supports it.
- Bursts miss the splash peak: Pre-focus, anticipate the impact and repeat the action. For precise droplet collisions, a dedicated trigger can be more reliable than guessing the timing.
Three Water Photography Exercises to Try
- Compare one fountain at different speeds. Photograph the same stream at 1/500, 1/1000 and 1/2000 second. Keep the composition similar and review how clearly the droplets separate.
- Freeze garden-hose spray. Work outdoors in good light, place a darker background behind the water and try 1/2000 second. Change your angle until individual drops become visible.
- Make a tabletop splash. Drop a small piece of fruit into a shallow bowl over a tray that contains spills. Pre-focus on the impact point and use either strong continuous light with a fast shutter or a short flash pulse in a safely controlled setup.
Editing Frozen Water Without Losing Detail
Once the photo is captured sharply, editing can improve how the water looks without trying to recreate detail that was never recorded. If you shoot RAW, begin by balancing white balance and exposure. Reduce highlights only as needed to separate bright droplets from white foam, then refine contrast so the water retains texture without becoming harsh.
In Lightroom Classic, inspect the image at 100% and adjust sharpening in the Detail panel rather than judging tiny droplets from a fit-to-screen preview. Apply noise reduction carefully if a higher ISO was needed. Adobe's Lightroom Classic sharpening tutorial explains the relevant Detail controls. Sharpening may improve the appearance of fine edges, but it does not replace accurate focus and exposure at capture.
If you use a Lightroom preset for coastal color or overall contrast, treat it as a starting point. Recheck the whites, blue saturation, highlights and the appearance of spray after applying it. A consistent color grade can complement well-frozen motion, but it cannot turn severely blurred droplets into a reliably sharp photograph.
The Main Takeaway
Start around 1/1000 second to freeze splashing water outdoors, move faster when fine spray still blurs, and balance aperture, ISO and light so the subject is properly exposed. For controlled close-up droplets, focus and timing matter just as much, and a short flash pulse can be the better motion-freezing tool. Review actual droplet detail, adjust one thing at a time and build your technique through repeatable experiments.
Written by Asanka — creator of AAAPresets.

Leave a comment
This site is protected by hCaptcha and the hCaptcha Privacy Policy and Terms of Service apply.